
netcup wiki
Server

Installing Windows

netcup does not sell Windows licences. The Windows DVDs provided by netcup are suitable for evaluation for 180 days. Please always observe the licence conditions of the manufacturer Microsoft.
The installation of Windows on ARM servers is currently not supported.
1. Preparation
First, turn off your server completely in the Server Control Panel (SCP) under "Control".
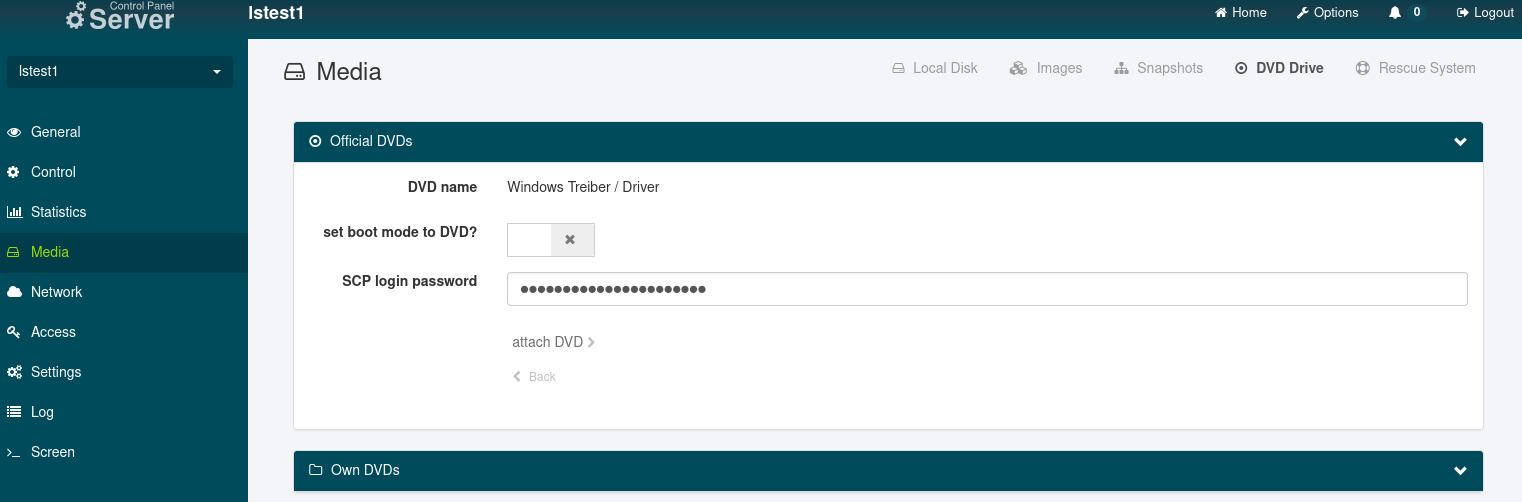
Now insert the desired Windows installation DVD under "Media" -> "DVD Drive" in the SCP. Set the switch "Set boot mode to DVD" to on.

2. Starting the installation
You can now start the server again under "Control" and connect to the VNC console via the menu item "Screen". You will now see all outputs as if you were directly connected to the server with a screen.
After the Windows DVD has booted, first select the edition of Windows to be installed. Usually, you will want to choose the version with Desktop here.
Confirm the licence conditions and you will reach the menu for configuring the partitions.
3. Detect hard disks
Windows does not natively support the VirtIO storage technology used by KVM virtualisation. Therefore, it is necessary to load a driver CD, which we provide in the SCP. To do this, proceed as follows:
Keep the screen (VNC console) open and navigate in the SCP to "Media" -> "DVD drive".
Insert the "Windows Driver" CD.
On the screen, click on "Load driver" in the Windows installation wizard during partitioning and then "Browse".
Now search for the appropriate folder with the drivers on the inserted CD and install them. Multiple selection is possible by pressing and holding the CTRL key. In the case of the Windows Server 2016 for evaluation (180 days) version, please select the driver you see in the image below.
In general, the correct driver should be located on the CD under vioscsi/<Windows-Version>/amd64, or viostor/<Windows-Version>/amd64. If you are using VirtIO, please utilize amd64/<Windows-Version>/. Please note that the installation wizard cannot automatically search subfolders at this point, so you must select the specific folder where the correct driver is located.
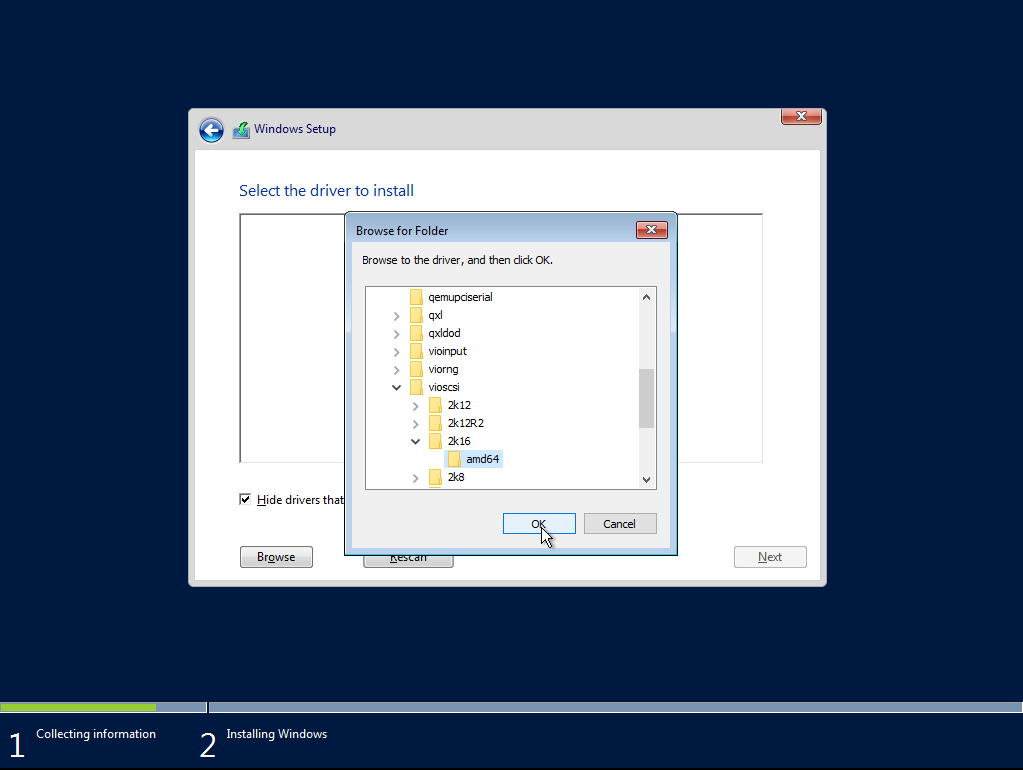
Click on "Next" to load the driver.
4. Finishing the installation
When the correct driver has been loaded, the hard disk will be recognised.
It is now important that you remove the driver CD in the SCP under "Media" -> "DVD Drive" and insert the Windows installation DVD again.
If you receive an error message when proceeding with the installation, this is usually due to the fact that you have forgotten to insert the Windows installation DVD again. A successful installation is not possible with the driver CD inserted! It is therefore absolutely necessary to insert the Windows installation DVD again.
You can now partition the hard disk as desired and complete the installation. If you want to completely reinstall your server, it is usually a good idea to remove all existing partitions and then select the whole disk for installation.
5. Installing remaining drivers
Further steps are now required to connect your server to the network, for example.
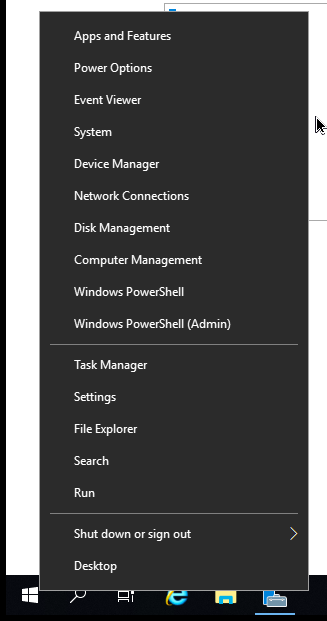
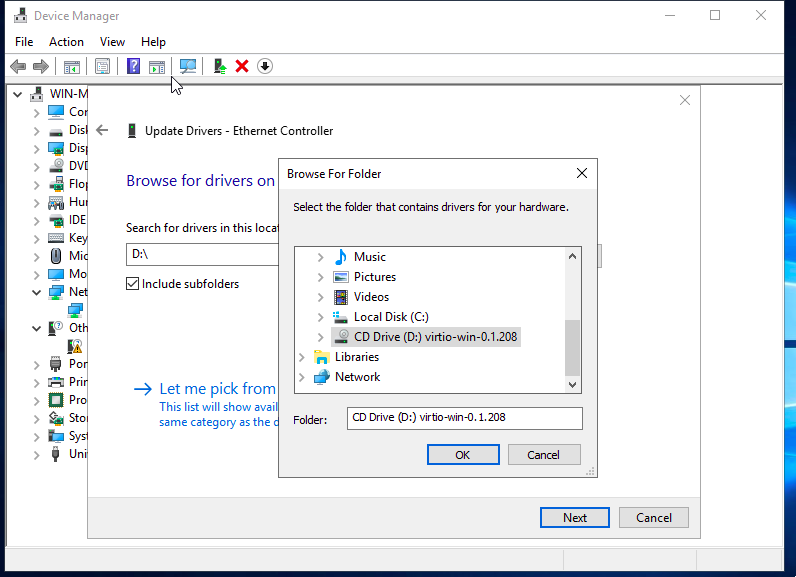
After Windows has started for the first time, right-click on the Windows start menu icon and select "Device Manager":
You will now see some devices for which no driver has been installed yet:
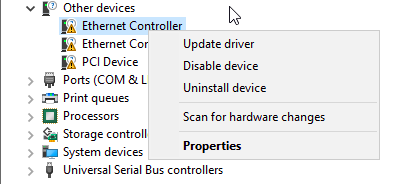
Click on each of these with the right mouse button, select "Update driver" and then "Browse my computer for driver software".
Insert the Windows driver CD again under "Media" -> "DVD drive" in the SCP.
You can now click on "Browse..." in Windows and select the CD. It will be searched for the appropriate driver including all of its subfolders and the correct drivers will be installed if you continue with "Next".
Proceed in this way for each device for which the driver is missing according to the device manager.
The installation of Windows is now completed.