
netcup wiki
Server

Adding IP Addresses
1. Ordering Additional IP Addresses
Order your desired additional IP address at: Extensions for KVM Servers
You can choose from the following options:
Additional IPv4 Address
With an additional IPv4 address, you receive an extra IPv4 address for your root or vServer.
Failover IPv4 Address
A failover IP address provides an additional IPv4 address for your root or vServer. If one of your servers becomes unavailable, for example, if you need to perform a software update, another server can take over the failover IP address. This ensures that services can continue to be offered through the IP address.
Additional /64 IPv6 Subnet
With an additional IPv6 subnet, you receive an additional /64 IPv6 subnet for your root or vServer.
A subnet is a separate part of an IP network. It divides a larger address range into smaller ranges so devices can be organized into groups and routed efficiently.
The standard subnet with IPv6 is /64. This means that the first 64 bits belong to the network and the remaining 64 bits are reserved for device addresses. Therefore, a subnet consists of a large number of individual IPv6 addresses.
Failover IPv6 Subnet
A failover IPv6 subnet provides an additional IPv6 subnet for your root or vServer. If one of your servers becomes unavailable, for example, if you need to perform a software update, another server can take over the failover IP address. This ensures that services can continue to be offered through the IP address.

A processing fee may apply if the additional IPv4 or /64 IPv6 subnet is to be assigned to another server. However, the failover IPs or failover IPv6 subnet can be switched between servers free of charge at any time.
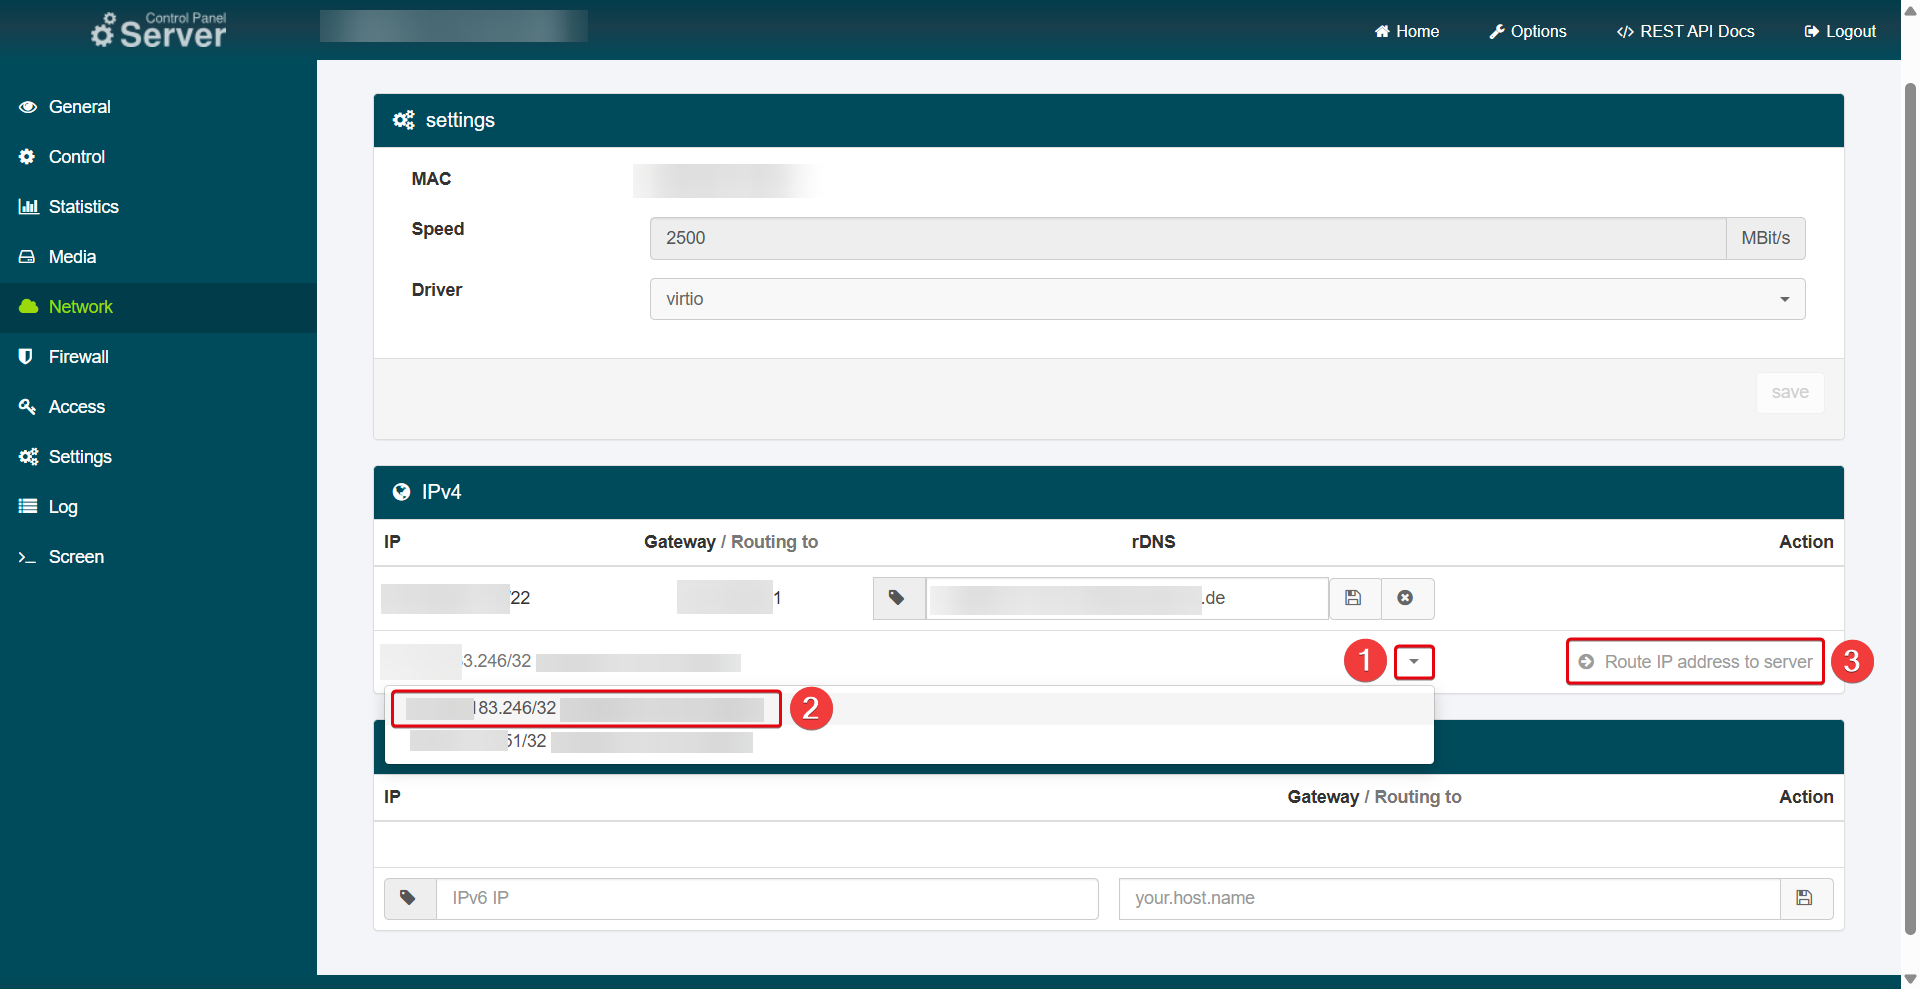
2. Assigning Additional IP Addresses to a Server

The location of the IP address must match the location of the server. You can view the location of your products in the Customer Control Panel (CCP) under Products.
- After placing your order, log in to the Server Control Panel (SCP).
- Select the server to which you want to add the IP address.
- Go to the Network menu item.
- Select your previously ordered IPv4 address or your /64 IPv6 subnet from the drop-down list.
- Optional: Select an IPv6 address from your subnet and assign it an rDNS entry via the text field.
- Click Route IP address to server.
3. Setting Up Additional IP Addresses
The following instructions may not work on all operating systems and Linux distributions. Follow the instructions for your specific operating system.
Setting Up IPv4
To set up an additional IPv4 address, you must change the configuration in the file /etc/network/interfaces .
- Run the following command:
nano /etc/network/interfaces
- Add the following line:
iface eth0 inet static address XXX.YYY.Z.00 netmask 255.255.255.0 gateway 192.168.1.1
Replace “XXX.YYY.Z.00” with the desired IPv4 address.
Setting Up /64 IPv6 Subnet
To set up an additional /64 IPv6 subnet, you must change the configuration in the file /etc/network/interfaces .
- Run the following command:
nano /etc/network/interfaces
- Add the following line:
iface eth0 inet6 static address 2a03:4000:2:11c5::1 netmask 64 gateway fe80::1
Replace “2a03:4000:2:11c5::1” with the desired IPv6 address from the assigned /64 subnet.
4. Restarting the Server
Then restart your server to apply the changes.
5. Frequently Asked Questions (FAQ)
How is the IP routed?
Additional IP addresses are redirects to the main IP. This cannot be customized individually.
Can an additional IPv4/IPv6 be converted into a failover IPv4/IPv6 at a later date?
No, this is not possible.
Can an IP address be migrated to another location?
No, this is not possible. They are tied to a data center.
Does netcup offer cross-location IPs?
We do not offer cross-location IPs. Our IPs are tied to a data center.