netcup wiki
Server

Media
You can navigate between these categories by clicking on the corresponding names in the menu at the top right.
Local Disk
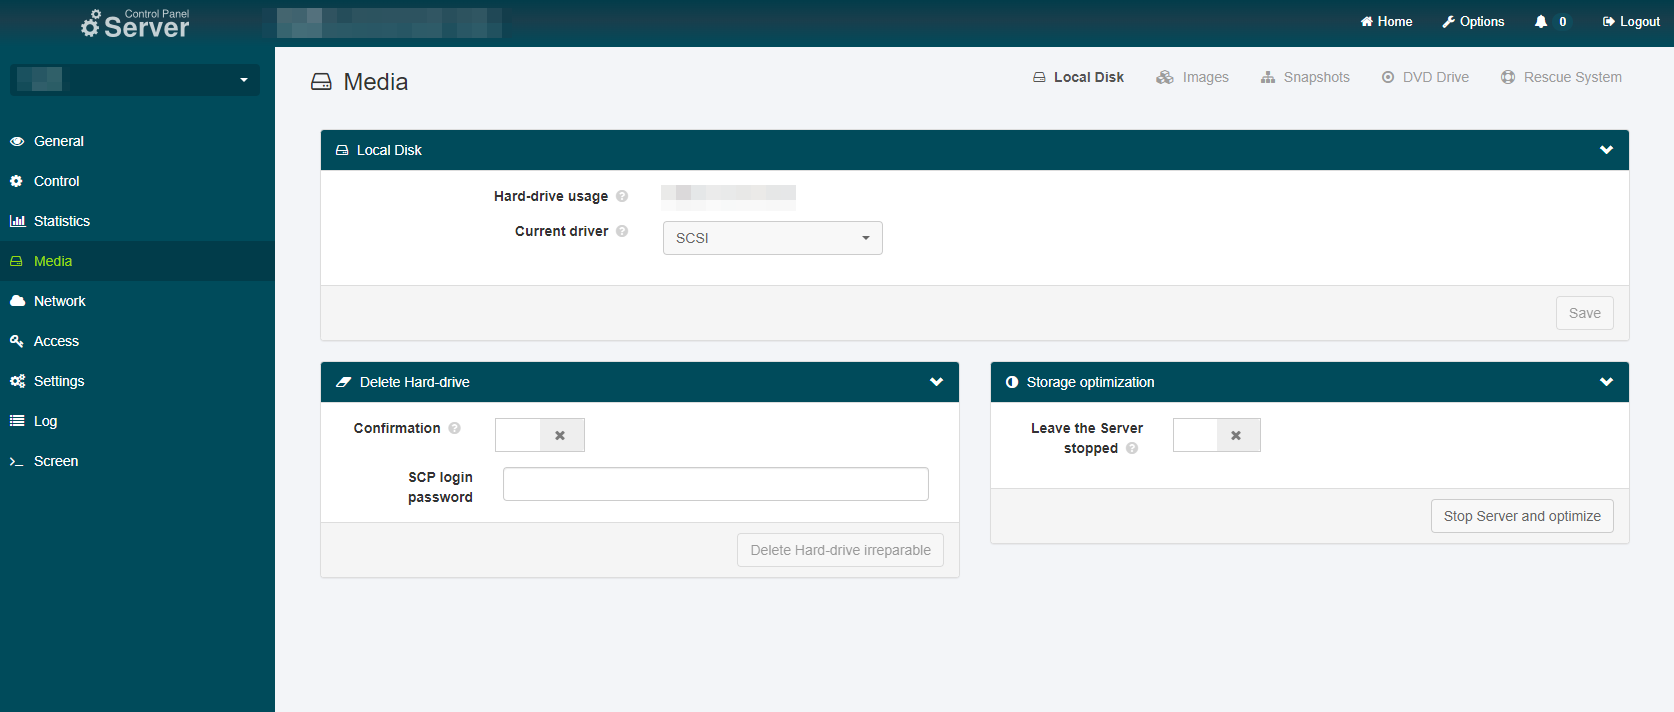
This section provides you with an overview of the available storage space. You can also change the driver for your server's hard drive.
| Label | Content |
|---|---|
| Hard drive usage | This is the reserved storage on the host system. Overall, the value may differ from the storage used. If this is the case, trigger a storage optimization. Encrypted systems are not displayed correctly because of their unused blocks. These cannot be detected by the SCP. |
| Current driver | This setting allows you to change the driver used by your main hard drive. Changes to the storage driver are not trivial. In the worst case, the server can no longer be booted. Note that changes to SATA or IDE severely affect other functions, such as snapshots. |
Delete hard drive
This section allows you to permanently erase all contents from the main hard drive used by your server. Your server must be stopped for this, and you must first confirm that you are aware of the full consequences of this step by clicking the Confirmation slider. If you do not use the Simple password option, the SCP password must also be entered.
Upon clicking Delete hard drive irrepealable, the SCP immediately erases the contents of your server's hard drive and creates a new, completely empty image. After that, you can install a new operating system.
Storage optimization
In this section, you can manually trigger an optimization of your server's hard drive. This is not necessary during normal operation, but it can resolve certain issues you might encounter during use.
To trigger optimization, simply click the Stop server and optimize button. This will shut down your server, optimize the disk, and then restart your server. If you want your server to remain stopped after optimization, activate the Leave the Server stopped slider before starting the optimization process.
Depending on your server, this process may take up to 30 minutes. The process can take even longer, especially for servers with SAS hard disks. During this entire time, the server is not accessible.
It is not necessary to leave your browser window open during the optimization process.
Images
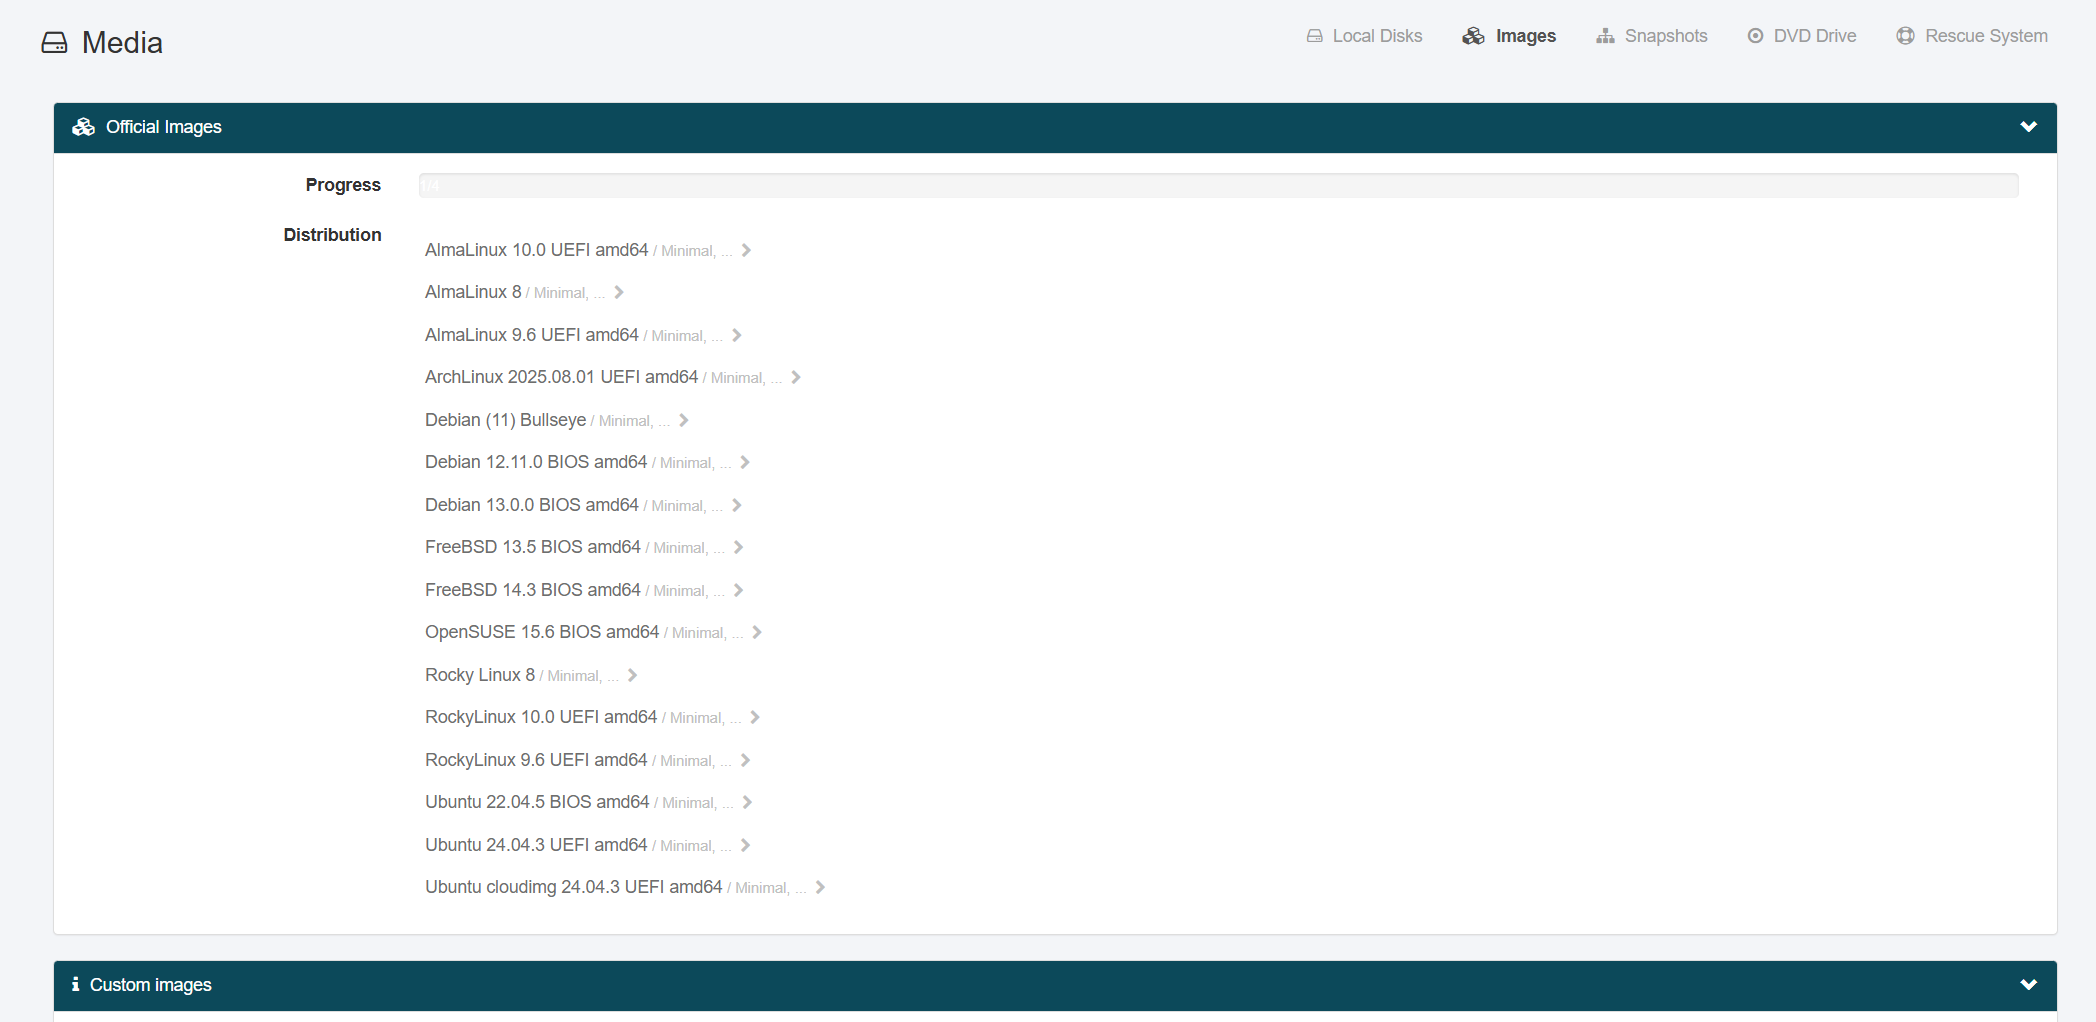
In this section you will find a wide selection of premade images, but you also have the option to manually provide your own image.
Images are one of two options for installing an operating system (other option: DVD Drive). In the Server Control Panel (SCP) you can directly select which time zone and language settings you want to use and can directly import SSH keys that are stored with us. As soon as the installation is complete, you will receive an email and can connect directly via SSH.
Note that when installing a new operating system, the contents are removed from your server's hard drive.
Going forward, we will only offer images with UEFI boot. You can still boot a server with BIOS, but you will have to perform the installation manually. To install a server with BIOS boot, go to the server settings and disable UEFI Boot. Then insert the DVD and start the installation process.
Official Images
This section provides you with a selection of popular server-focused operating systems that can be installed on your server.
Select the desired operating system by clicking on its name. Continue by clicking on Minimal.
Having made your selection, you will be asked to choose between two possible partition layouts. Choosing One big partition with OS as root partition will give the operating system full access to the entire storage that is available on your server's hard drive. This option is recommended. Small partition layout for individual use will only create a partition of sufficient size to install the desired operating system. This option is for users who intend to partition the remaining hard disk space on their own.
After selecting the desired partition layout, you will be prompted to provide your SCP login password. Remember that this step will delete all data on your server. You can enable the Send email to me slider if you wish to receive an email when the SCP has finished installing the new image.
Once the installation process has finished, the SCP will provide you with your server's new root password.
Upload custom image
You can upload images directly via the Server Control Panel (SCP). To do so, go to Custom image upload in the Images tab and upload your image.

The following formats are supported: qcow, .qcow2, .raw
Once you have uploaded an image, you can select it in this section and import it to your server's hard disk.
Snapshots
In this section you can create new snapshots of your server's current state. You can also revert your server to a previous state or export the snapshots locally.
There are two types of snapshots:
| Type | Information |
|---|---|
| Offline Snapshots (recommended) | Offline snapshots are created while the server is off. They can be used to back up the server before making major, potentially breaking changes, and can also be exported to your local system. Offline snapshots can also be imported into another netcup server at a later time, allowing easy switching between servers. Note: The hard disk of the new server must be at least as large as the partition used by the backed-up server. |
| Online Snapshots | Online snapshots are created while the server is on. Online snapshots cannot be exported, and making any file changes while the server is taking an online snapshot may result in irreparable data loss. Online snapshots can also cause your server to be unresponsive for a few minutes. The main advantage of online snapshots is that they also save the state of the server. This means that anything running on the server during the online snapshot can be reverted to the current state. Note: Online snapshots are currently not available for Local Block Storage. |
You cannot create new snapshots while an .iso image is attached as a CD-ROM or DVD.
Create and export snapshot
- Enter a name and a description for the new snapshot.
- Select the snapshot type Online or Offline from the drop-down menu and click on create snapshot.
- Click on Export snapshot.
- The Download button appears.
- Download the snapshot either directly via a web browser or copy the link and paste it into a download manager and download the snapshot from there.

A one-off free export is included with every server. Further exports can be booked in the Customer Control Panel under Products > Magnifying glass in front of product > Backups.
The Restore snapshot button resets your server to the selected snapshot. If you click on Delete snapshot, the selected snapshot will be deleted. This process cannot be undone.
Decompress downloaded snapshot
Snapshots are compressed by default. To be able to use them again, they must be decompressed before uploading.
To decompress a snapshot:
- Unzip the snapshot with the following command:
zstd -d snapshot.raw.zst -o snapshot.raw - Alternatively, you can unzip the snapshot directly when downloading by using this command:
curl --progress-bar -L <presigned_download_url> | zstd -do snapshot.raw.
DVD Drive
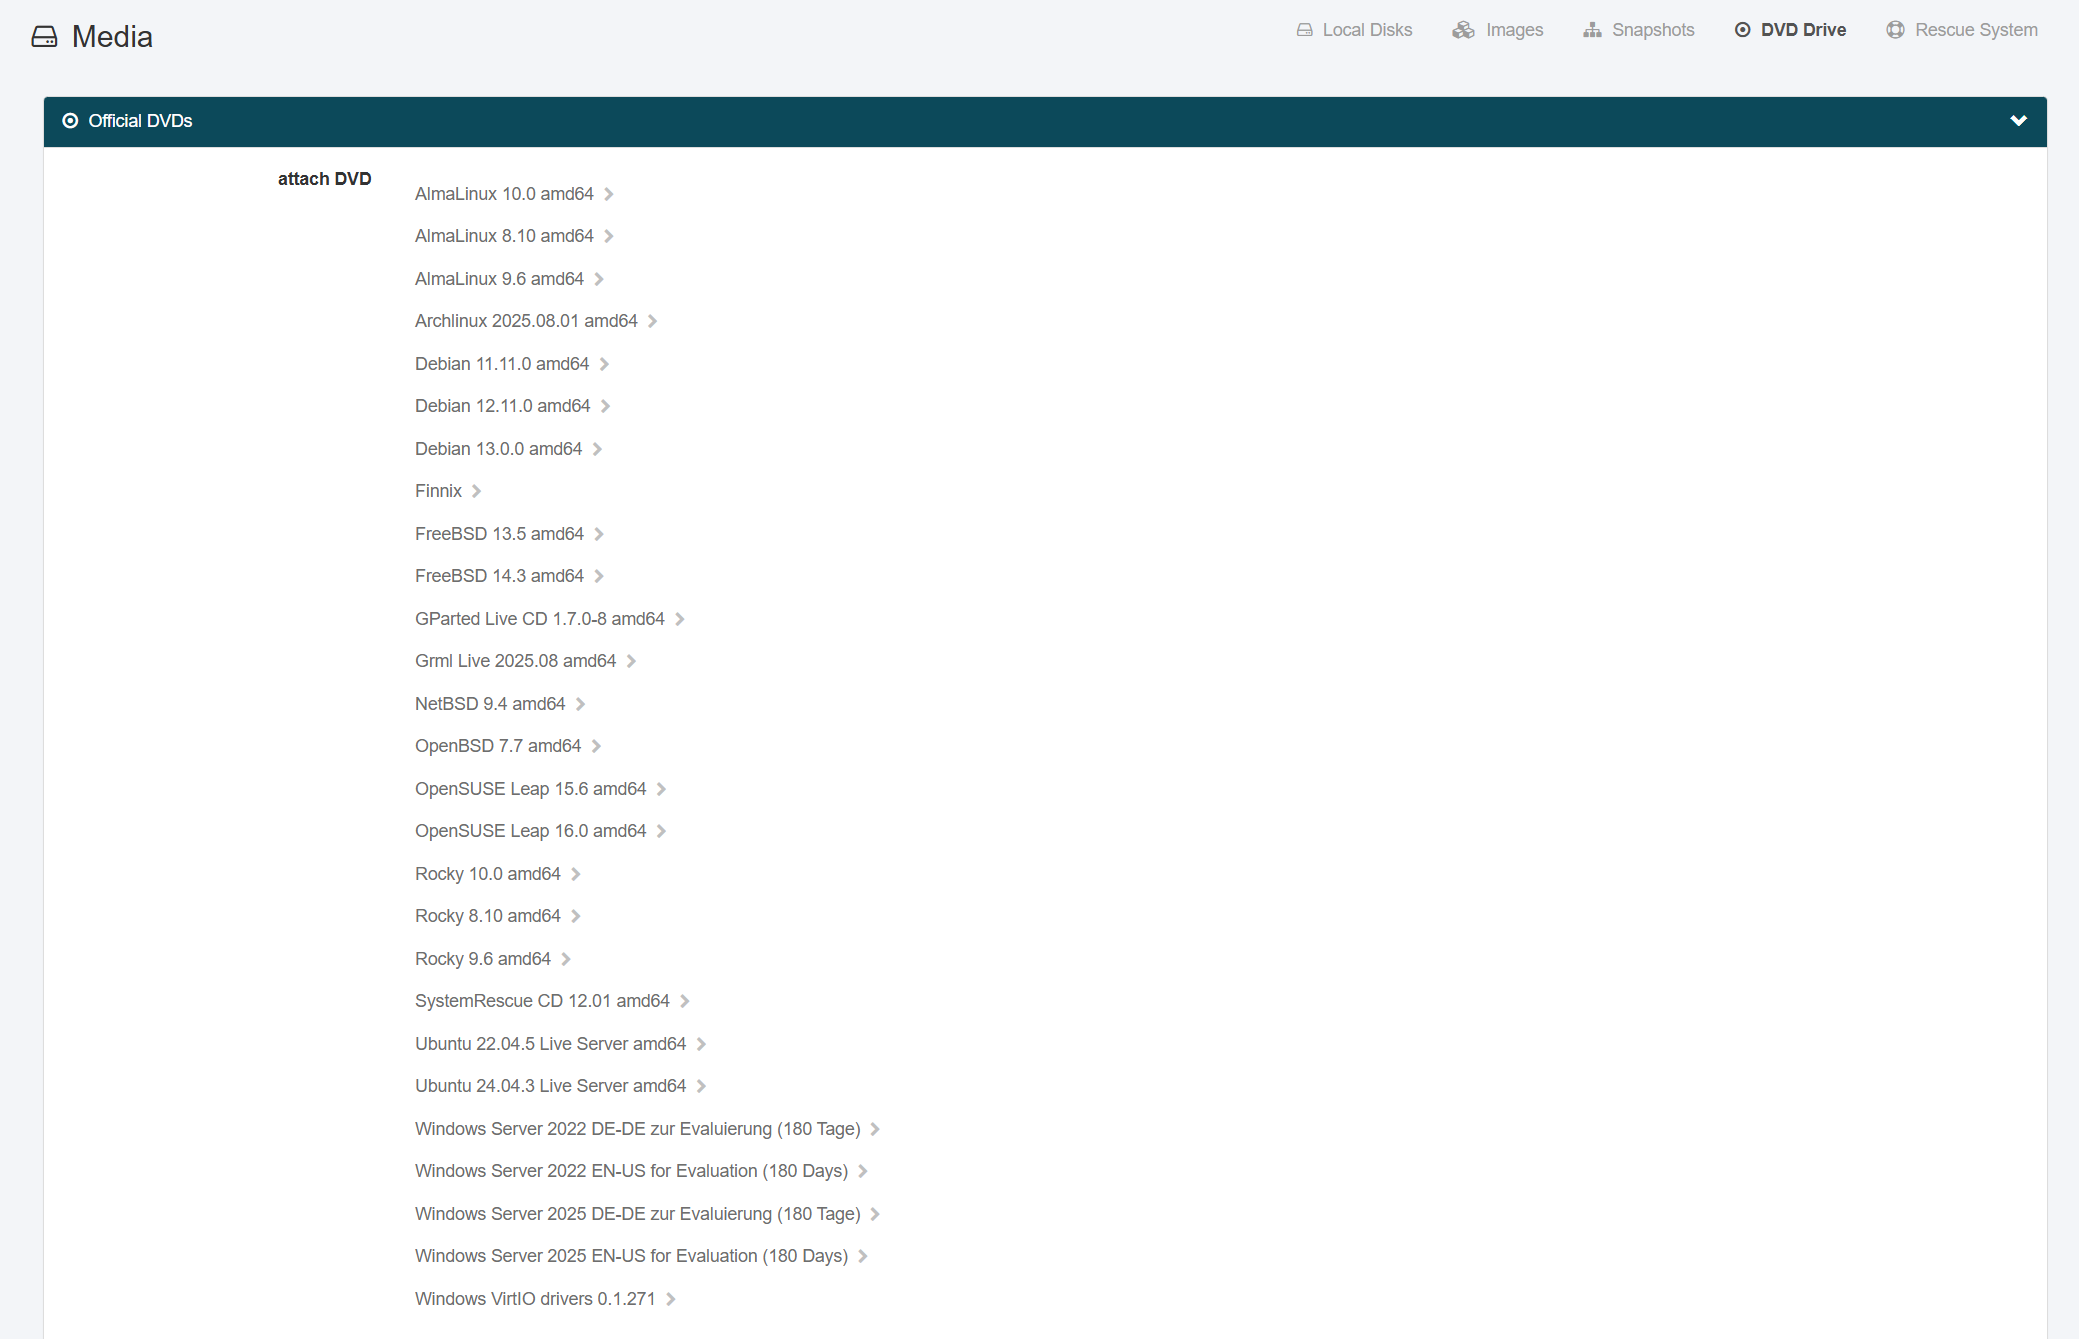
In this section you will find a wide selection of .iso images, but you also have the option to manually provide your own image. Please note that BIOS compatibility may depend on the respective operating system. Installation via the DVD drive is one of two ways of installing an operating system (other option: Images). Our DVD images are the original images of the various operating systems. These allow you a more individual and flexible installation of operating systems. The installation is carried out directly via the screen in the Server Control Panel (SCP).
Note that when installing a new operating system, the contents are removed from your server's hard drive and that manual installation via an .iso file tends to be more complex compared to using images.
Official DVDs
This section provides you with a selection of popular server-focused operating systems that can be installed on your server.
Select the desired operating system by clicking on its name. Then click the set boot mode to DVD? toggle so your server can boot from the desired DVD. Type in your SCP login password and click attach DVD.
Next, you will have to fully power off and power on the server using the Control section.
Now, your server will boot from the desired DVD image and you can install the new operating system. This process tends to differ between operating systems.
Own DVDs
Under Upload own ISOs you can upload an .iso image and then select it under Own ISOs and insert it into the server's DVD drive.
Rescue System
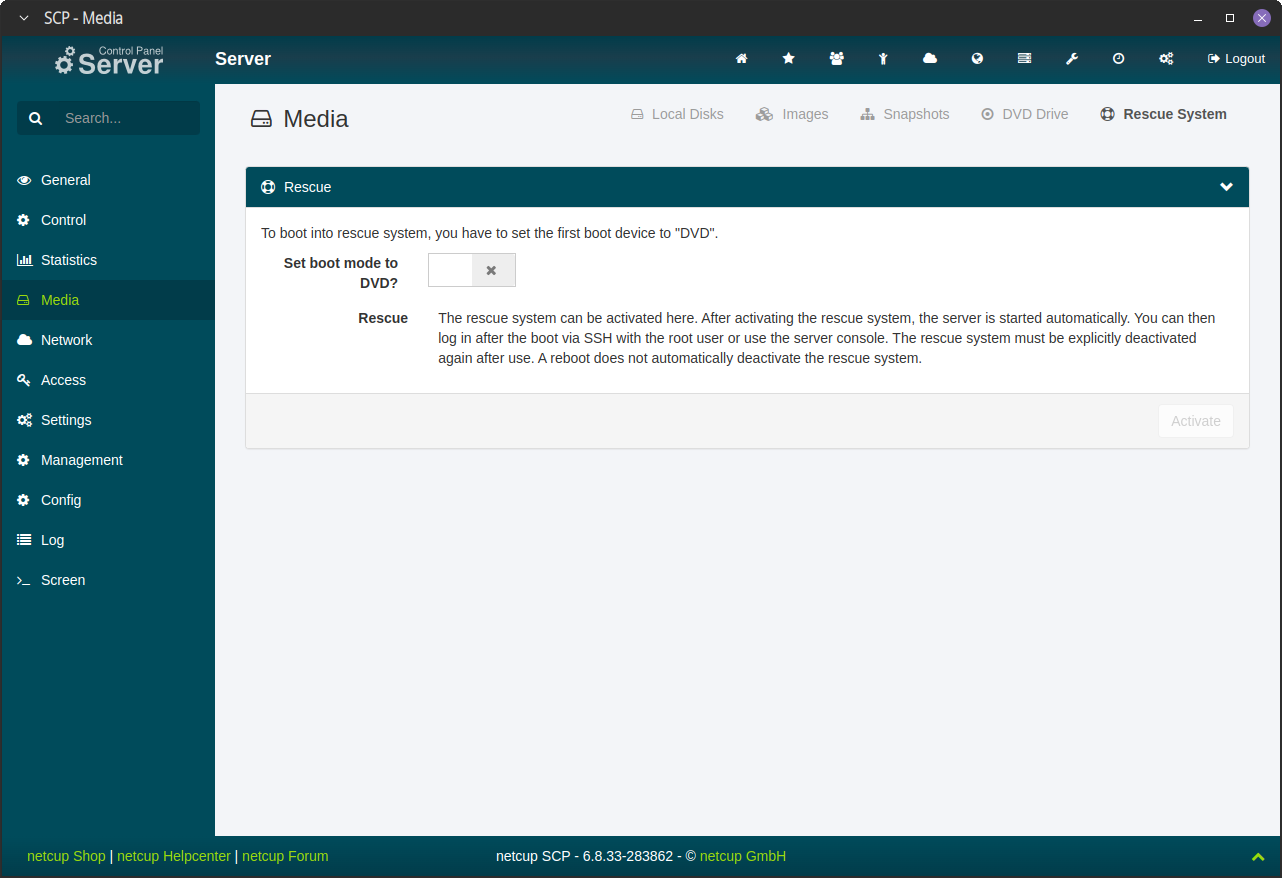
The Rescue System can be a resource for addressing issues, troubleshooting and fixing bugs. It offers you a compact Linux distribution with a multitude of tools that can help you fixing issues, such as problems at booting.

You can find an in-depth guide on how to use the Rescue System here.


