
netcup wiki
SOGo Groupware

Using SOGo with iOS devices
Connect your SOGo instance to your iOS device to access emails, calendars and address books directly.

Note that these instructions may not exactly replicate the process on your device, as iOS devices may differ depending on the version.
1. Set up email
Open Customer Control Panel
- Open the details of your SOGo instance in the Customer Control Panel (CCP).
- Select the Mailboxes tab.
- Select the email address you want to set up and click on the key icon.
- A window will open with the access data you need for the setup.
Open settings
- Open the Settings on your iOS device.
- Select the menu item Apps.
- Go to Mail.
- Go to Accounts.
- Select Add Account.
- Select Other.
- Tap Add Mail Account.
Enter data
- Enter your name. This will be displayed when you send emails to other people.
- Enter your email address and your password.
- Add a description (optional).
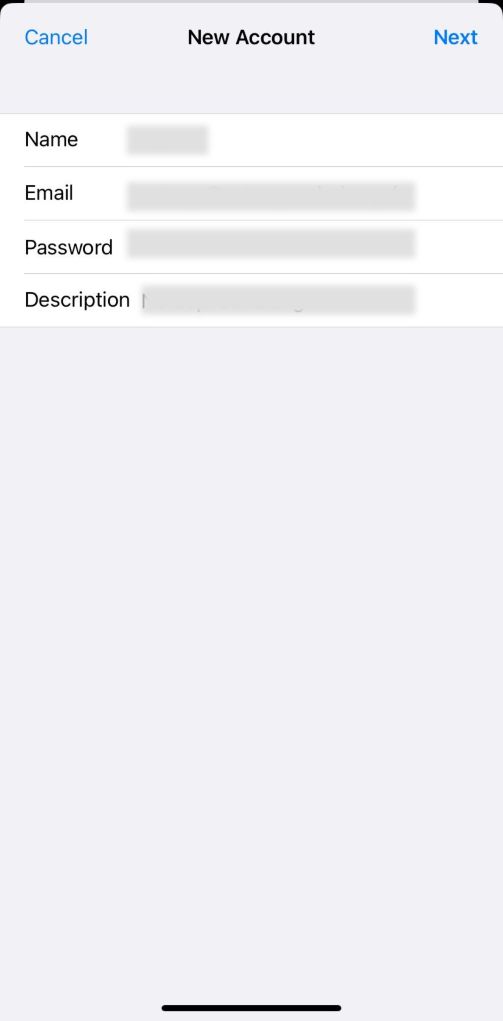
- Tap Next.
Connect
-
Select IMAP.
-
Enter your data for name, email and description again.
-
Enter the information listed under IMAP Server in the access data in the CCP in the Host Name field under Incoming Mail Server.
-
Enter your username (= Email address).
-
Enter your password.
-
Enter the information listed under SMTP Server in the access data in the CCP in the Host Name field under Outgoing Mail Server.
-
Enter your username (= Email address).
-
Enter your password.
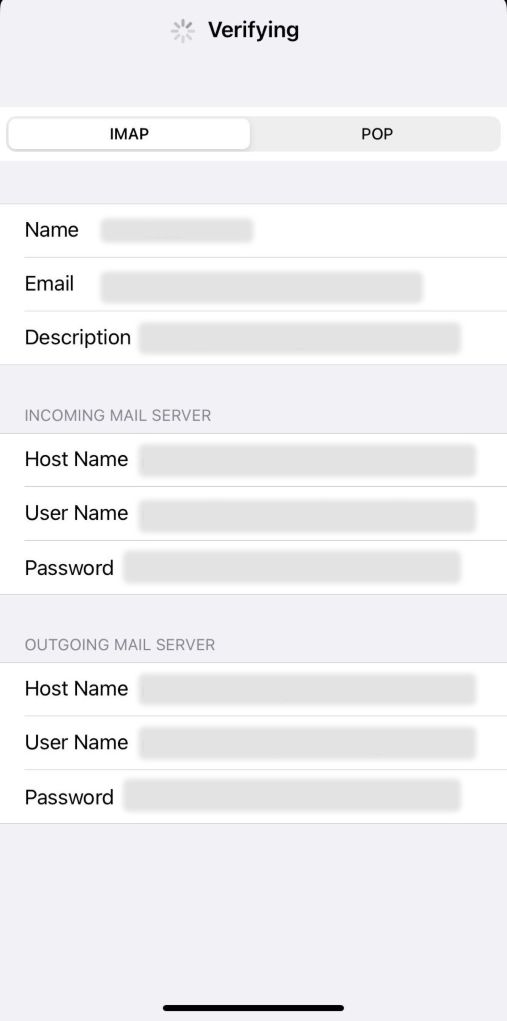
- Tap Next.
- Select Save.
- The setup is complete.
2. Set up calendar
Open settings
- Open the Settings on your iOS device.
- Select the menu item Apps.
- Go to Calendar.
- Go to Accounts.
- Select Add Account.
- Select Other.
- Tap Add CalDAV Account.
Enter data
- Enter your URL without "https://" in the Server field:
yoururl-tld.netcup-mail.de. - Enter your username (= Email address).
- Enter your password.
- Add a description for your account.
- Tap Next and then Save.
- The setup is complete.
Error message: "Connection via SSL not possible"
- Tap Continue.
- Confirm the message "CalDAV account verification failed" with OK.
- Select Advanced Settings.
- Activate Use SSL (the slider must appear green).
- Add the URL:
https://yoururl-tld.netcup-mail.de/SOGo/dav/username. - Exit the advanced settings via <.
- Tap Next.
- Select Save.
- The setup is complete.
3. Set up contacts
Open settings
- Open the Settings on your iOS device.
- Select the menu item Apps.
- Go to Contacts.
- Select Add Account.
- Select Other.
- Tap Add CardDAV Account.
Enter data
- Enter your URL without "https://" in the Server field:
yoururl-tld.netcup-mail.de. - Enter your username (= Email address).
- Enter your password.
- Add a description for your account.
- Tap Next and then Save.
- The setup is complete.
Error message: "Connection via SSL not possible"
- Tap Continue.
- Confirm the message "CardDAV account verification failed" with OK.
- Select Advanced Settings.
- Activate Use SSL (the slider must appear green).
- Add the URL:
https://yoururl-tld.netcup-mail.de/SOGo/dav/username. - Exit the advanced settings via <.
- Tap Next.
- Select Save.
- The setup is complete.
Success
You have successfully connected your SOGo account to your iOS device. You now have direct access to all SOGo functions, including webmail, calendars and address books.