
netcup wiki
SOGo Groupware

Adding a Domain to SOGo

Please ensure that you are not using a pre-existing mail server with the selected Domain as this process will make it inaccessible.
Note that netcup SOGo only works with netcup Domains.
In this chapter, we are providing you with a step-by-step guide on how to connect a netcup Domain with your SOGo instance. Once finished, you will be able to create SOGo accounts using that Domain.
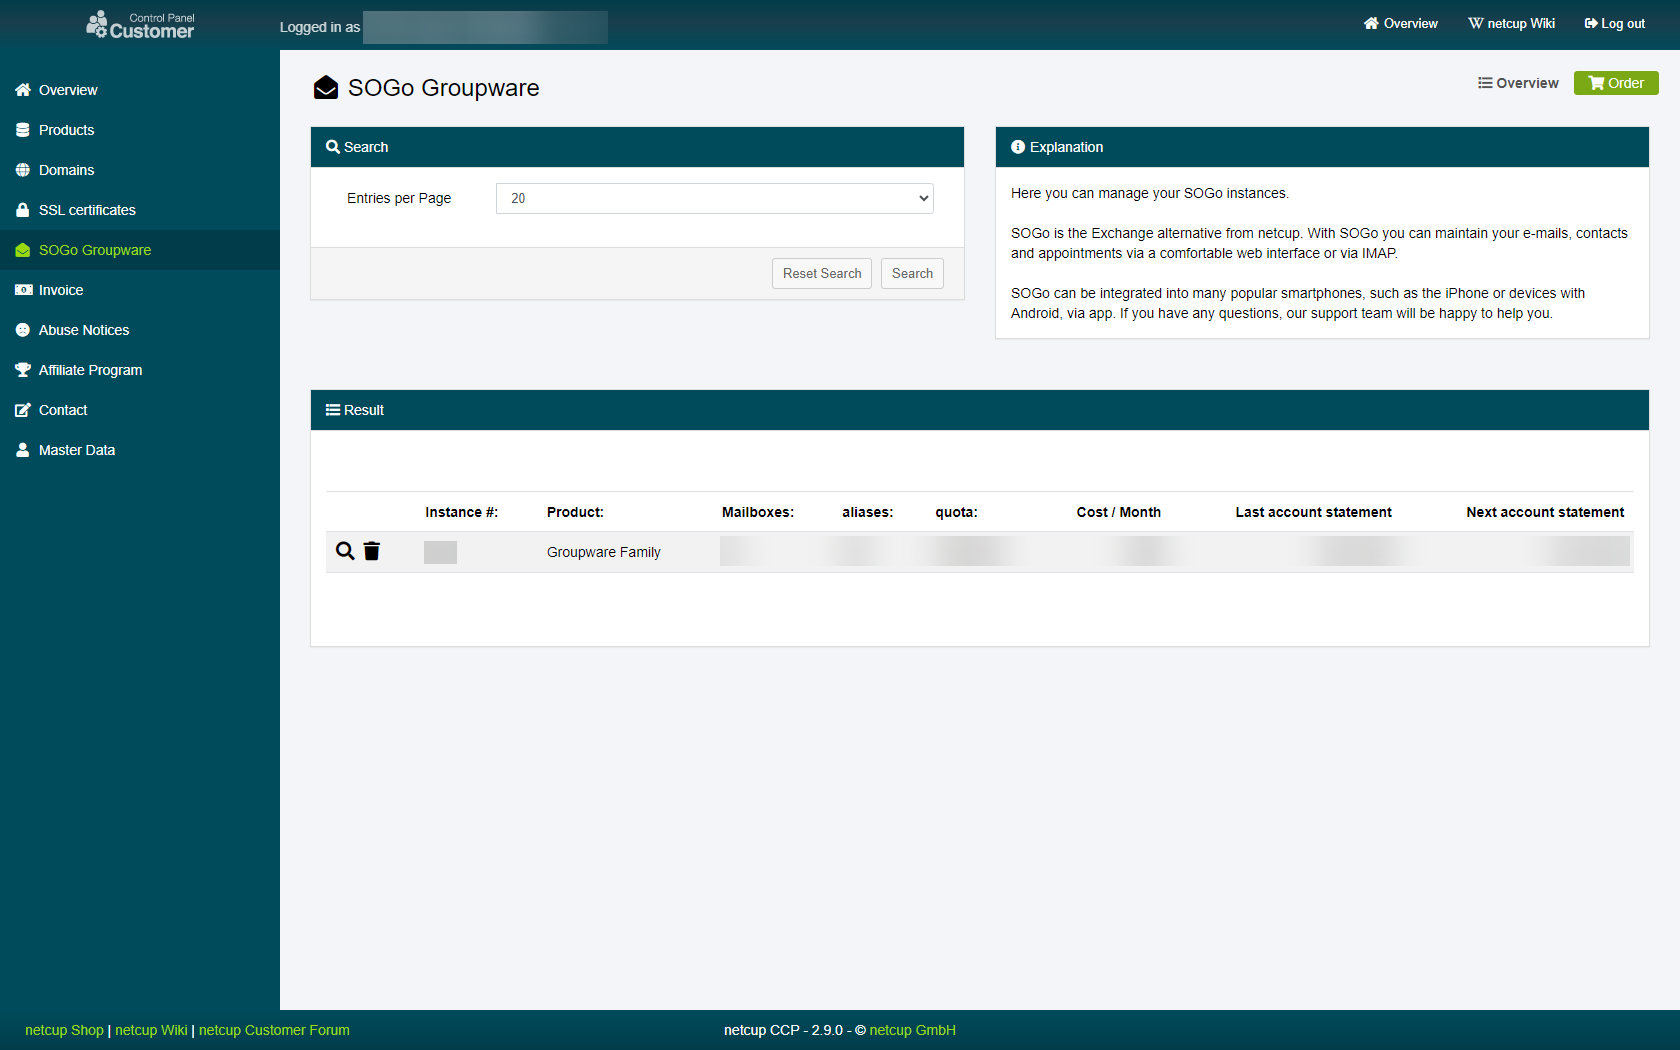
1. Selecting the instance
Head to the SOGo page in your Customer Control Panel and click on the magnifying glass next to the SOGo instance you want to add a Domain to:
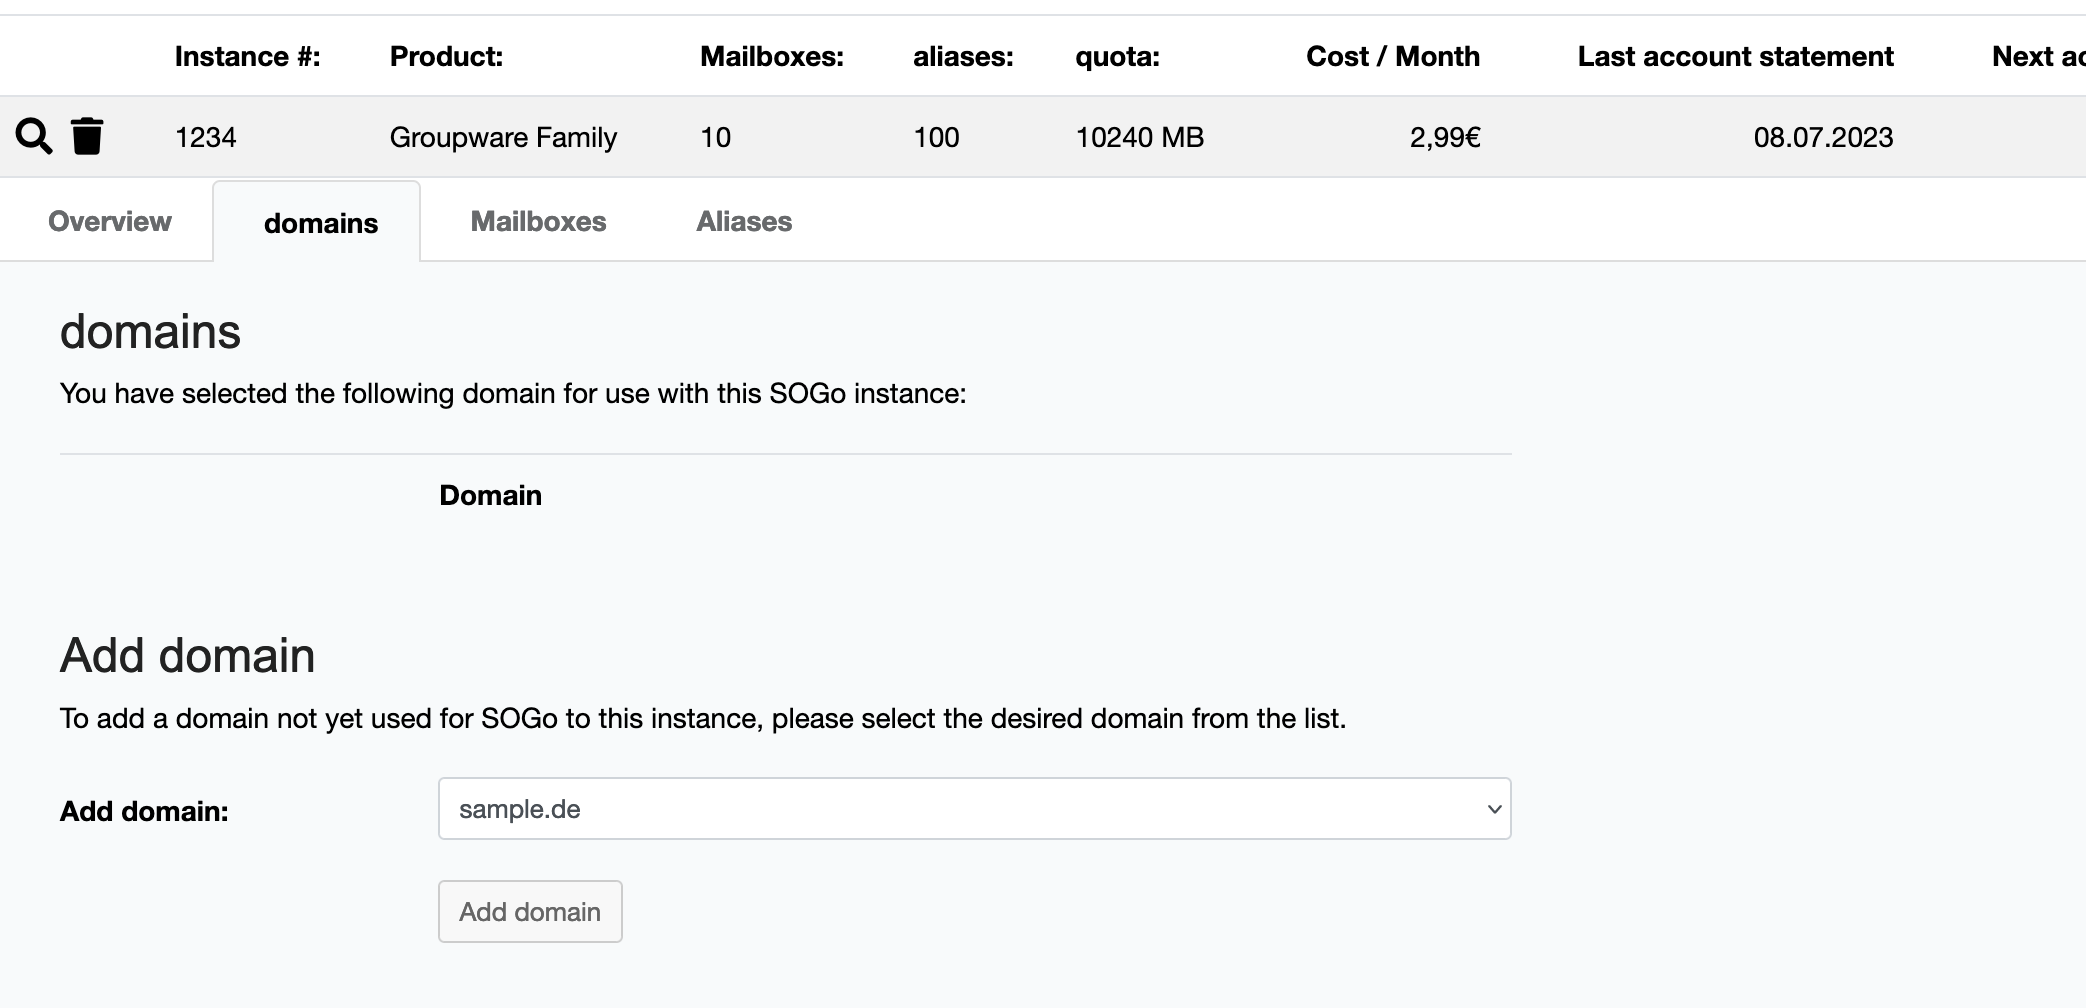
2. Adding the Domain
Switch over to the "Domains" tab and look for the section titled "Add domain". Use the drop-down menu to select the Domain you would like to use with your SOGo instance and click on the "Add domain" button below:
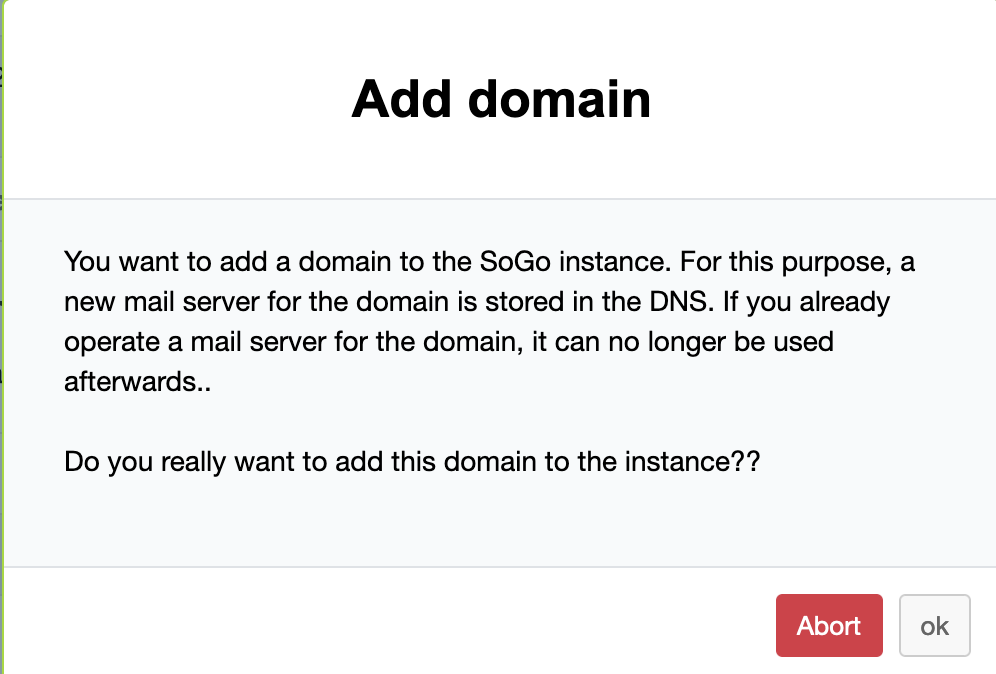
3. Finish
You will be asked to verify that you want to add the Domain to your SOGo instance. Once you have read and accepted the text, click on "Ok" to finally add the Domain to your SOGo instance.
4. Success
You have successfully added a Domain to your SOGo instance.
netcup
netcup Enterprise
Community
netcup Enterprise
Community