
netcup wiki
Webhosting

Enabling SSL/TLS Encryption
It is recommended that you add a SSL certificate to your Webhosting Domains. This will enhance both security and increase trust.
1. Accessing the CCP
Open your Customer Control Panel (CCP) and go to the "Products" section in the navigation bar on the left. Look for the Webhosting whose domain you want to protect with encryption and click the magnifying glass next to the product name. Then, select the domain for which you want to enable encryption for under "Select a domain" and click on "Let's Encrypt".
2. Enabling Let's Encrypt

Please only select Wildcard if you are certain that you need the additional subdomain protection. Wildcard should only be selected when absolutely necessary as the certificate will not be renewed automatically in that case.
You will be redirected into your Webhosting Control Panel for the chosen domain. Click on the "Install" button.

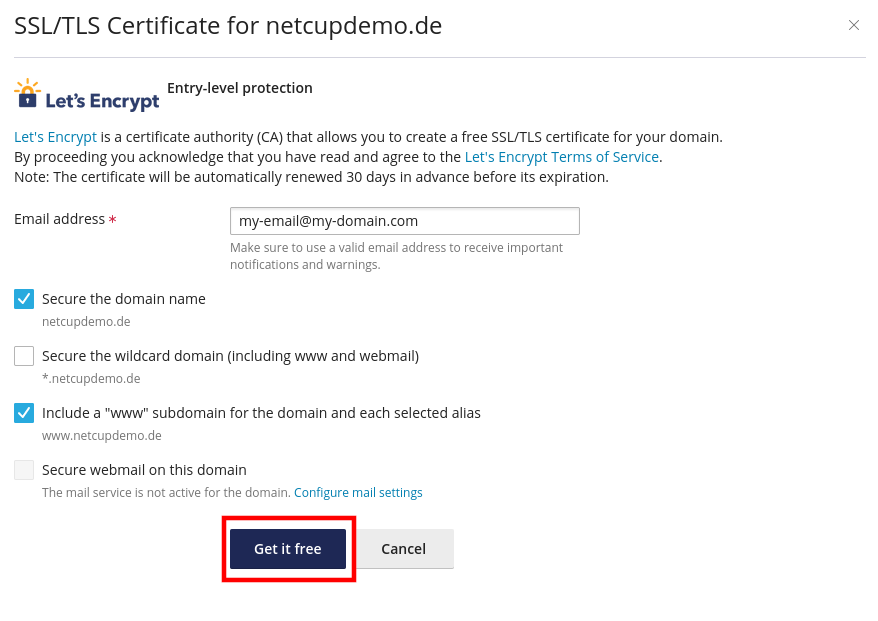
In the newly opened window, add the email address for the administrator under "Email address" and select whether you want to additionally secure "www" subdomains. You may also choose to additional secure subdomains by adding a tick under "Wildcard". This will automatically assign a wildcard certificate for new subdomains.
Then, click on "Get it free".
I have not selected "Wildcard"
If you have not selected "Wildcard", the process of enabling SSL/TLS encryption for the specific domain is completed. The certificate will be issued, deployed and regularly renewed.I have selecte "Wildcard"
If you have selected "Wildcard", please continue with the following steps.Note the necessary DNS record

If you have not selected Wildcard, these steps can be ignored.
Please do not click on "Reload" during this step. Please keep this tab open during the next step.
You will be redirected to a confirmation page which includes instructions for setting the DNS records of your domain. This needs to be done before encryption can be enabled. Note the following information and keep this page open during the following step.
Setting the necessary DNS record
Head back to your Customer Control Panel (CCP) and go to the "Domains" section in the navigation bar on the left. Look for the domain from the previous step, click on the magnifying glass left of its name and then go to the "DNS" section.
Scroll down till you find an empty row and add the information we received in the previous step as seen below.
Finish this step by clicking on "Save DNS records". Please wait 48 hours for the changes to be applied.
Applying the certificate
This change may take up to 48 hours to propagate.
Once the changes have been applied, go back to the browser tab from step #3 and click on the "Reload" button.
3. Success
Your Webhosting domain is now protected with a Let's Encrypt certificate.