netcup wiki
Webhosting

Webhosting Interface
Our web hosting uses the Plesk Onyx panel. Log in to manage your Customer Control Panel (CCP) and click "WCP Auto-Login":
You will now be redirected to the "Products" page of the Customer Control Panel (CCP) and the menu for the first web hosting tariff in the list will open. If you have several web hosting tariffs and want to manage another one, simply click the magnifying glass in front of the desired tariff.
wProdukte_Lupe2.png)
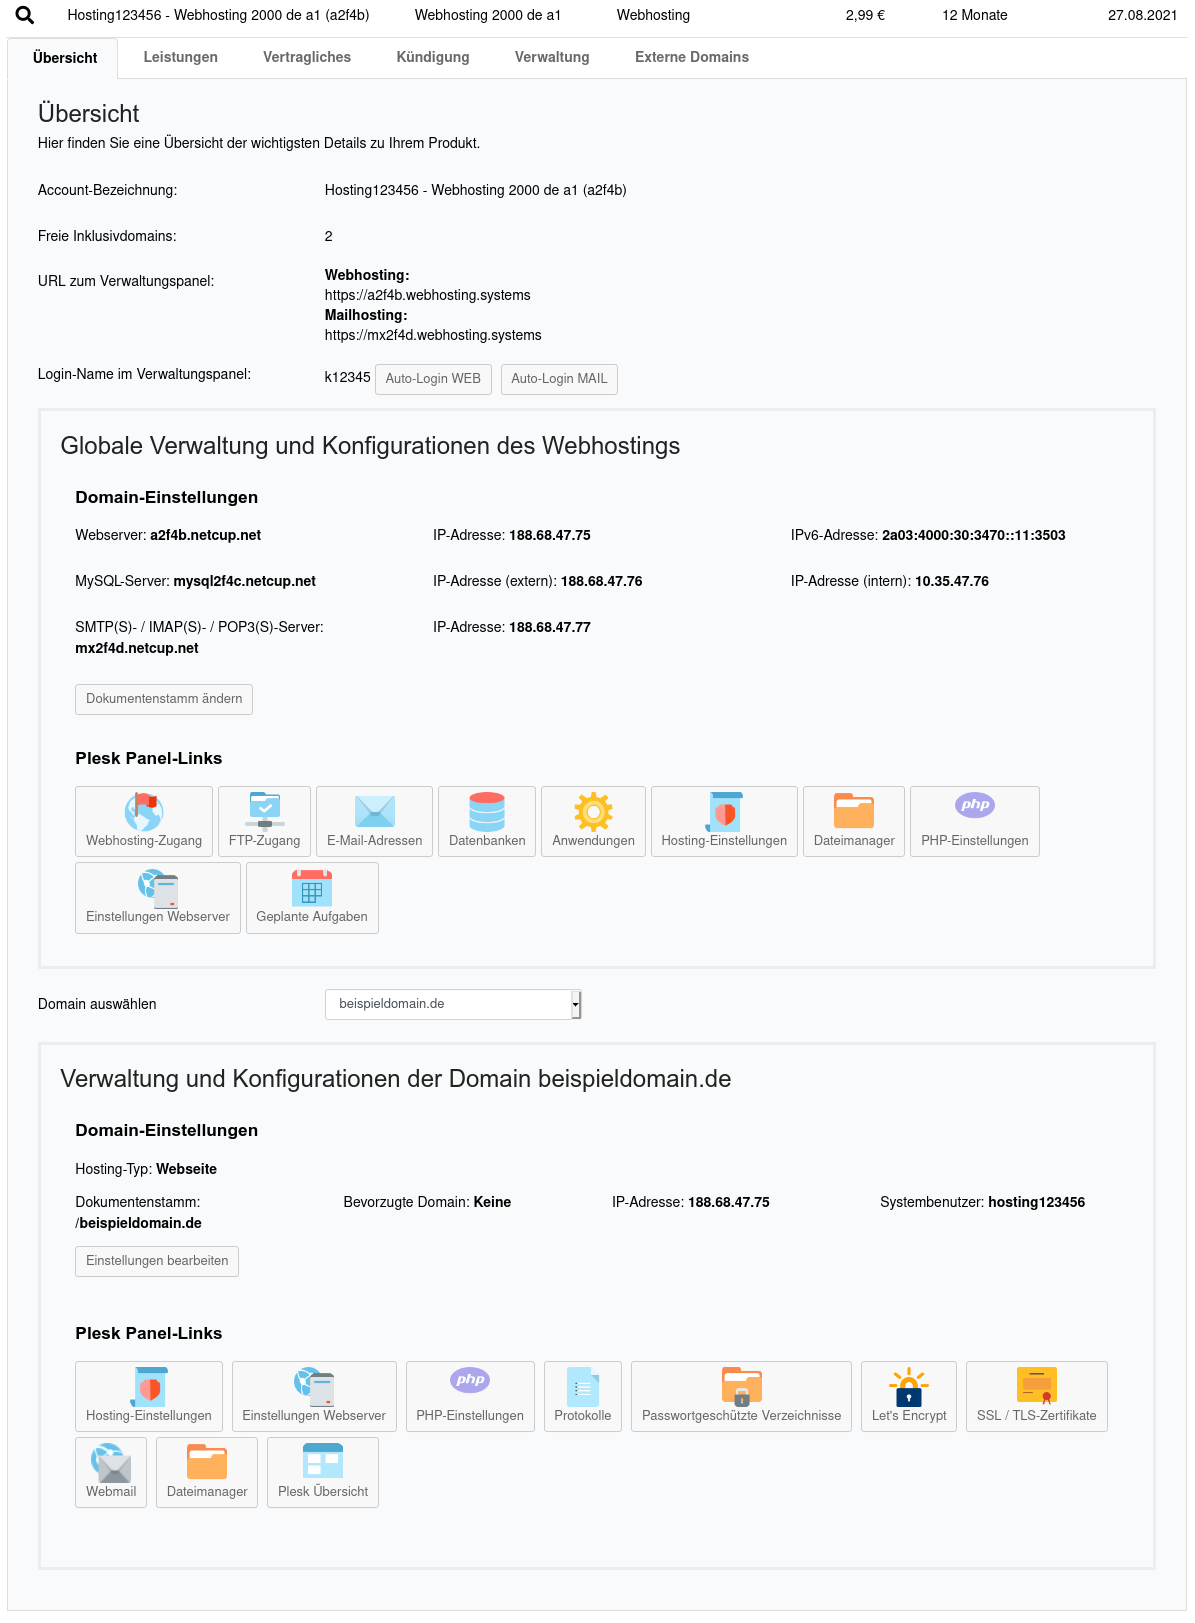
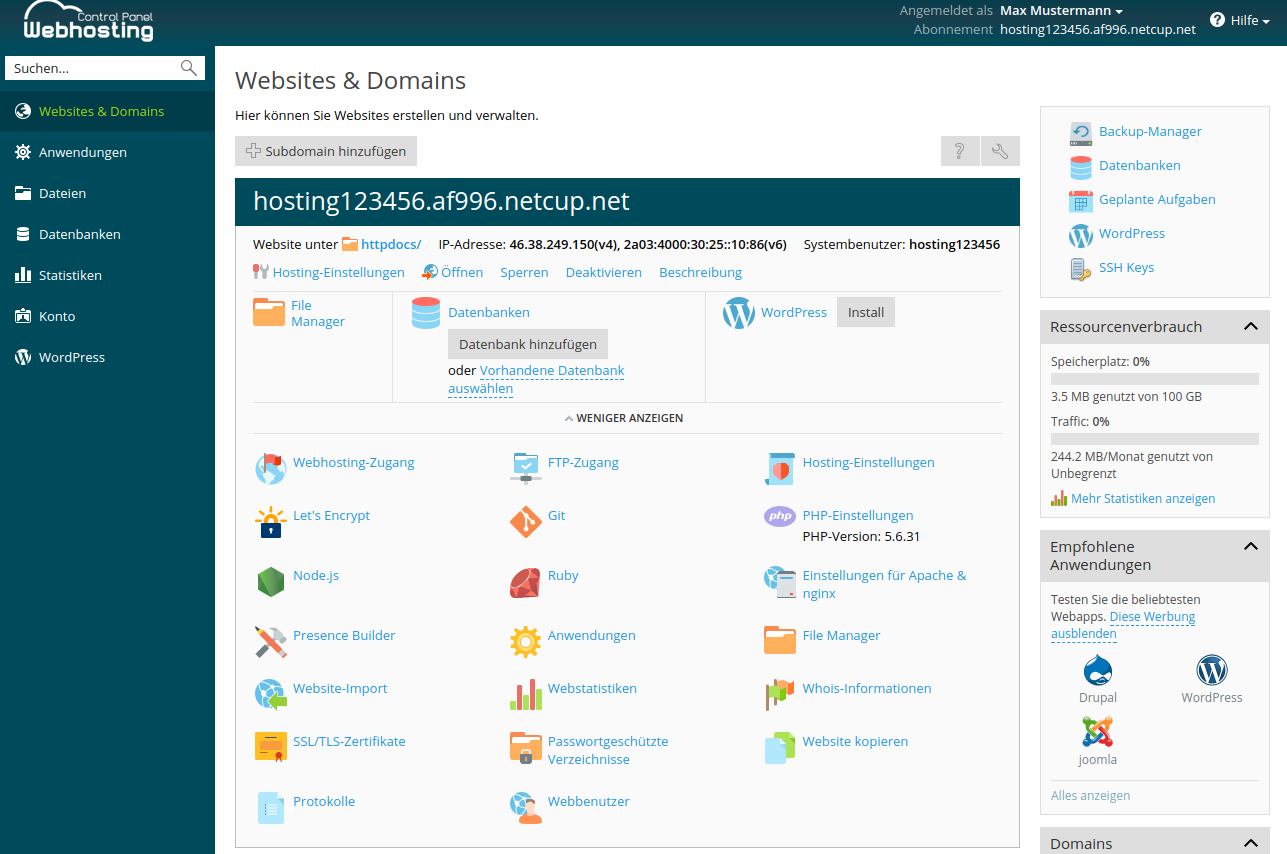
The menu that appears looks like this:
In the following, each of the individual points available will be discussed.
General information about the product
First you will receive general information about the product. You will be given the product name, which should be specified when contacting support, for example, so that they know which of your products your request relates to. You can also see the number of free included domains. As you can order additional included domains (and additional domains) at any time directly via your Customer Control Panel (CCP), you will learn how to do this here.
In addition to "URL to the administration panel:" you will find the two URLs for web hosting and mail hosting. Since our web hosting tariffs are based on cloud infrastructure for high reliability and speed, the panels for configuring web hosting and configuring mail hosting are separated from each other and have different URLs. If you have set a password in the Plesk interface, you can log in to it here.
Next to "Login name in the administration panel" you will find out what your login name is for the panels. Via the link "Auto-Login WEB" or "Auto-Login MAIL" you can log in to the respective panel at any time without having to enter a password.
Global administration and configuration of web hosting
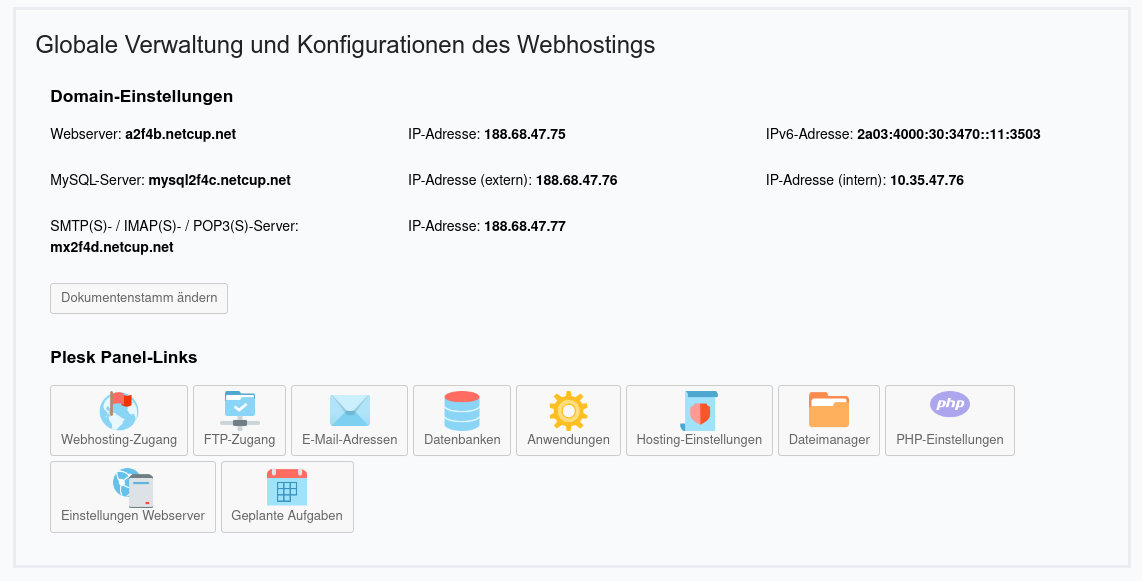
In this menu you have the option to make settings that apply to the entire web hosting. First you will receive information about connecting to the web hosting tariff:

| Title | Description |
|---|---|
| Webserver | The hostname of the web server is displayed here. |
| IP address | Here you will find the IPv4 address of the web server. This must be set as an A record for the main domain and any subdomains in the DNS. |
| IPv6 address | Here you will find the IPv6 address of the web server. This must be set as an AAAA record for the main domain and any subdomains in the DNS. |
| MySQL server | The hostname of the MySQL database server is displayed here. |
| IP address (external) | The IP address of the MySQL database server is displayed here, via which it can be reached externally, i.e. also from systems outside our web hosting. |
| IP address (internal) | The IP address of the MySQL database server is displayed here, which should preferably be used for internal connections to it. |
| SMTP(S) / IMAP(S) / POP3(S) server | Here you will find the hostname of the mail server for your web hosting tariff. Use this as the incoming and outgoing mail server when configuring your mail program. |
| IP address (mail server) | Here you will find the IP address of the mail server. |
Change document root
Here you have the option to change the document root, i.e. the directory to which the standard domain of your hosting tariff (in the format hosting123456.af123.netcup.net) should point. To do this, click the button and enter the new desired document root in the menu that appears:
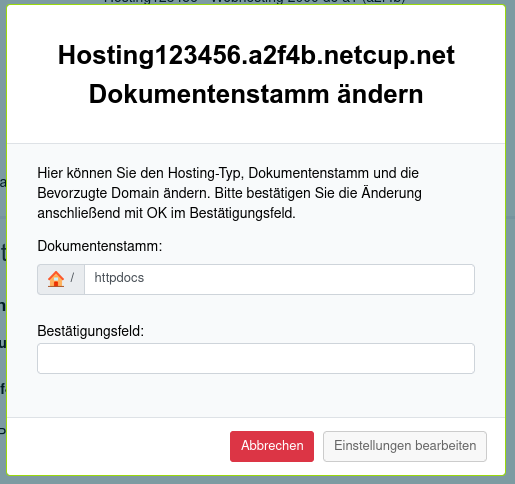
Please note that only the document root can be changed for the standard domain, but not the preferred domain (redirect to "www." subdomain / redirect to variant without "www." / no redirect) or the hosting type. The standard domain is required for administrative purposes of the web hosting tariff and must therefore not be modified significantly.
Web hosting access
![]()
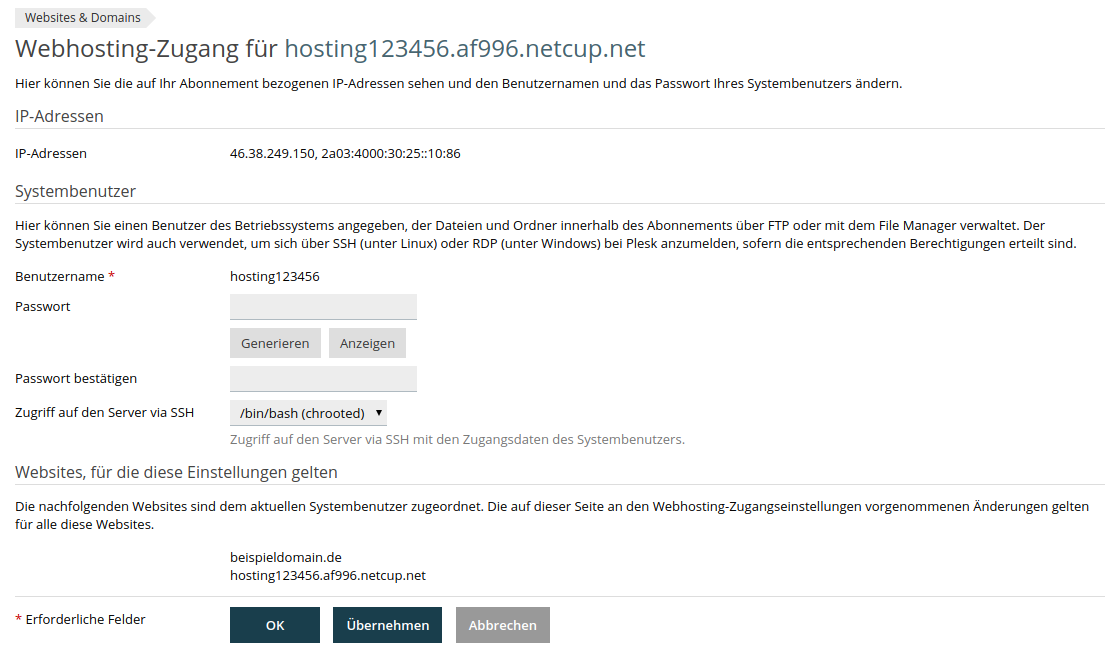
Under "Web Hosting Access" you can set the password for connecting via SSH / SFTP or FTP / FTP(ES) for web hosting. After entering and saving the entered password, you can then connect to the web hosting with an SSH client, SFTP client or FTP client. Use the IP address of the web server as the hostname. This is also displayed on the page for setting the password:

Please note that the user whose password you edit under "Web Hosting Access" has full access rights to all folders in your web hosting.
FTP access
![]()
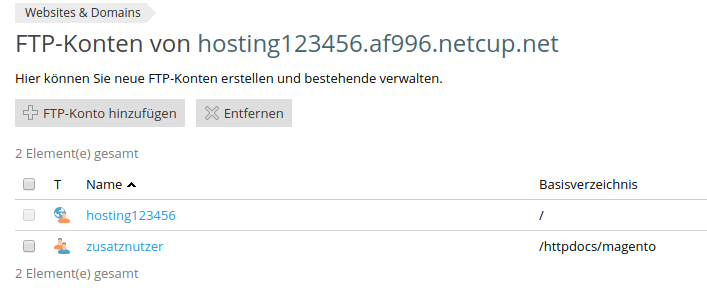
Under FTP access you can add additional FTP users within the scope of your tariff limits and manage existing additional FTP users. You can also assign them a base directory of your choice. The user then only has access to this base directory and its subdirectories.
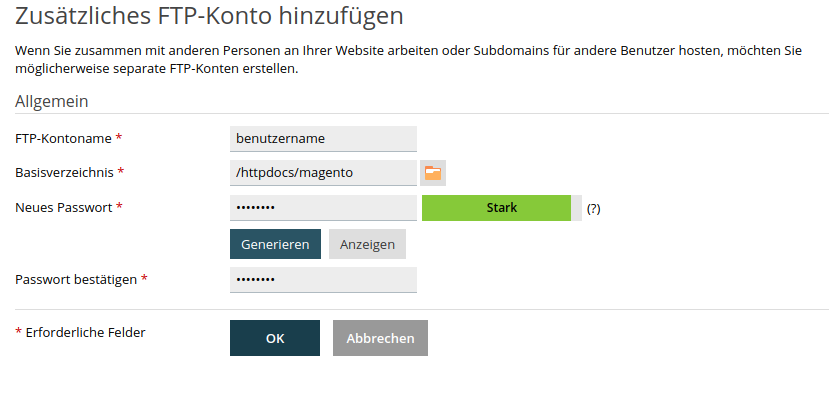
Access via SSH / SFTP is not possible, but the additional users can use FTPES for encrypted login to the FTP server.
Email addresses
![]()
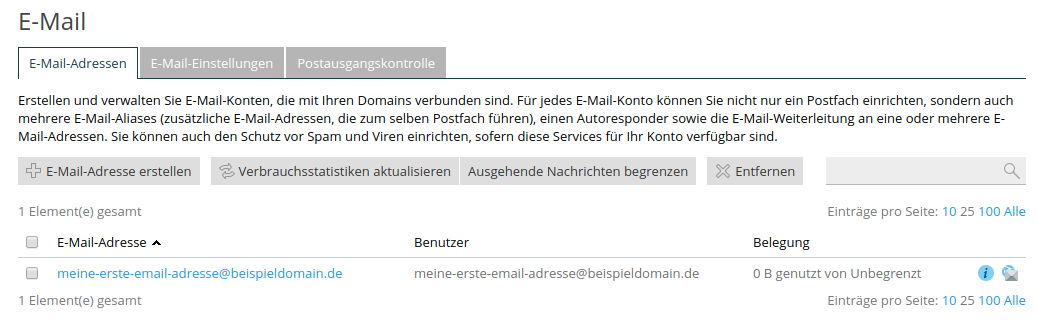
Click the "Email Addresses" button to go to the email address management panel.
By clicking the envelope icon next to the email address, you will go to the webmailer.
Create email address
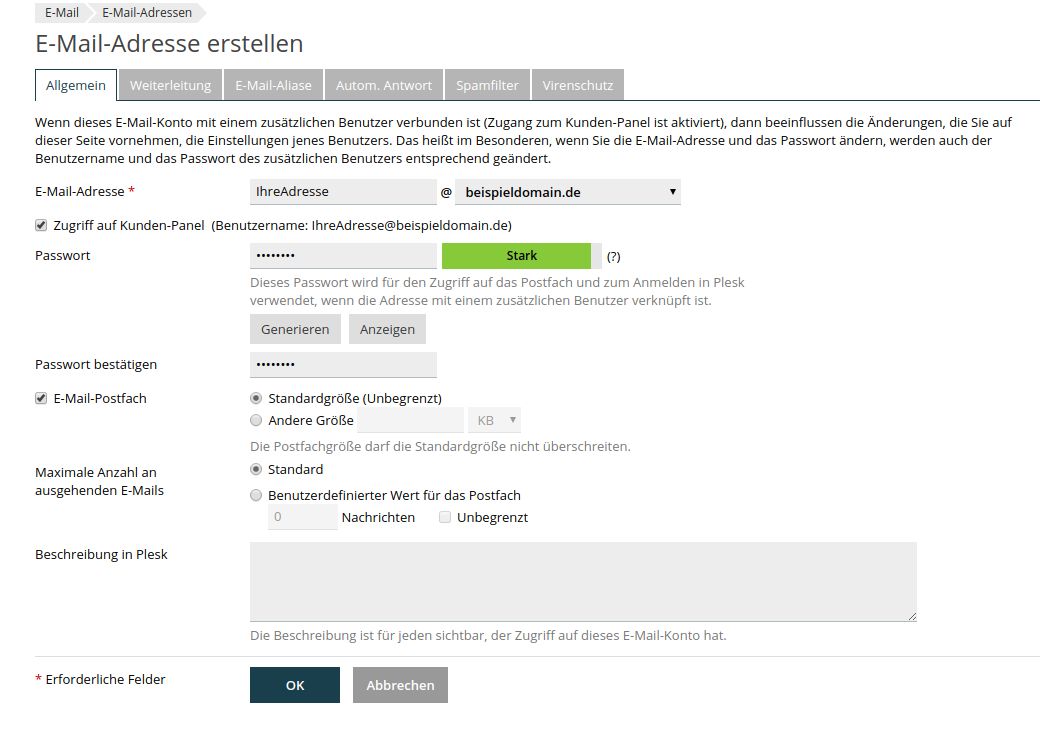
After clicking "Create Email Address", you can create a new email address. To do this, enter the desired name of the email address in the field provided and select the domain for which the email address is to be created. Also assign a password.
You can also define the mailbox size and the maximum number of outgoing emails.
"Forwarding"
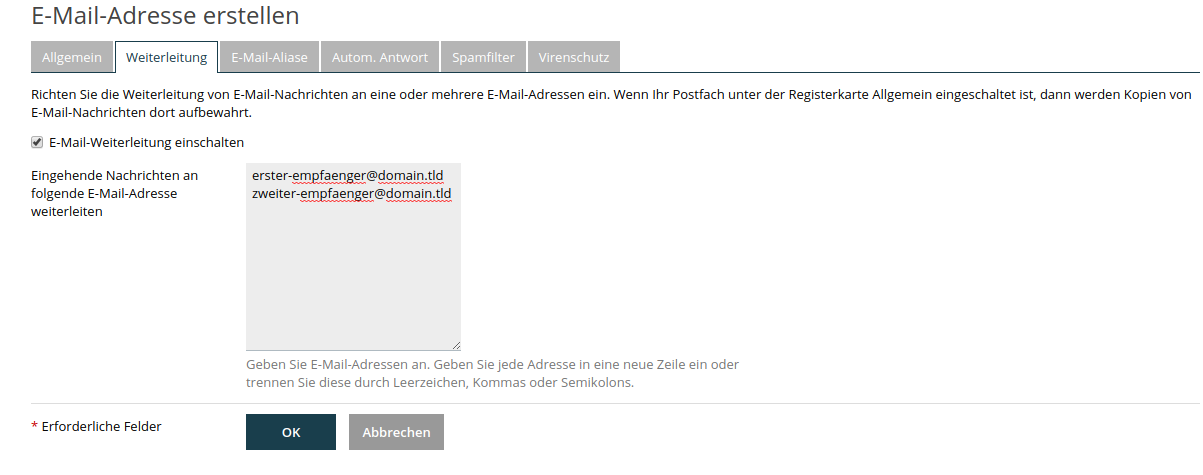
Here you can define email forwarding for the email mailbox to be created. To do this, check the "Enable email forwarding" box and enter one email address per line in the text field to which the messages are to be forwarded.
"Email aliases"

Here you can add aliases for the email address. By clicking "Add email alias" you can define multiple aliases.
"Auto response"
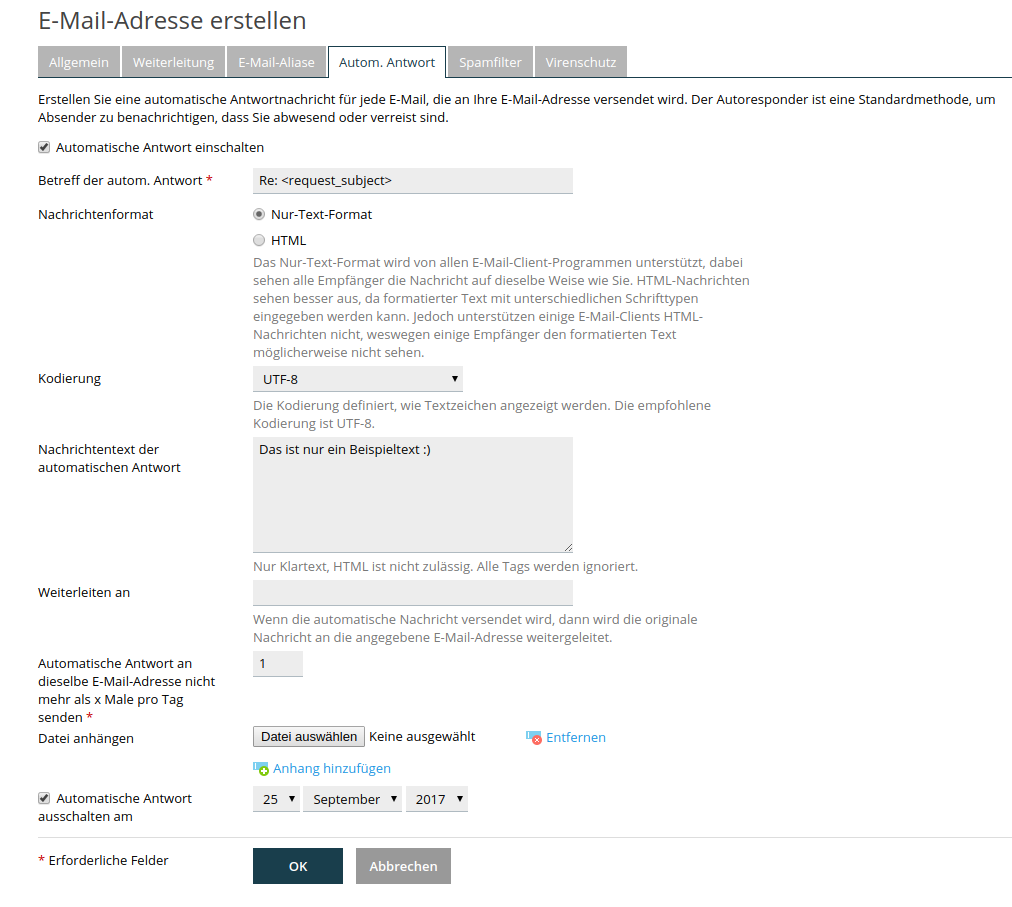
Here you can set up an automatic response for incoming email messages (this is often referred to as an "autoresponder").
To do this, check the "Enable automatic response" box.
You can now define the subject, message format (text only or HTML), encoding (UTF-8 is recommended), the actual message text, possible forwarding of the original message, and a limit for the number of autoresponders sent per email address per day. You can also attach a file to the autoresponder.
You also have the option to automatically deactivate the automatic response function on a specific date. To do this, check the box next to the option and set the desired date.
"Spam filter"
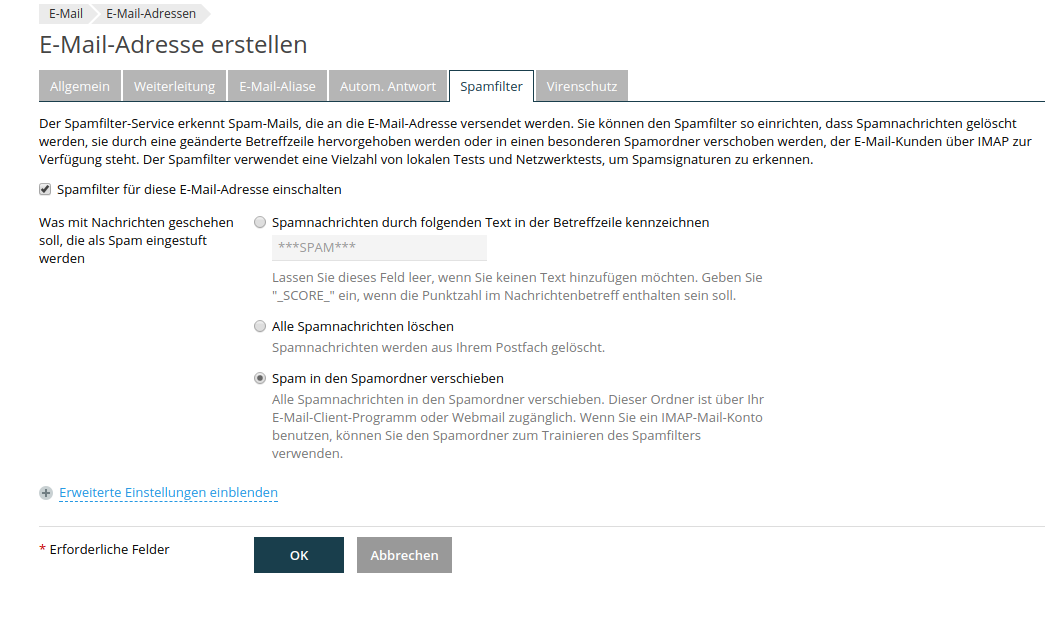
Here you can activate the spam filter for the email address. You can also select what should happen to detected spam messages. By clicking "Show advanced settings" you have the option to make further configurations. For example, you can adjust the sensitivity of the spam filter there and define a white list and black list of email addresses.
Please note: In addition to the Plesk spam filter that can be configured here, the netcup spam filter for web hosting is also active by default. You can deactivate this for each domain in the Customer Control Panel (CCP).
"Virus protection"
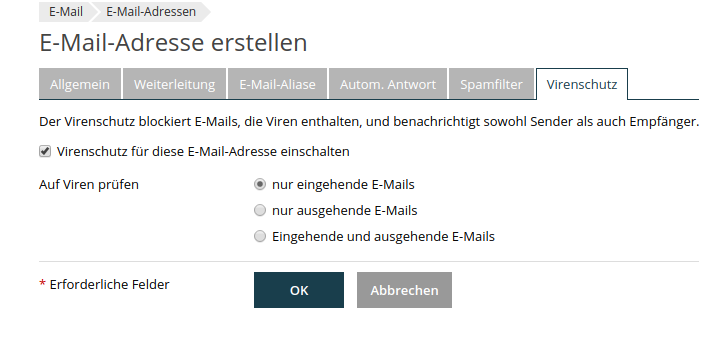
Virus protection blocks emails containing viruses and notifies both senders and recipients.
You can activate this by checking the "Enable virus protection for this email address" box. You can also define whether only incoming or outgoing emails or both incoming and outgoing emails should be checked by the virus protection.
"Email settings"
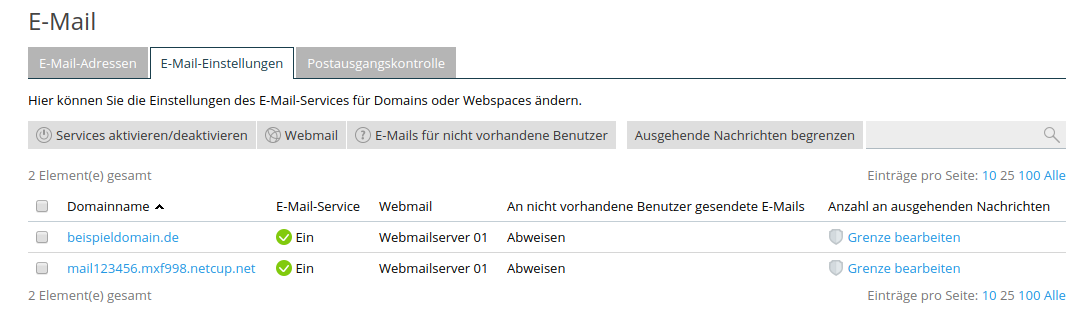
In this tab you can (de)activate the email service for a domain, configure what should happen to emails for non-existent users (catch-all), and limit outgoing messages per domain.
- Activate / deactivate services
Check the boxes next to the domains for which you want to (de)activate the mail service and then click the "Activate / deactivate services" button.
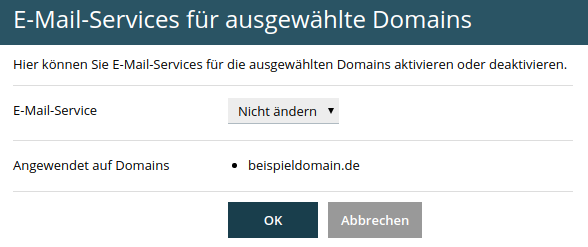
Here you can now make the desired change.
- Webmail
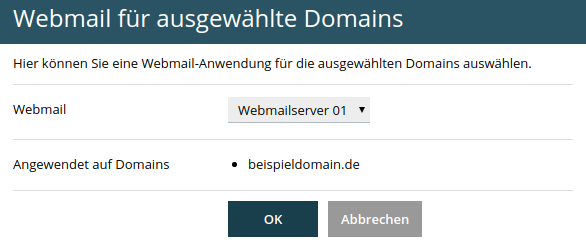
Here you can select the webmail server you want to use.
- Emails for non-existent users
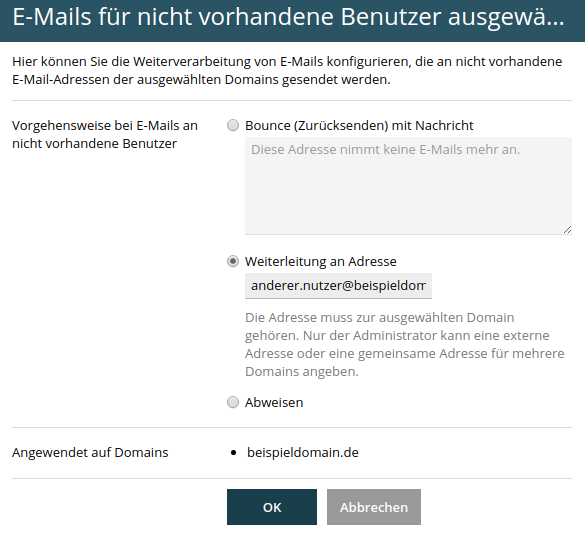
Here you have the option to define the behavior when emails are sent to a non-existent email address in a domain ("catch-all").
With a bounce, the sender receives a message whose content you can define in the input mask.
You can forward the email to another email address.
Alternatively, you can reject the email. This is the default setting.
- Limit outgoing messages
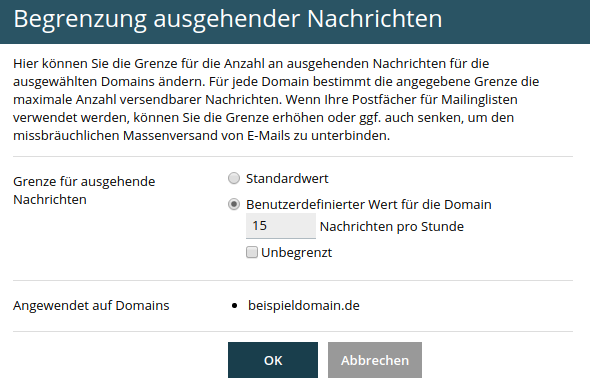
Here you can limit the number of outgoing emails per hour per domain. For each domain, the specified limit determines the maximum number of messages that can be sent.
"Outgoing mail control"

Follow the "Outgoing Mail Control" link in the tab of the same name to get detailed information about the number of outgoing emails per mailbox and domain.
Databases
![]()
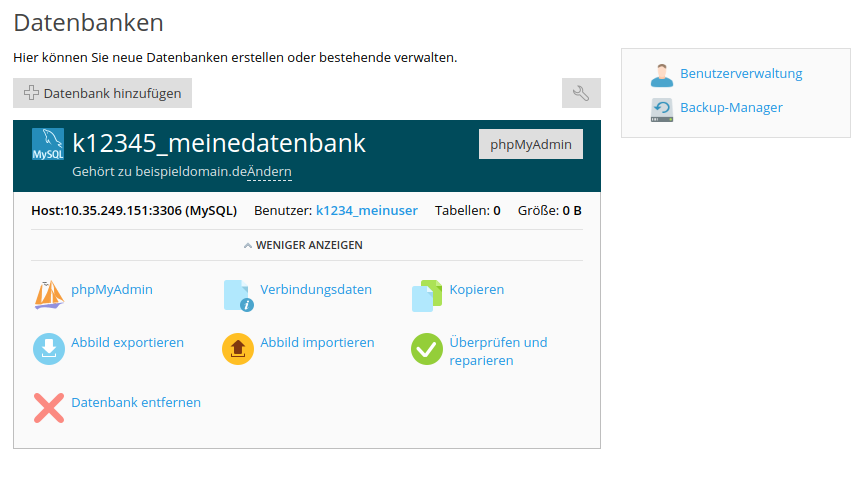
Via the "Databases" menu item you can manage your MySQL databases.
Add database
By clicking the "Add Database" button, you can add a new database:

Enter a database name and create a database user who has access to the database. For the connection, please use the IP address specified next to "Database server".
phpMyAdmin
![]()
By clicking "phpMyAdmin" you will reach the tool of the same name and can execute SQL queries, for example.
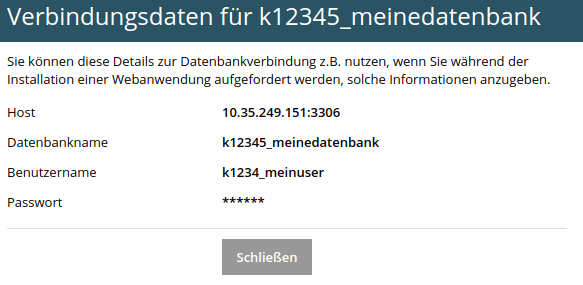
Connection data
![]()
Here you will find the data you need to connect to the database, e.g. when setting up a PHP application.
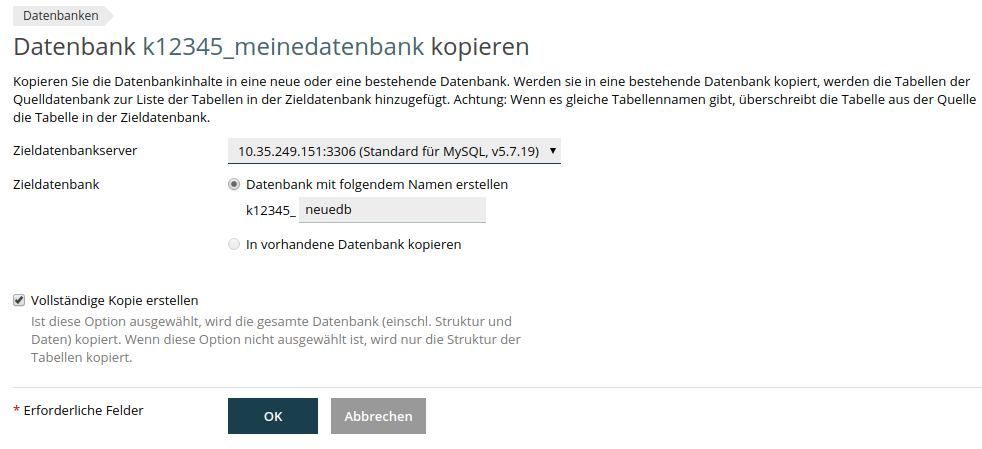
Copy
![]()
Copy the database contents to a new or existing database. If copied to an existing database, the tables from the source database are added to the list of tables in the target database. Caution: If there are tables with the same names, the table from the source overwrites the table in the target database.
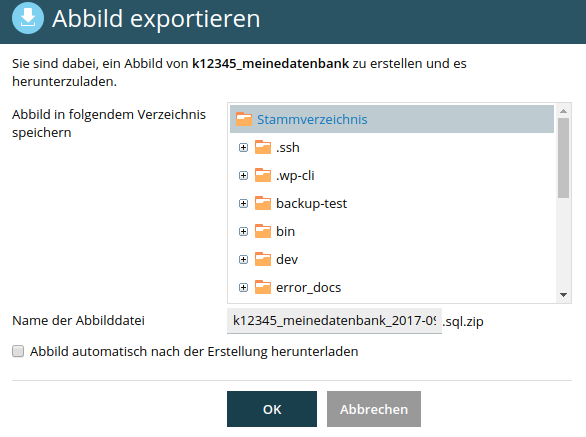
Export image
![]()
This allows you to create an image of your database. This can be stored in a folder of your web hosting (in this case you should usually make sure that it is not freely accessible) and then downloaded.
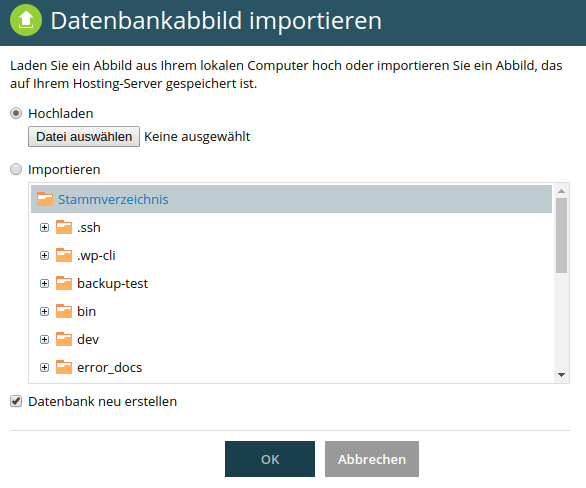
Import image
![]()
Here you have the option to import a database image. You can either upload it directly or select a file from your web space.
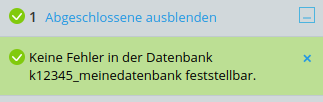
Check and repair
![]()
This function checks your database for errors and repairs them if necessary. The progress of the operation is displayed to you on the right at the bottom.
Remove database
![]()
Here you can delete your database if necessary.
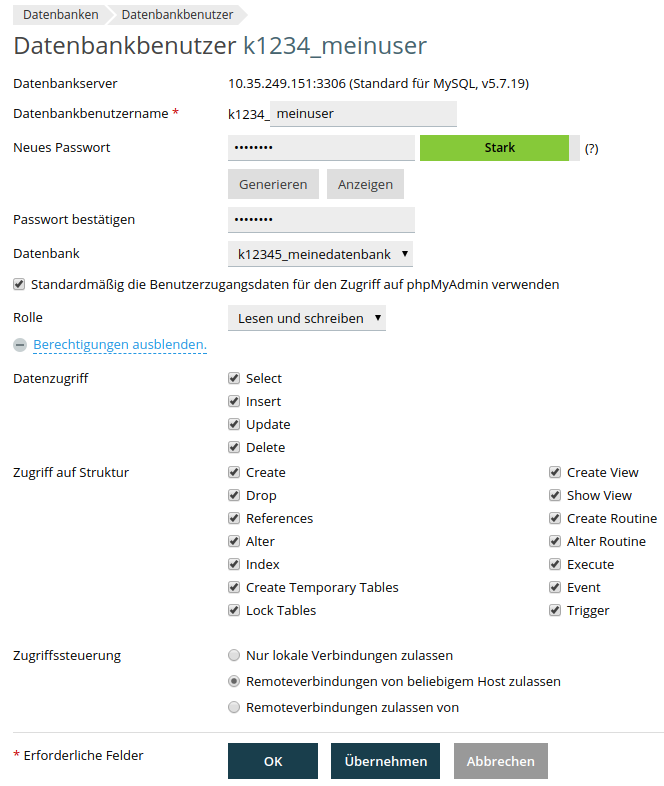
User management
![]()
At the top right you will find the item "User Management". Here you can manage the database users currently created. After clicking on existing users, you can, for example, change their password or modify permissions. You can also create new database users here.

Applications
![]()

Via the "Applications" button you can easily install many different web applications with just a few clicks. In the following we will demonstrate the installation of WordPress as an example. Installing other applications is comparable, and additional data may be requested from you.
Of course, the usual manual installation of applications is possible, especially if you want certain program versions that are not available in this context.
Installing WordPress
-
Click "Top Applications" in the menu on the left
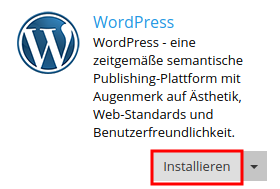
-
For WordPress, click the "Install" button
Now specify on which domain WordPress is to be installed. Also note that you can choose between "https" (encrypted connection) and "http" (unencrypted connection). If you choose "https", an automatic redirect to the encrypted version of your website will be made when you call it up. You should therefore have provided it with a certificate. This is possible free of charge via "Let's Encrypt" in our web hosting.
You must also specify the folder in which WordPress is to be installed. By default, the suggestion is blank, so that WordPress can be reached directly when the domain is called up:
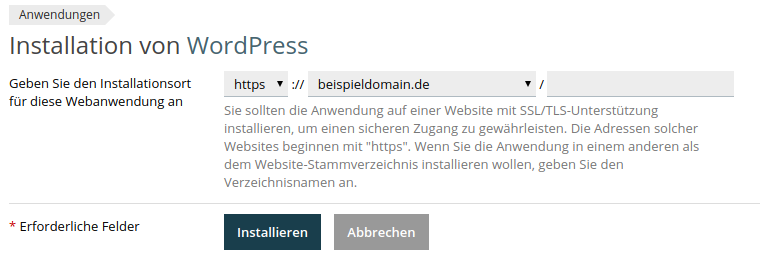
In this case, we are installing WordPress directly on the domain "beispieldomain.de", which is to be accessed via an encrypted connection.
- Click "Install".
WordPress will now be installed and then integrated into the WordPress Toolkit.
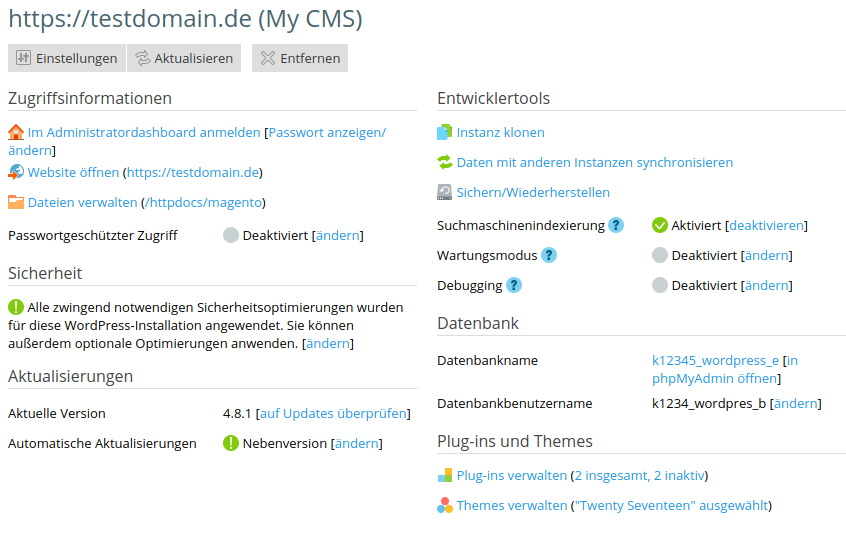
The WordPress Toolkit gives you many options to manage your WordPress website directly via the Plesk Onyx panel. For example, you can log into the admin interface by clicking "Log in to the admin dashboard". You can set up automatic updates for the installation, clone it, back it up, restore it and install plugins or themes directly via our interface.
Remove application
If you want to remove an application again, click "Manage my applications" on the left and then "Remove" next to the respective application:

Hosting settings
![]()
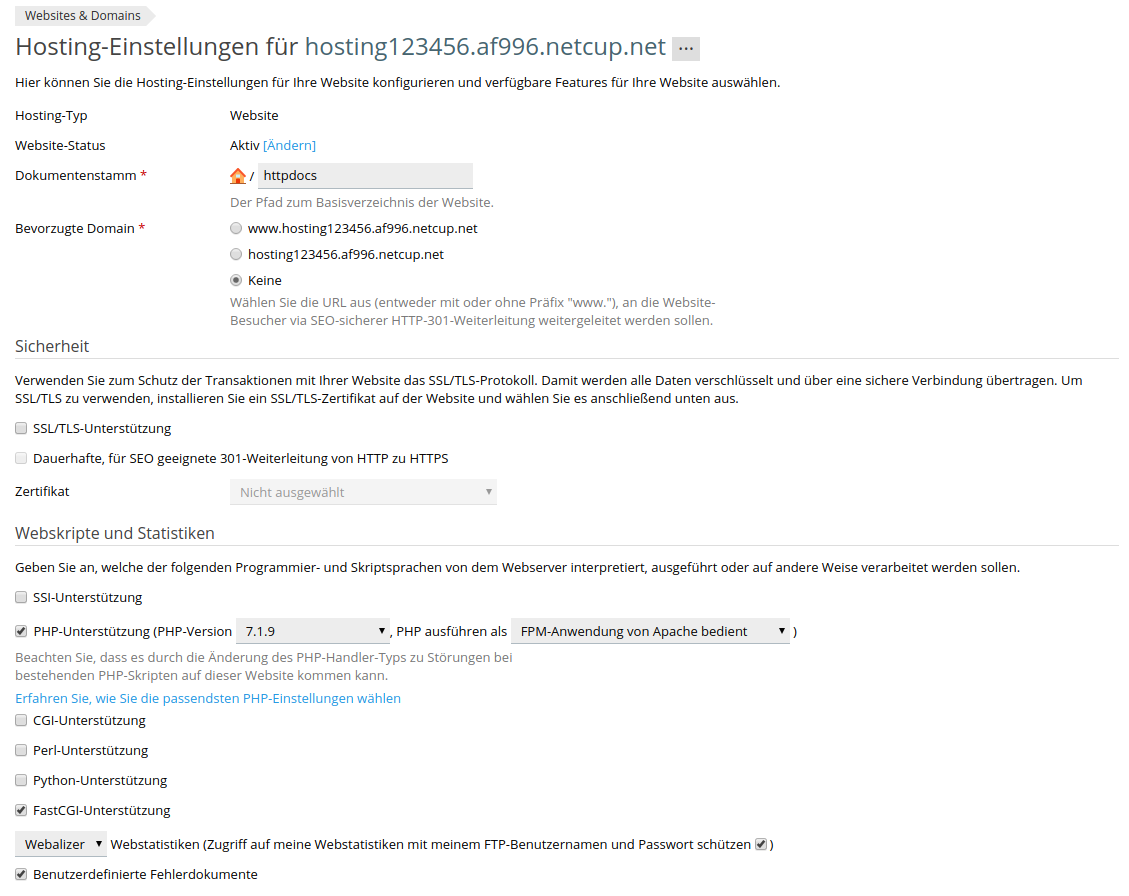
In the hosting settings you can customize many settings for hosting your website. The individual options are discussed in more detail below. If you change the hosting settings for the standard domain (e.g. hosting123456.af996.netcup.net), these settings will apply to all (sub)domains added to the web hosting afterwards, as well as to the standard domain itself. You will find the "Hosting Settings" menu item for each domain created, so that you can set individual settings for each domain.
Website status
Click the "[Change]" link next to "Website Status" to change the website status to "Locked" or "Disabled".
Locked: "The website will continue to be hosted on the server, but visitors will be redirected to the custom error document page with HTTP code 503. Email service will remain available."
Disabled: "The website will no longer be hosted on the server and can no longer be accessed (exception: via FTP clients and the File Manager). Visitors will see the standard page of the web server. The email service will not be available."
Document root
Here you can see which directory the domain currently points to when called up. So if you operate several domains in your web hosting tariff and they are all to have different content, they require different document roots. Domains with the same document root show the same content because they both point to the same content.
You can change the document root in the Customer Control Panel (CCP).
For subdomains, a change can be made directly in the hosting panel itself.
Preferred domain
If you want your visitors to be redirected to the domain without "www" or with "www" via HTTP 301 redirect, you can use the "Preferred Domain" option. You can view the set setting here.
Security
SSL stands for "Secure Sockets Layer“. By using an SSL certificate, the data transmitted to your computer when a website is called up, for example, is encrypted. SSL certificates can be used to encrypt data streams on websites, but also for emails, for example. For example, if you retrieve your emails from your internet provider and the connection is SSL encrypted, no third party can read the data when retrieving your emails.
Here you can (de)activate SSL support and set up a permanent HTTP 301 redirect for secure SEO from HTTP to HTTPS. You can also select the SSL certificate to use. If you do not have such a certificate, you can obtain a free certificate via Let's Encrypt or, as described here, deposit a commercially purchased certificate.
Web scripts and statistics
Here you can configure various settings for the supported script types and web statistics:
| Title | Description |
|---|---|
| SSI support | Here you can (de)activate so-called server side includes (SSI). |
| PHP support | Allows you to (de)activate PHP execution. You can also select the PHP version used and the PHP handler used. Depending on the scripts you use, the best possible settings here can vary. In general, PHP 7 is much faster than PHP 5, but your scripts must also support PHP 7 to use it. |
| CGI support | Allows you to activate CGI support. |
| FastCGI support | Here you can determine whether you want to activate FastCGI. |
| Web statistics | Here you can activate web statistics. Select the desired tool (Webalizer / AWStats) and secure access with your FTP username and password. This is the username and password of the user you can assign under "Web Hosting Access". You can access the web statistics at yourdomain.tld/plesk-stat/ |
| Custom error documents | You can also (de)activate support for custom error documents here. |
File Manager
![]()
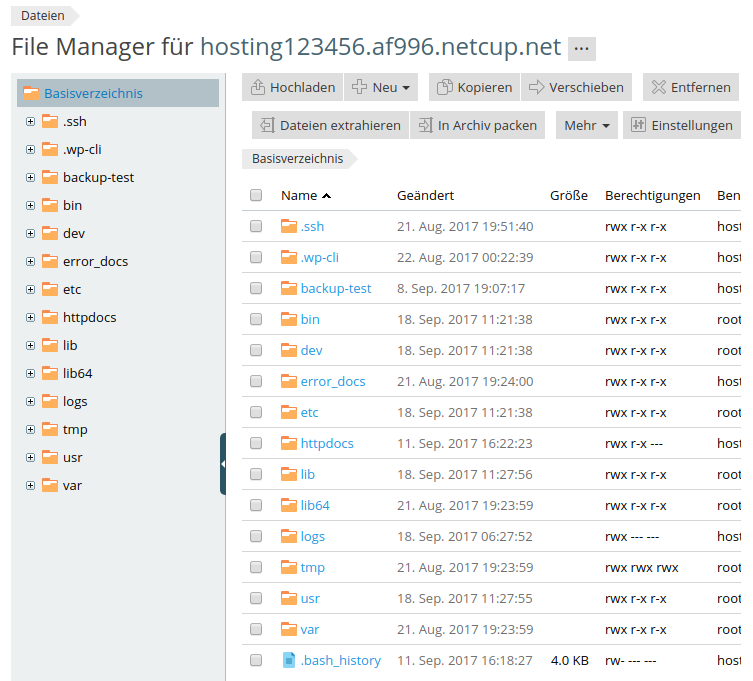
The file manager allows you to manage the files in your web hosting directly via the Plesk Onyx interface. The file manager offers you the following functions:
-
Upload files
-
Download files
-
Edit files
-
View files
-
Create new files or folders
-
Rename files or folders
-
Copy files or folders
-
Move files or folders
-
Delete files or folders
-
Extract archives
-
Pack files and folders into archives
-
Show file size
-
Change file timestamp
-
View permissions
-
Change permissions
PHP settings
![]()

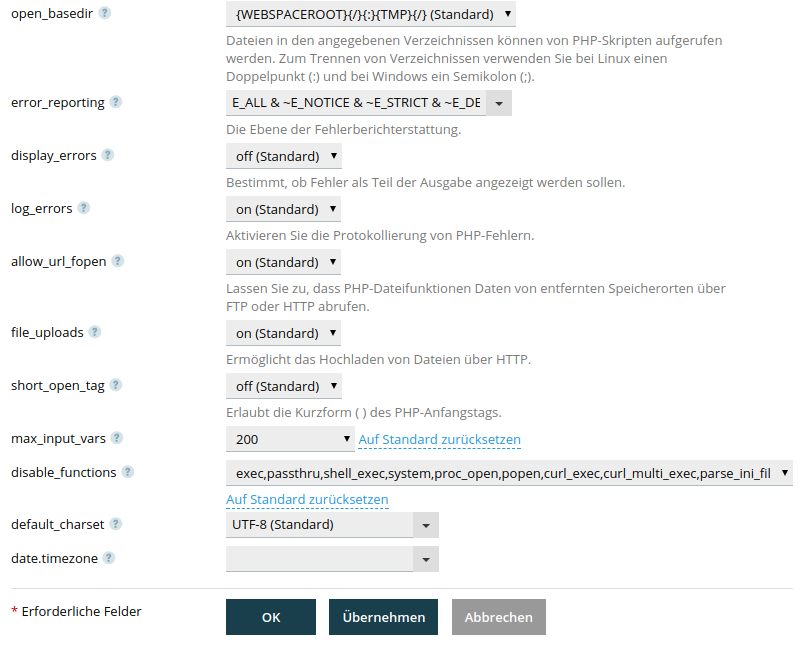
Here you can make various PHP settings. If you make changes to the PHP version and PHP handler for the standard domain, these changes will apply to all (sub)domains created after the change. All other settings only apply to the respective domain where they are made (here, for example, for the standard domain hosting123456.af996.netcup.net).
Web server settings
![]()
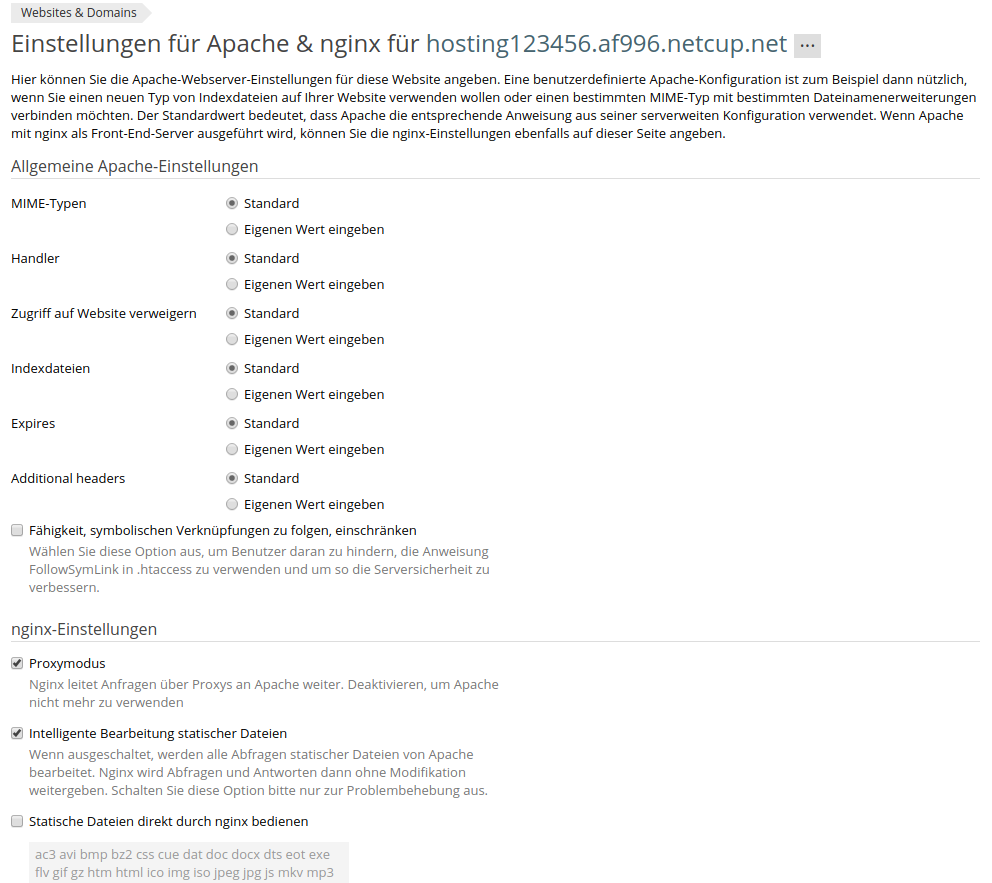
Here you have the option to configure various settings for both the Apache web server and the nginx proxy. For example, you can customize MIME types, prohibit access from certain IPs to your website, and set Expires headers and other headers. When switching from "Standard" to "Enter your own value", Plesk also provides information on the correct configuration.
Settings made here also apply only to the respective domain for which they were made, even if you make them for the standard domain.
If "Proxy Mode" is enabled under "Nginx Settings", Nginx forwards requests to Apache as a proxy. You can disable this option, then Apache will no longer be used.
If you do not want static files to be processed by nginx, disable "Intelligent processing of static files". In this case, all requests are forwarded directly to Apache. This usually results in loss of speed, so permanent deactivation of the option is not recommended.
If you want nginx to serve certain file types directly, you can enable the "Serve static files directly with nginx" option and specify the desired types. However, please note that Apache rewrite rules will then not be applied to these files.
Scheduled tasks
![]()
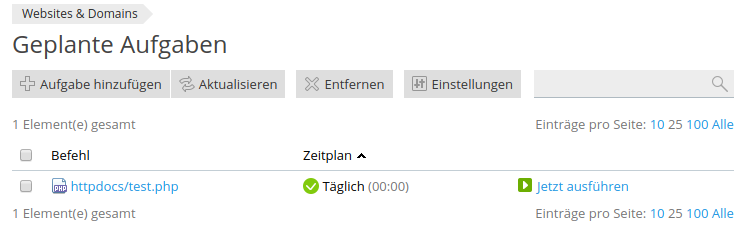
Under "Scheduled Tasks" you have the option to create so-called "cron jobs".
To do this, click "Add Task".
Add task
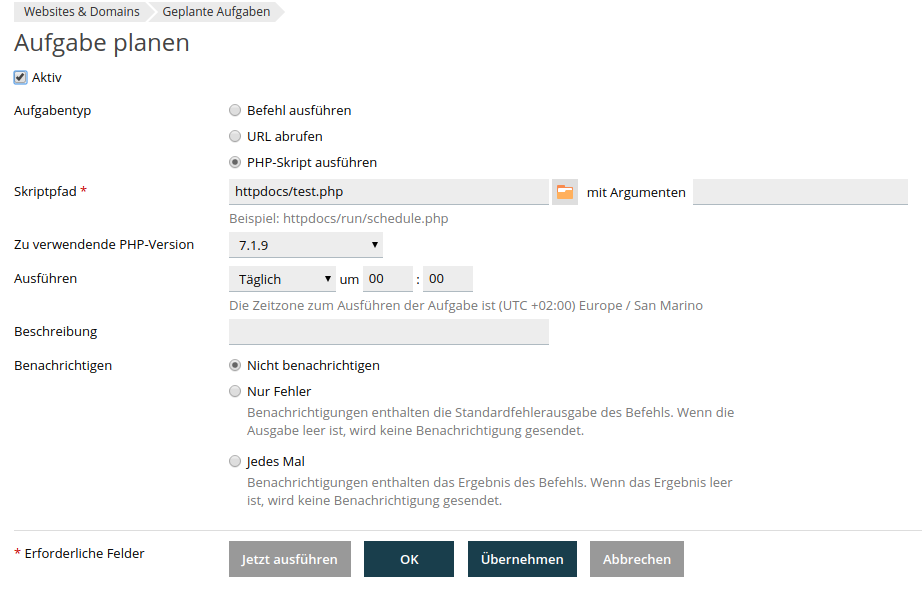
You have the option to schedule different types of tasks:
-
Execute commands
-
Retrieve URLs
-
Execute PHP script
Enter the command, URL, or PHP script to be executed in the field provided. Select how often this should be executed. When executing PHP scripts, you can also add arguments and specify the PHP version to use. You can also enter a description of the task. Finally, there is the option to be informed about the result / output when errors occur or each time the command is executed. If the result / output is empty, no notification will be sent in any case.
Management and configuration of the domain your-domain.tld
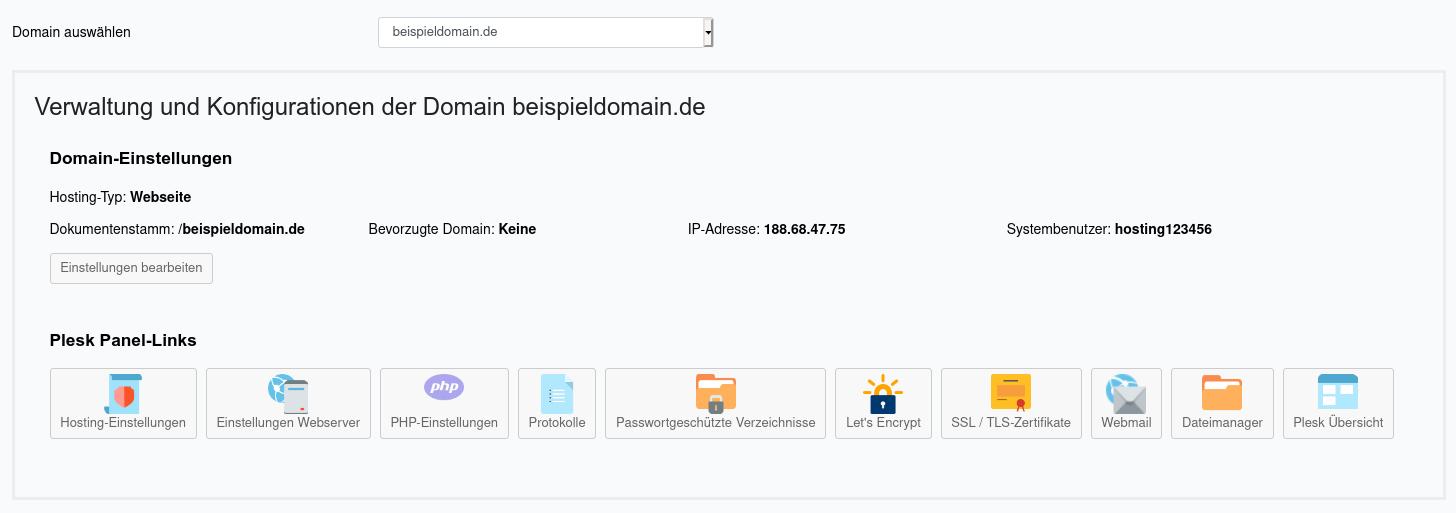
Here you will find configuration options that affect a specific domain. These are explained in more detail below.
Edit settings
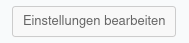
Via the "Edit Settings" button, you can change the website type and, for example, the document root or redirect target of the selected domain. To do this, click the button. The following menu will then appear:
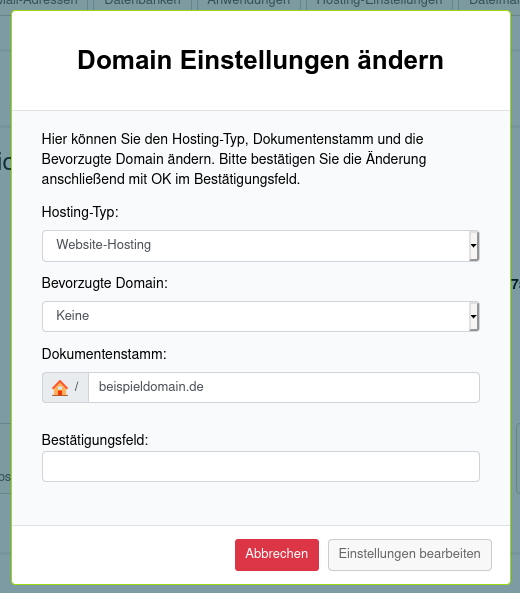
Hosting type
In the "Hosting Type" selection menu, you can specify the hosting type:
Please note that changing a hosting type for a domain to a redirect (whether 301, 302 or frame redirect) will irrevocably delete all data for the domain (including web space contents, databases, settings, applications, etc.) on the web server.
In order to ensure the highest possible compatibility of all browsers and to take into account any hosting settings previously cached by the browser, please also set up a free Let's Encrypt certificate for domains that redirect to another website.
General information on SSL/TLS can be found here. Furthermore, you can find a documentation on how to activate Let's Encrypt here.
-
301 Permanently Moved: Create a redirect to another website with HTTP code 301 (permanently moved). Browsers can cache this redirect.
-
302 Temporarily Moved: Create a temporary redirect to another website with HTTP code 302 (temporarily moved). Browsers usually do not cache this redirect or only cache it for a short time.
-
Frame redirect: The website to which redirection is to take place is displayed as an iframe under your domain. Your domain remains in the browser address bar. May not be compatible with all targets. Please only use frame redirects if this is unavoidable for your application, and you are aware of all its disadvantages.
-
Website hosting: Files on the web space are delivered.
For redirects, we recommend that you specify the target in the form of a URL, e.g. https://www.netcup.com.
Possible options when selecting "Website Hosting"
- Preferred domain
The "Preferred Domain" option allows you to determine whether a redirect should be made to a specific variant of your domain:
| Variant | Description |
|---|---|
| www.yourdomain.tld | Visitors to your domain will always be redirected to the variant with "www.". |
| yourdomain.tld | Visitors to your domain will always be redirected to the variant without "www.". |
| None | Access is possible with / without "www." and no redirect takes place. |
- Document root
Here you have the option to change the document root, i.e. the directory to which the domain should point. Enter the desired document root here, starting from the root path "/" of your hosting tariff.
Confirmation field
To confirm the changes to be made, please enter "OK" here.
Logs
![]()
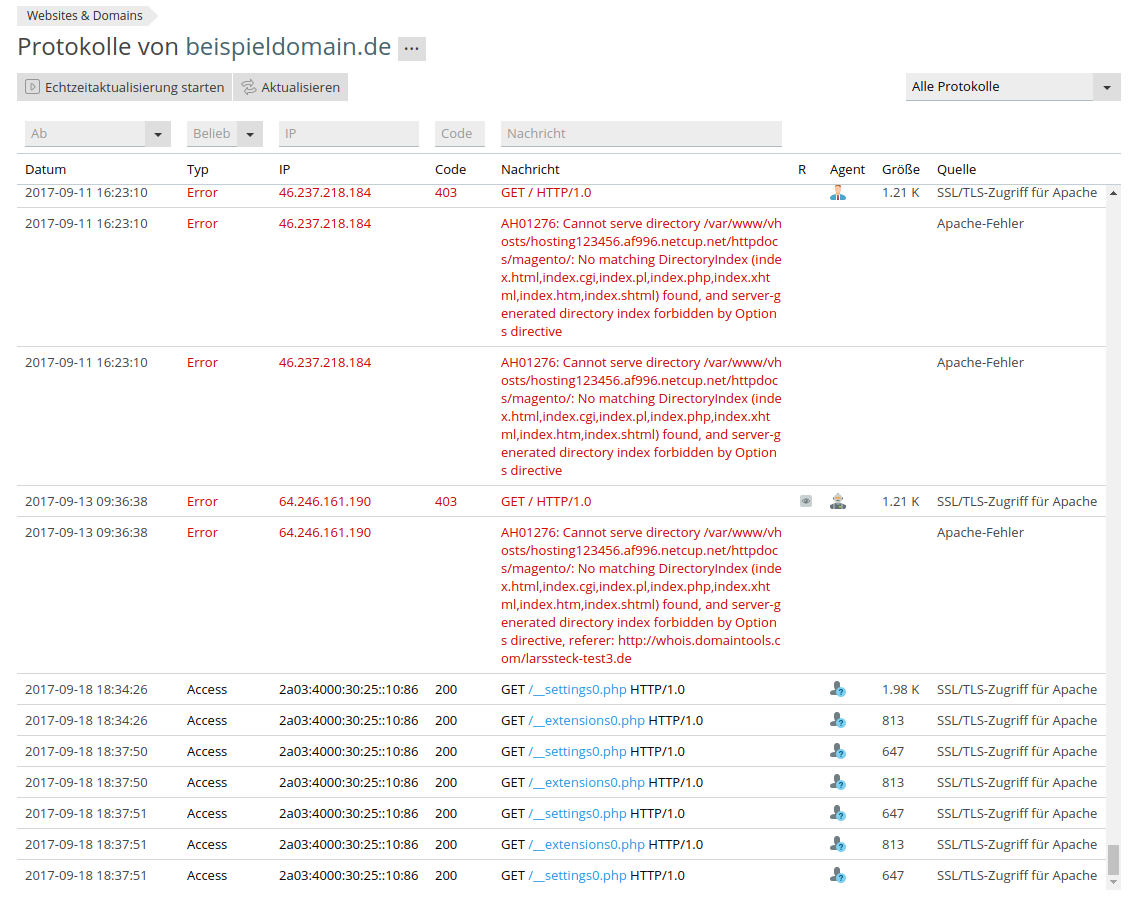
Via the "Logs" button you can view the log files ("logs") for the respective domain. By default, you will be shown accesses, warnings and errors. You have many options to filter the log display. For example, you can specify when the displayed log entries should start, whether log entries of the type Access, Warning and / or Error should be shown to you, filtering by IP and error code as well as message is possible.
The log display also offers you the option to update the log files in real time. You can activate this by clicking the "Start real-time update" button. Alternatively, the logs can be updated manually by clicking "Refresh".
In the selection menu at the top right, you can select which log files are to be displayed. Here you also have the option to click "Add custom log" to add your own log files. Via "Manage log files" you can reach further options.
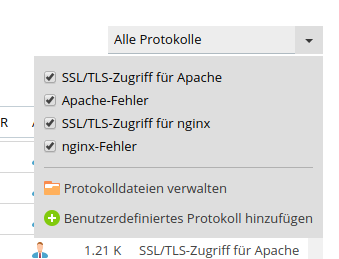
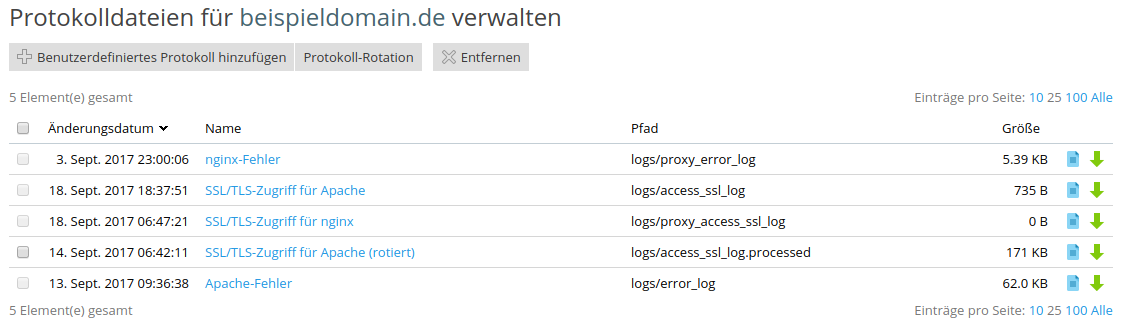
Here too you can add a custom log.
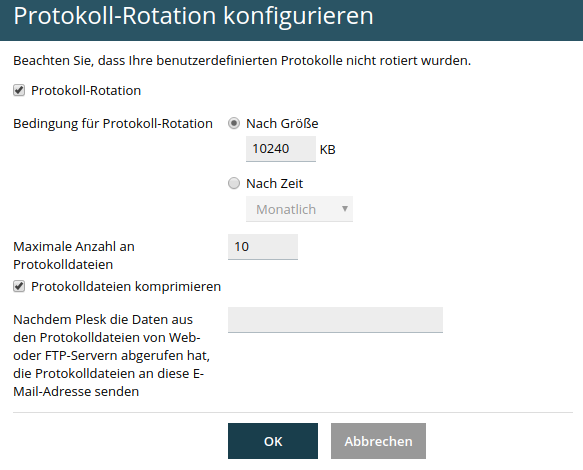
You also have the option to adjust the log rotation. Old log files are compressed or deleted.
Password protected directories
![]()
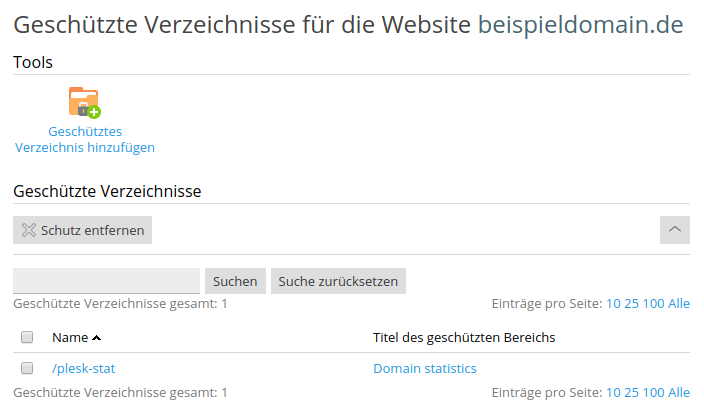
Here you have the option to password protect directories in your web hosting. When the corresponding directory is called up, your browser will prompt you for a username and password.
Add protected directory

Here enter the directory to be protected and, if desired, a message that your browser should display in the login dialog when calling up this directory. Then save your entries by clicking "OK".
You must then add a user who can log in to the directory. To do this, click on the newly created protected directory in the list.
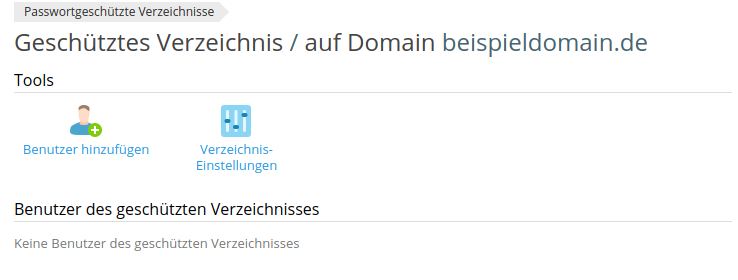
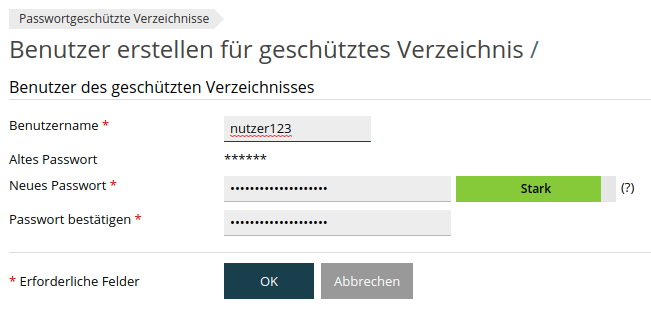
By clicking "Add User" you can create a new user who can then log in successfully when the directory is called up.
Let's Encrypt
![]()

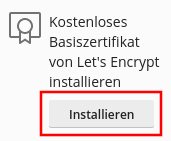
With the help of Let's Encrypt you can obtain a free SSL certificate for your website. This is set up and renewed automatically. This allows you to access your website encrypted without certificate errors.
After clicking the "Let's Encrypt" icon, you only need to click the "Install" button under "Install free Let's Encrypt basic certificate".
In the menu that appears, you should enter a correct email address that can be used for urgent notifications from Let's Encrypt and for recovering lost keys.
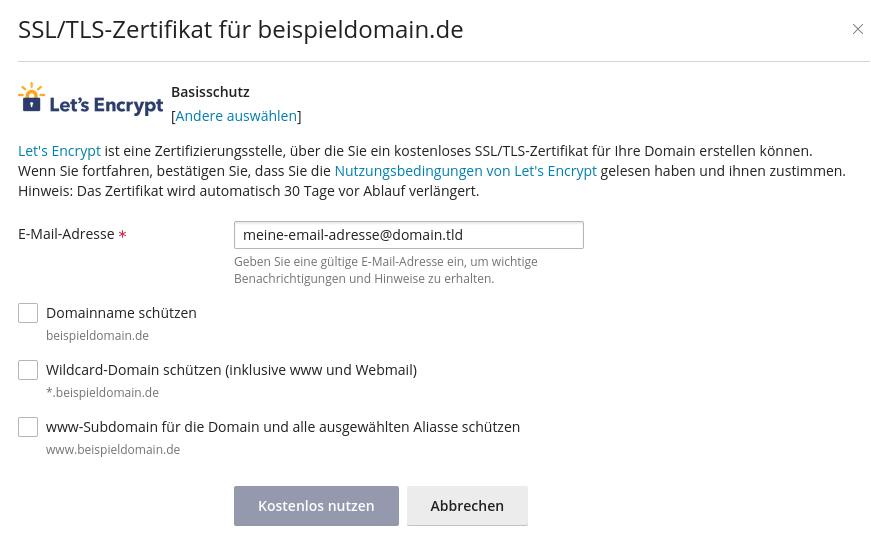
You can also choose various options:
-
Protect domain name: Protects the domain without subdomains
-
Protect wildcard domain (including www and webmail): Protects all subdomains of the domain (Important: If this option is selected, manual adjustment of the DNS entries is required. This requires appropriate knowledge on your part and delays and complicates the certificate issuance process. Automatic renewal of the certificate is then no longer possible. We expressly recommend using the following option if sufficient! You can issue a separate certificate for each subdomain via the "SSL/TLS Certificates" button in the hosting panel.).
-
Protect www subdomain for domain and all selected aliases: Protects the domain with "www" and any created aliases.
SSL/TLS certificates
![]()
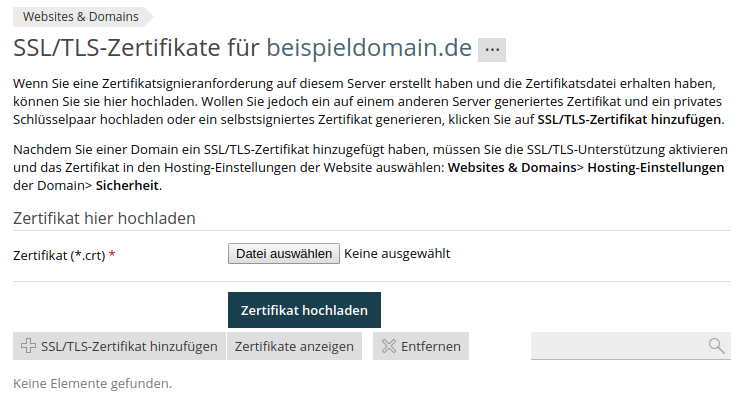
Here you can deposit SSL certificates for the domain to secure access to your website. You can also use commercially purchased certificates here. Please note that you can obtain a free certificate from Let's Encrypt for each of your (sub)domains, which is automatically set up and renewed.
Create a CSR and deposit the purchased certificate
To purchase an SSL certificate, you need a so-called CSR. You submit this to the provider from whom you order the certificate. Using the Plesk Onyx interface, you can generate such a CSR for your domain. Please proceed as follows:
- Click "Add SSL/TLS Certificate".
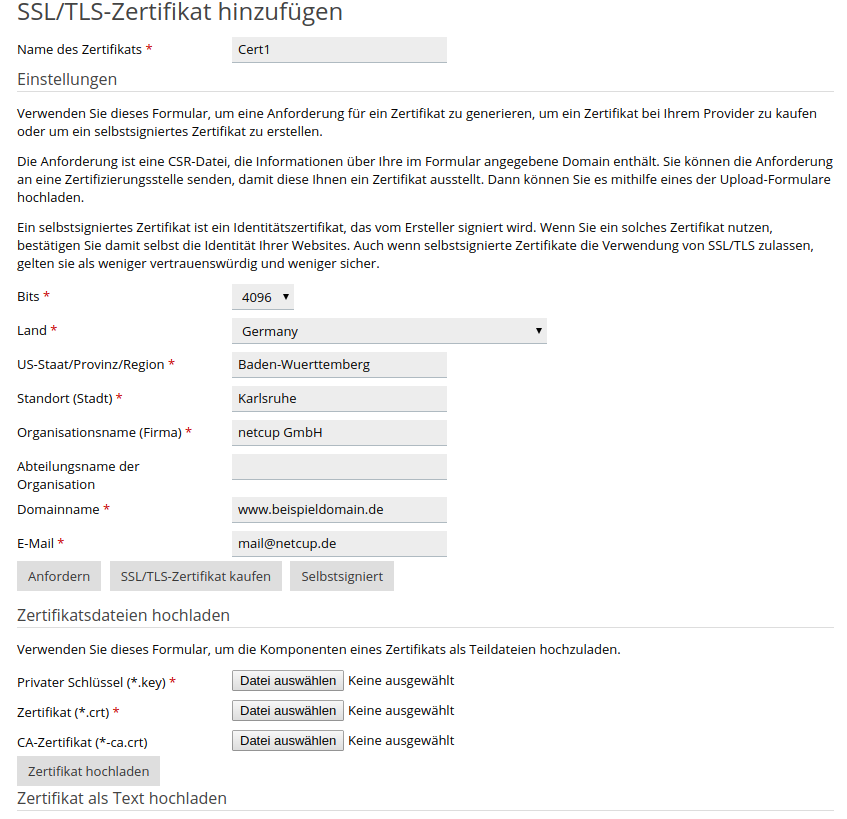
- Fill in the fields:
| Certificate information | Description |
|---|---|
| Certificate name | Here you can enter a name for the certificate. This is only used within the Plesk Onyx panel for management. |
| Bits | Here you can select how many bits your issued certificate should have. As a rule, you can use the default setting here. |
| Country | Enter your country. |
| US state/province/region | Here you can enter the federal state, for example. |
| Location (city) | Enter the city here. |
| Organization name (company) | Enter the company or your name here. |
| Department name of the organization | If you want to enter a department name of this organization, you have the option to do so here (not a required field). |
| Domain name | Enter the domain name for which the certificate is to be issued here. Most CAs issue the "www" subdomain free of charge together with the main domain. As a rule, you must apply for the certificate with it. Please check with the issuing CA beforehand if in doubt. |
| Enter your email address here. |
-
Now click "Request".
-
Now click on the certificate in the list.
- You will find the CSR at the bottom of the page. Copy this and submit it when ordering the certificate to the provider. At netcup you can conveniently purchase certificates directly via your Customer Control Panel (CCP).

Never pass on the private key displayed there to third parties - not even to the CA!
-
Once you have received your certificate, call up the page again and enter or upload the text. Please also upload the "CA certificate" (often called "Intermediate Certificate") you receive from most CAs.
-
Finally, go to the hosting settings of the domain, activate SSL/TLS support, activate the redirect from HTTP to HTTPS if necessary, and select the certificate. Save your changes. The domain should now be reachable via HTTPS.
Webmail
![]()
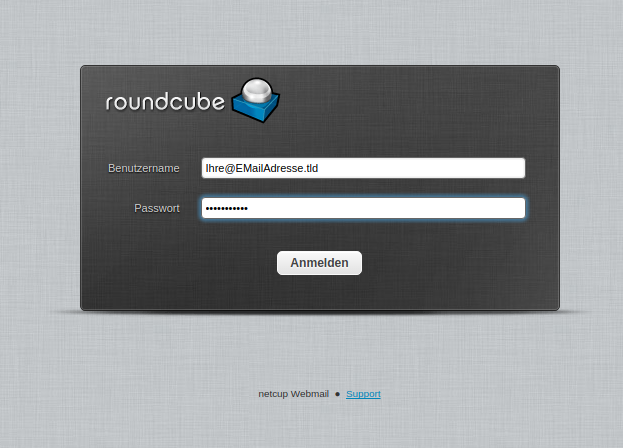
Via the "Webmail" icon you will go directly to the webmailer for your domain. Enter your email address at "Username" and the password you assigned for this mailbox at "Password".
Plesk Onyx Overview
Via the "Plesk Onyx Overview" button you will go directly to the overview page of the Plesk Onyx web hosting panel. Here you have the option to make many other settings that are not directly linked in the Customer Control Panel (CCP).
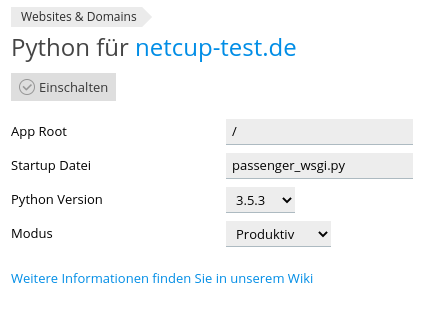
Python
If Python is included in your tariff, you will see the Python logo in the domain overview. The Python integration is solved via a Passenger server with WSGI interface. Your applications must be specifically written for WSGI.
![]()
Module settings
Buttons:
-
Turn on: Activates Python support for the corresponding domain
-
Turn off: Deactivates Python support for the corresponding domain
-
Rewrite configuration: Changes to the settings are applied (slow)
-
Application restart: Only the application server is restarted (fast)

Changed settings are only applied after reactivation. Clicking Application Restart places the restart.txt file in the App Root/tmp/ directory. This causes the Passenger Server to reload the application.
Settings:
-
App Root: The root directory of the application is specified here, it is relative to the web space and should not be in the document root for security reasons.
-
Startup file: Execution of your application starts with this file
-
Python version: The currently available Python versions are displayed here
-
Mode: Productive = no output of error messages, Development = error messages are output