
netcup wiki
Webhosting

General
Getting Started
User Guide
Server
Getting Started
User Guide
Webhosting
Getting Started
User Guide
Domain
Getting Started
User Guide
SOGo Groupware
Getting Started
Setting Up Email Forwarding
Learn how to set up forwarding for your email inbox.
There are two ways to set up forwarding:
1. Setting Up Forwarding in the Webhosting Control Panel (WCP)2. Setting Up Forwarding in the Webmail Client
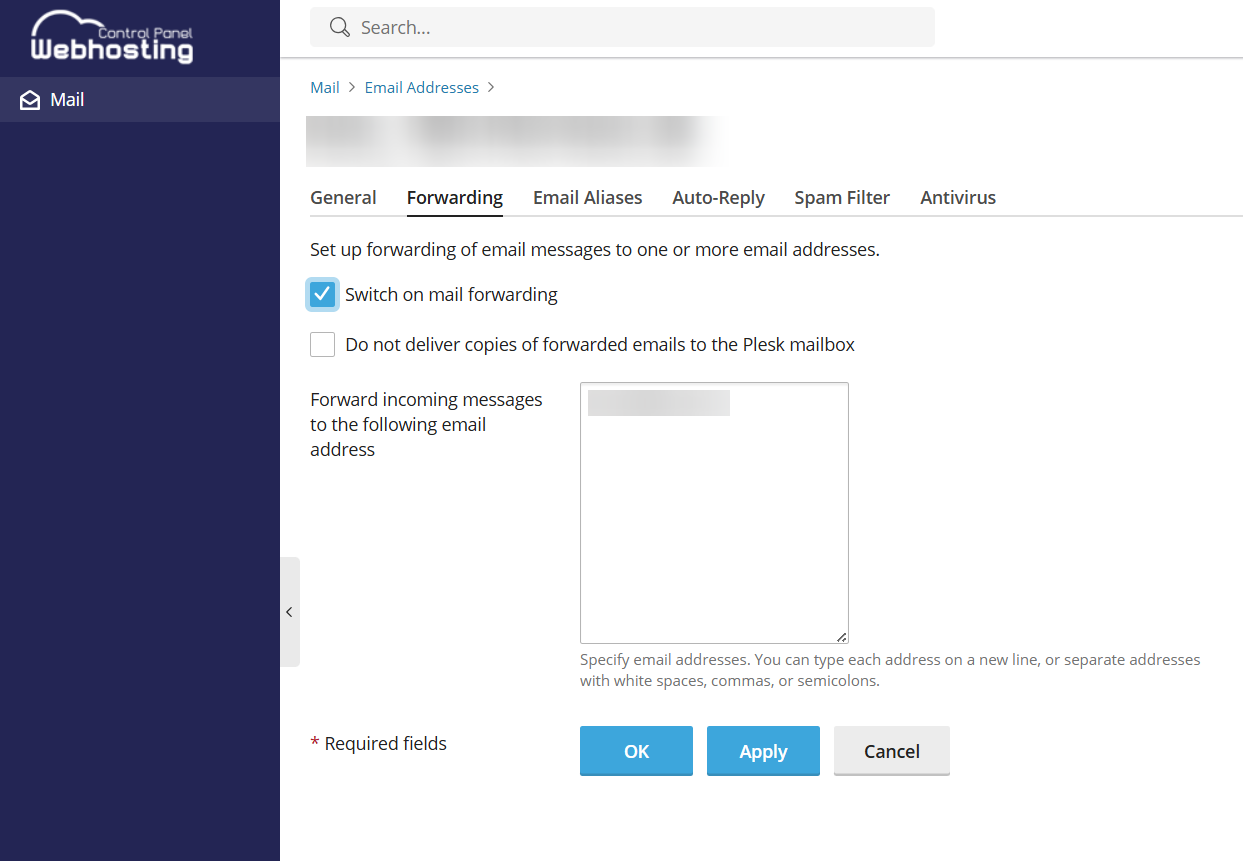
1. Setting Up Forwarding in the Webhosting Control Panel (WCP)
- Open the corresponding email address in the Webhosting Control Panel (WCP).
- Go to the Forwarding tab.
- Select the checkbox next to Switch on mail forwarding.
- Choose whether you want copies of forwarded emails to be saved in your inbox.
- Enter the email address(es) to which incoming messages should be forwarded.
- Click OK to save the changes.
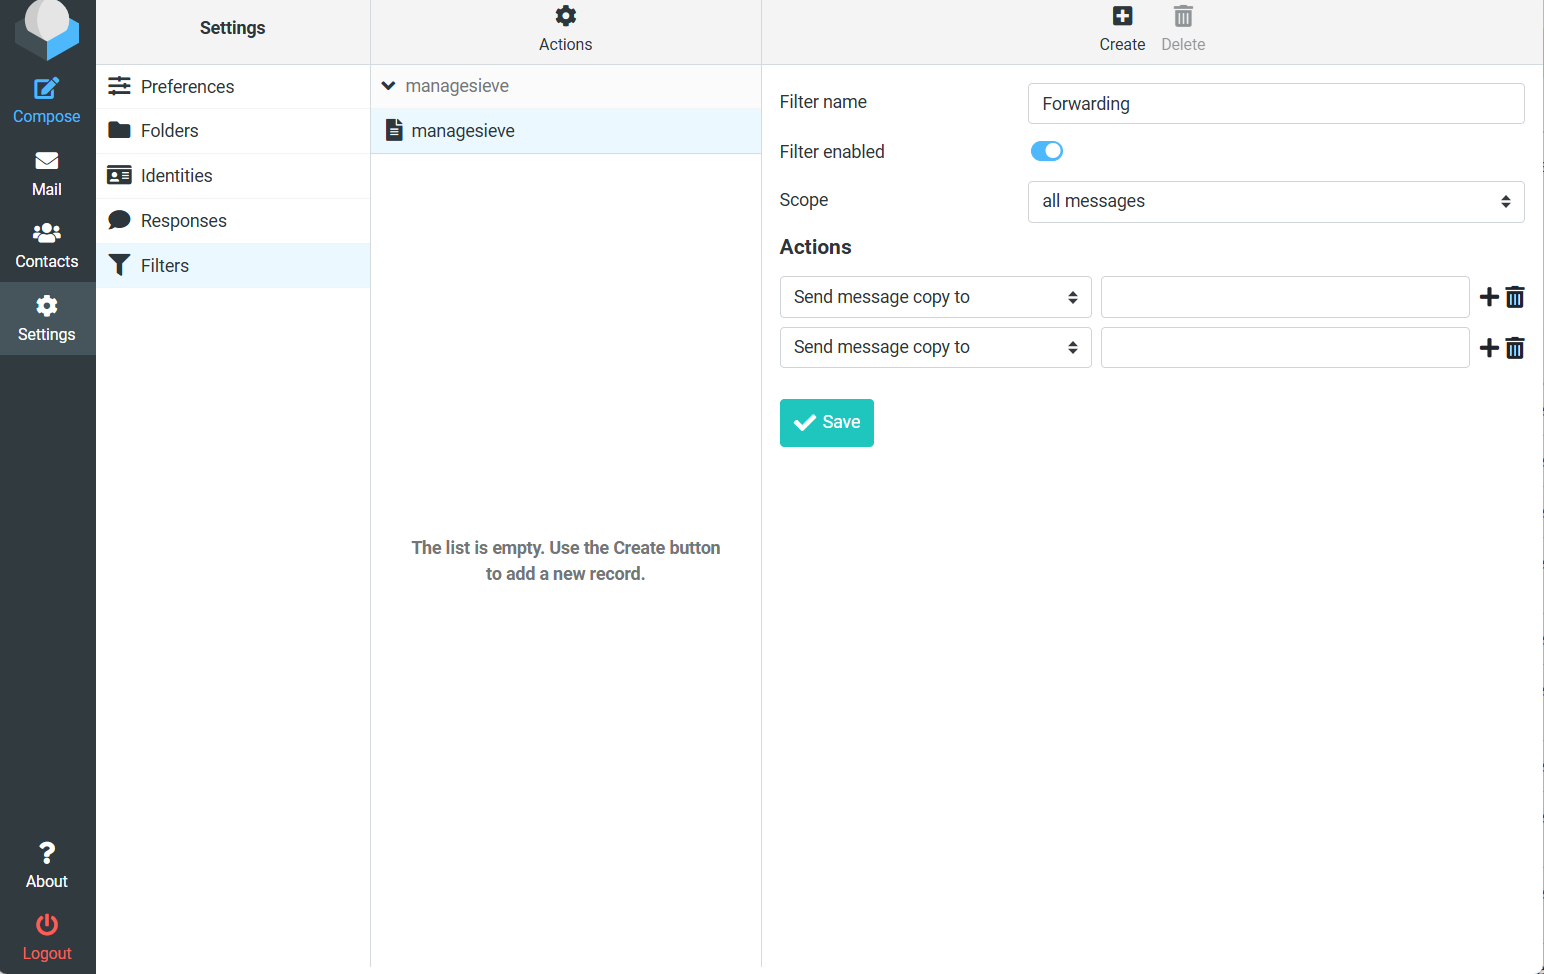
2. Setting Up Forwarding in the Webmail Client
Note that filter rules via managesieve are server-wide and are also applied when the webmail client is not in use.
- Log in to the webmail client.
- Go to Settings > Filters > managesieve.
- Click Create.
- Enter a filter name, for example, "Forwarding".
- Select All messages under Scope. If you only want to forward certain emails, you can create your own rules here.
- Under Actions, you have 2 options:
- Send message copy to: The messages are forwarded and a copy remains in your mailbox.
- Redirect message to: Messages are forwarded directly and no copy is saved in your mailbox.
- On the right-hand side, enter the email address(es) to which incoming messages should be forwarded. Click on the Plus Icon to add further addresses.
- Click Save.
netcup
netcup Enterprise
Community
netcup Enterprise
Community