
netcup wiki
Webhosting

Setting Up Spam Filter

Important note regarding spam messages: Items that have been in the spam folder for more than 30 days will be automatically deleted.
1. Activate Spam Filter in the Webhosting Control Panel (WCP)
- Open the respective email address in the Webhosting Control Panel (WCP).
- Go to the Spam Filter tab.
- Select the checkbox next to Switch on spam filtering for this email address.
- Then, configure your desired settings.
- Click Show Advanced Settings to adjust the filter sensitivity and edit the whitelist and blacklist.
- Click OK to save the changes.
Filter Sensitivity
The lower the spam filter sensitivity setting, the more emails will be marked as spam. You can also enter decimal numbers with a period in the settings. If emails are incorrectly identified as spam, you can adjust the value based on the spam score of an email. You can find the spam status in the mail header in the line: X-Spam-Status: No, score=3.9 required=7.0
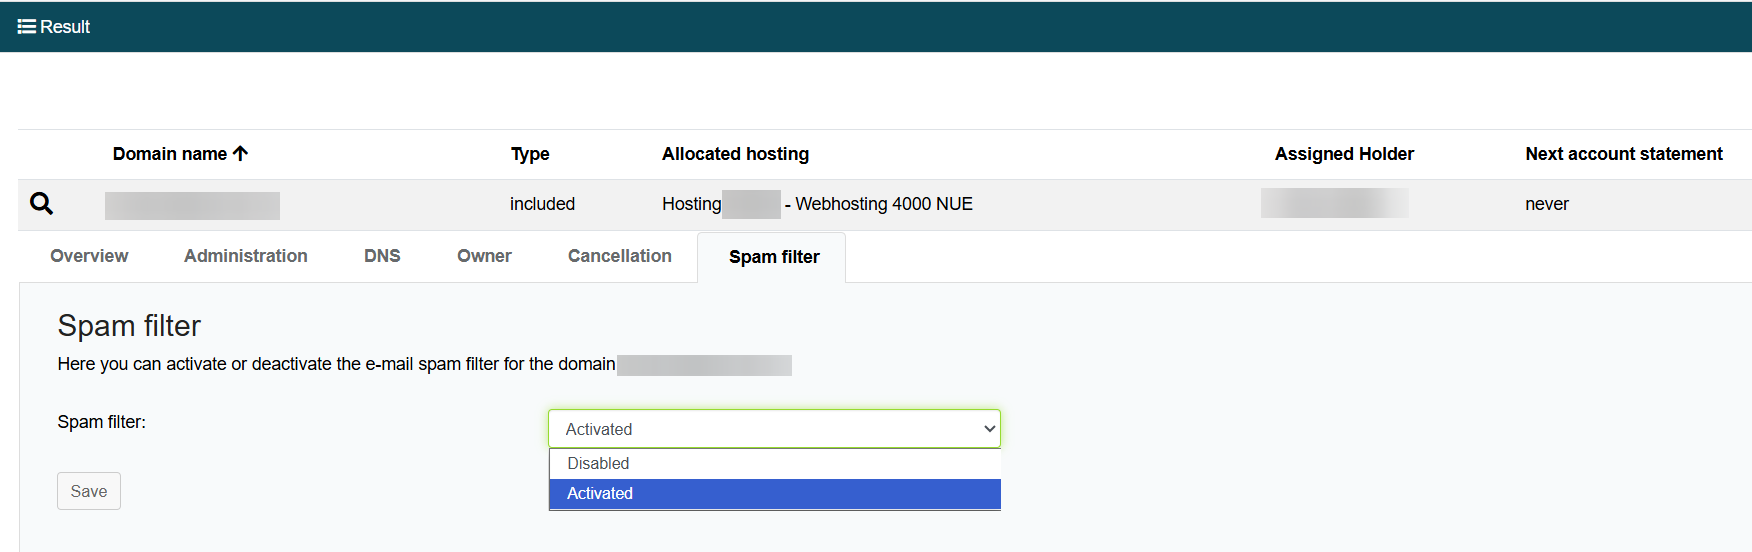
2. Deactivate Spam Filter in the Customer Control Panel (CCP)
For web hosting and reseller web hosting services, as well as for our SOGo groupware, netcup uses an additional spam filter. It is automatically active for all domains connected to the hosting.
If you want to deactivate the spam filter for external domains, contact Customer Support.
To deactivate the filter, follow these steps:
- Log in to the Customer Control Panel (CCP).
- Go to Domains > Magnifying Glass Icon in front of the domain > Spam filter.
- Select Disabled and confirm by clicking Save.
netcup
netcup Enterprise
Community
netcup Enterprise
Community