
netcup wiki
Webhosting

PHP Settings
Opening PHP Settings
- Log in to the Customer Control Panel (CCP).
- Go to the menu item Products.
- Click on the Magnifying Glass Icon in front of the web hosting package for which you want to manage the PHP settings.
- You will then be redirected to the Webhosting Control Panel (WCP).
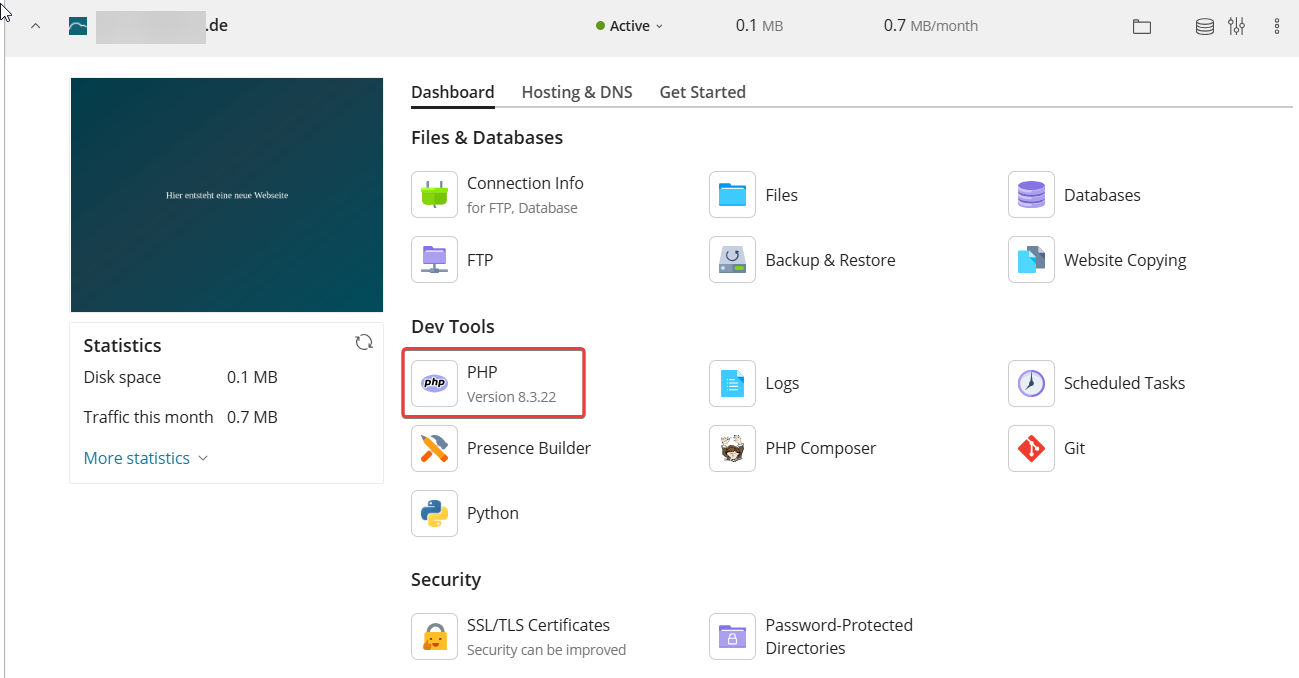
- Select the desired domain, then click PHP in the Dashboard under Dev Tools.
Managing PHP Settings

You can only edit PHP settings and values that have already been specified. Our Customer Support team cannot change these values either.
PHP Version
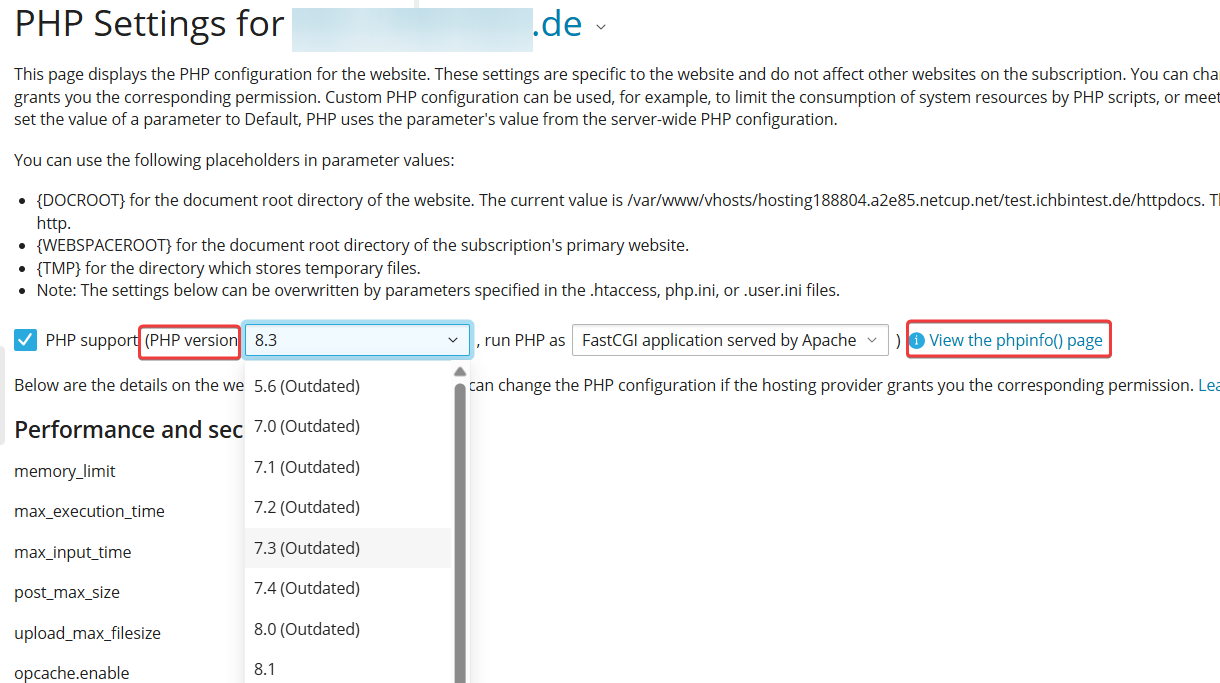
You can change the active PHP version using the drop-down list next to PHP support. Click on View the phpinfo() page for more information about the version currently in use.
Performance and Security Settings
These settings are tied to your plan and cannot be changed. If you need more resources, upgrade to a higher web hosting plan.
With our Managed Private Servers, the values can be customized individually.
memory_limit
Specifies the maximum amount of main memory (RAM) that a single PHP script may use.
max_execution_time
Sets the maximum execution time of a PHP script file in seconds. If the script takes longer than this, PHP stops it and reports an error.
max_input_time
Specifies how many seconds PHP waits until all input data (e.g., POST data, GET data, file uploads) has been completely transmitted.
post_max_size
Specifies the maximum size of all data that can be sent to the server via a POST request (e.g., for forms with file uploads).
upload_max_filesize
Specifies the maximum size of a single uploaded file. You can upload larger files directly via Files or using FTP.
opcache.enable
Specifies whether OPCache is enabled or disabled. OPcache is a bytecode cache that can significantly improve the performance of PHP applications.
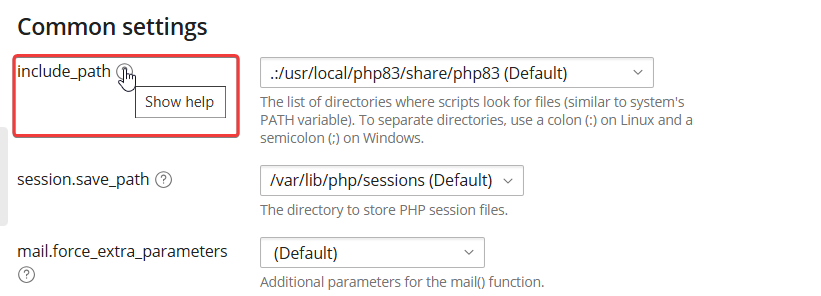
Common Settings
Here you can adjust the necessary settings. Then, click Apply to save them. Click on the Question Mark Icon for more information about the various setting options. You will then be redirected to the official PHP documentation.
open_basedir
open_basedir is a PHP security feature. It specifies which folders and/or files can be accessed via PHP.
For example:
open_basedir = /path/to/open_basedir
Then, PHP cannot access /path/to/other_folder.
For security reasons, this cannot be freely configured on our shared hosting plans.
The following options are available:
{DOCROOT}{/}{:}{TMP}{/}{:}{/}var{/}lib{/}php{/}sessions{:}{WEBSPACEROOT}{/}tmp
Allows access to:
- the document root of a domain.
- the PHP directory, which allows you to use PHP itself.
- a directory for temporary files.
{WEBSPACEROOT}{/}{:}{TMP}{/}{:}{/}var{/}lib{/}php{/}sessions
Allows access to:
- all directories and files in the hosting.
- the PHP directory, which allows you to use PHP itself.
- a directory for temporary files.
display_errors
PHP errors are displayed directly in the web browser when the website is accessed.
log_errors
PHP errors are displayed in the logs under Dev Tools for the corresponding domain.
Frequently Asked Questions (FAQ)
I don't have any PHP versions newer than 7.3 available.
To make PHP versions 7.3 and higher available, you need to activate proxy mode.
- Select the desired domain, go to Hosting & DNS > Apache & nginx.
- Under the nginx settings, activate the checkbox for Proxy mode.
Versions from PHP 7.3 onwards are only available in conjunction with this option, as FastCGI is used here.