
netcup wiki
Server

Firewall
1. About the Firewall
Our firewall is a free security feature that filters your server's incoming and outgoing traffic.
This simple firewall offers basic protection and can, for example, prevent internal data from being unintentionally transferred to the public internet. However, you will need to implement your own firewall solution for advanced features.
The firewall is managed via policies. These are sets of rules that define the rules for incoming and outgoing traffic.
For newly ordered servers, the firewall is configured by default to allow all traffic initially, except for the sending of emails. You can then create your own policies and assign them to your server.
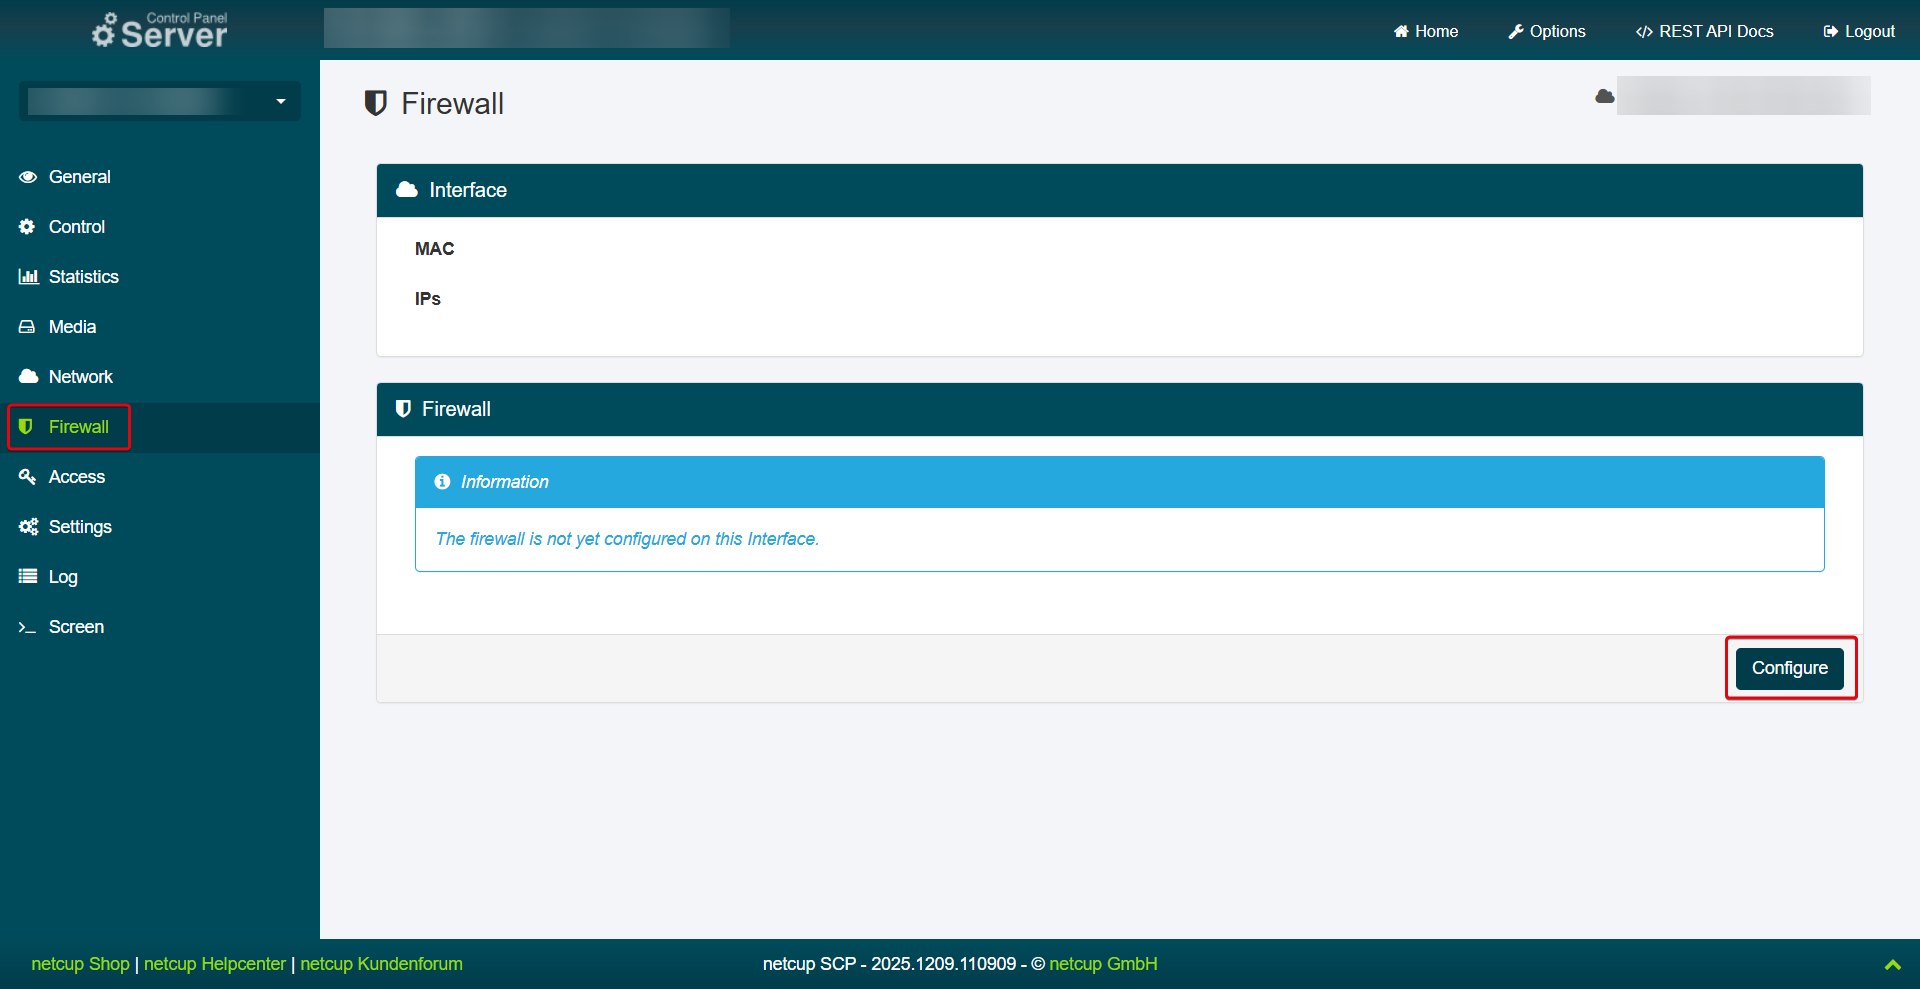
For existing servers, the firewall must first be configured. To do so, open the Server Control Panel (SCP), select a server, and open the Firewall menu item. Click Configure and confirm the process by clicking Yes.
The firewall is stateful. This means that it remembers connections originating from your server and automatically accepts return traffic. However, this only applies to TCP traffic. To whitelist UDP traffic, you must create INGRESS and EGRESS rules in your policy:
Example DNS Server: INGRESS, UDP, allow traffic TO port 53, EGRESS, UDP, allow traffic FROM port 53 (response traffic)
What is the difference between TCP and UDP traffic?
TCP (Transmission Control Protocol): Establishes a fixed connection that can be tracked by the firewall. This allows the firewall to automatically recognize responses to outgoing TCP connections.
UDP (User Datagram Protocol): There is no established session for the firewall to track. Therefore, both incoming and outgoing rules must be defined for UDP to allow requests and responses.
Availability
The firewall is available for all server products starting from Generation 9.
When will the firewall be available for my root server or VPS?
Older server generations will gradually be equipped with this feature. We are unable to provide an exact schedule at this time. We kindly ask for your patience.
2. Creating Policies
You can set and assign your own firewall rules (policies) to a server. If no policies are assigned to a server, the firewall automatically allows all traffic. Policies are defined across servers in the Server Control Panel (SCP) and can then be assigned to a server.
Default Policies
The standard firewall contains non-editable rules that allow mandatory traffic. For example, DNS traffic to the netcup DNS servers is always allowed. Additionally, rules are set by default to prevent email spamming. However, you can view these rules and remove them if necessary.
If you want to block outgoing traffic (EGRESS), make sure to whitelist NTP traffic to your server's configured NTP server, for example. DHCP traffic must also be whitelisted. However, this is likely only necessary during the installation of your server. If you want to restore your default policies, click on Restore Default Policies under Firewall and confirm by clicking on Save. This action will not affect your existing policies.
Implicit Rules
Implicit rules cannot be removed or edited. By default, they are set to ACCEPT ANY. However, as soon as you create your own incoming rule, the implicit incoming rule automatically changes to DROP.
The same behavior applies to outgoing rules. Background: Without this automatic change, all connections would still be allowed despite the defined rules, making the firewall rules ineffective.
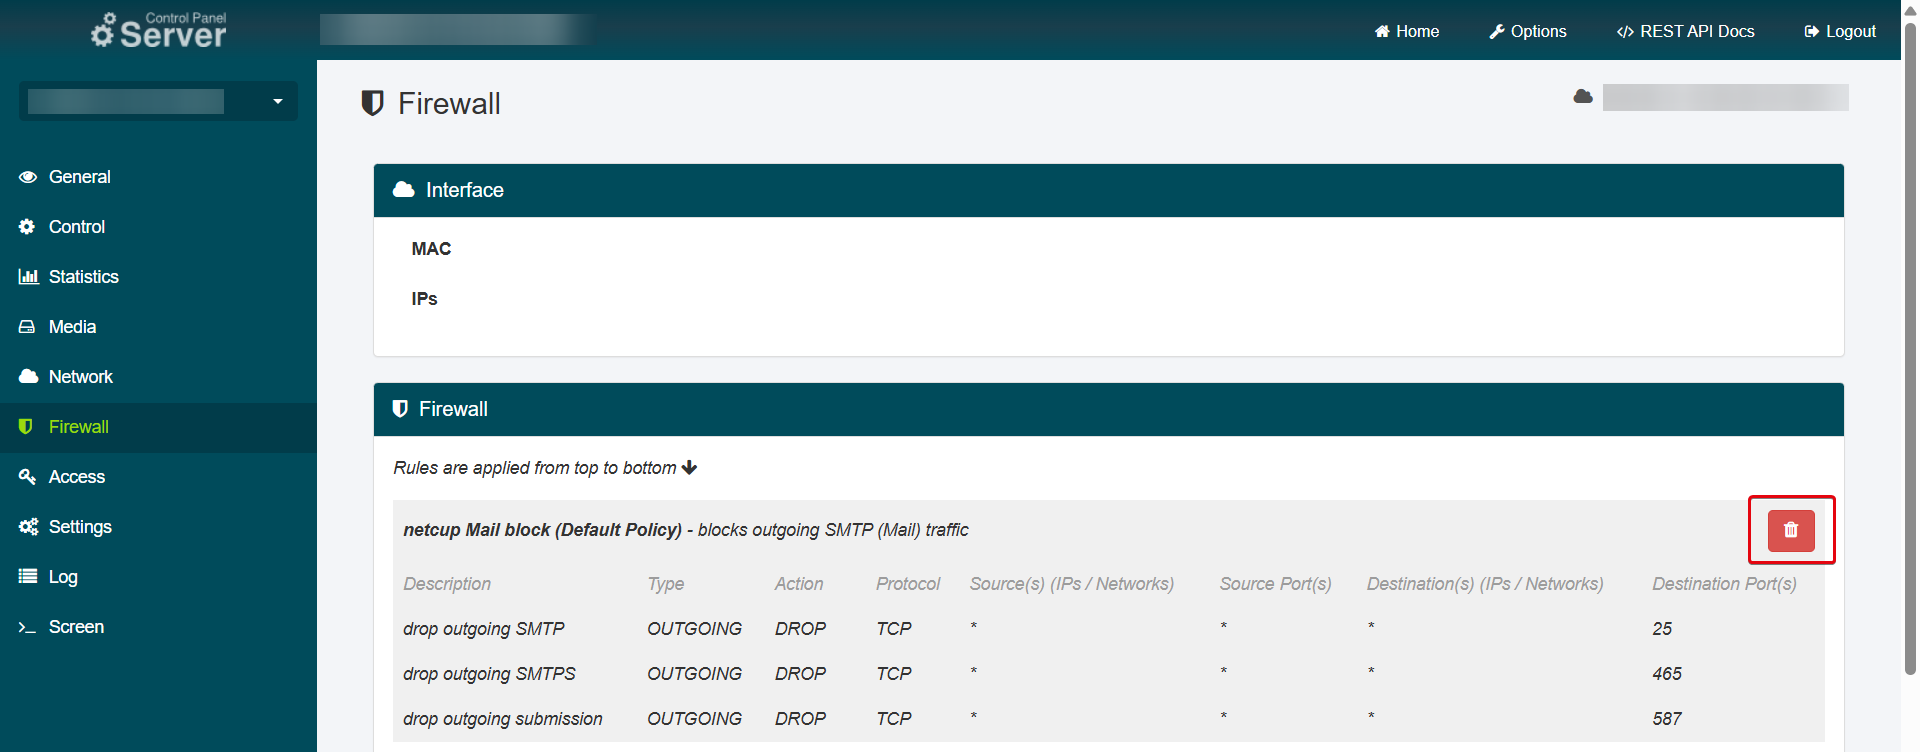
netcup Mail Block
To enable emails via SMTP, the default firewall policy must be removed, as it blocks incoming and outgoing SMTP connections by default.
- Select your server in the Server Control Panel (SCP).
- Go to the menu item Firewall.
- Click on the Trash Can Icon next to the netcup Mail block policy.
Limits
You can create up to 500 active rules per Server and public network interface within policies using the Server Control Panel. The following applies:
- Each combination of source IP address, destination IP address, and ports counts as a separate rule.
- One rule can have up to 100 IP addresses as the source or destination, which corresponds to 100 separate rules.
- One policy can contain up to 500 rules.
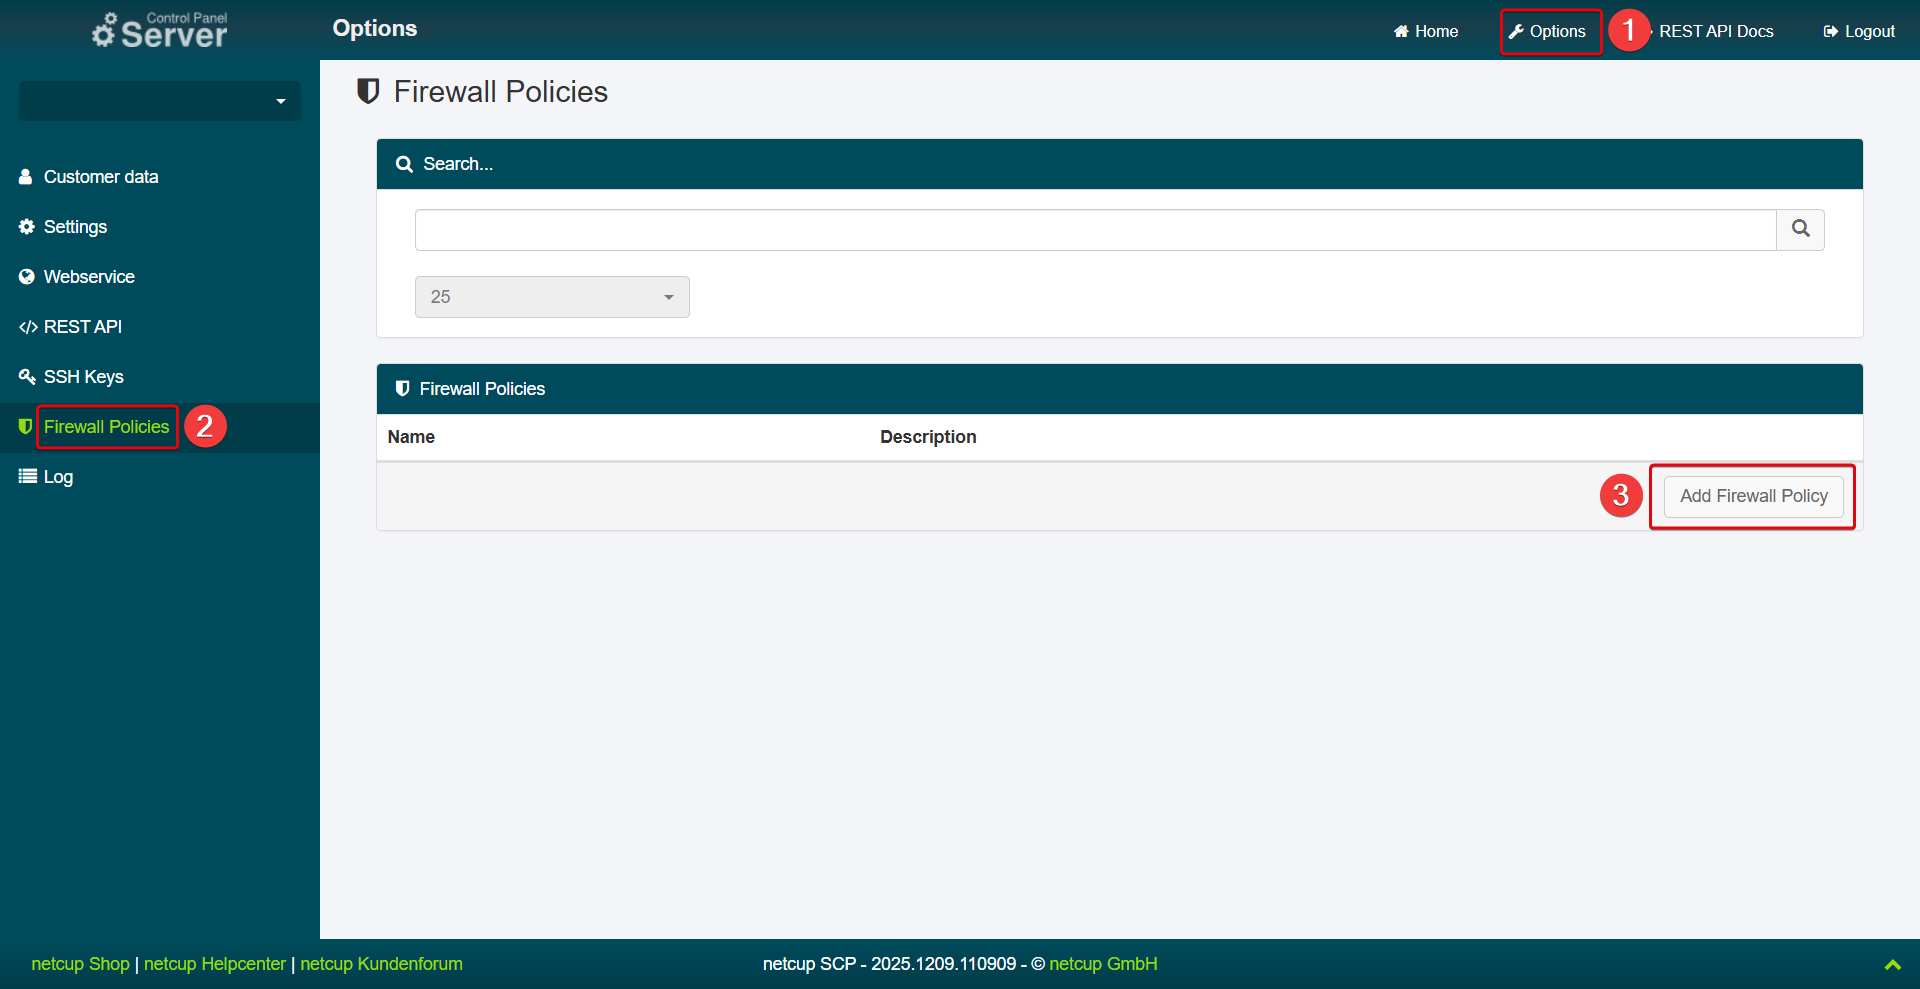
Creating Policies
- Select a server.
- At the top right, open the Options menu item > Firewall Policies.
- Click Add Firewall Policy.
- Enter a name.
- Enter a description (optional).
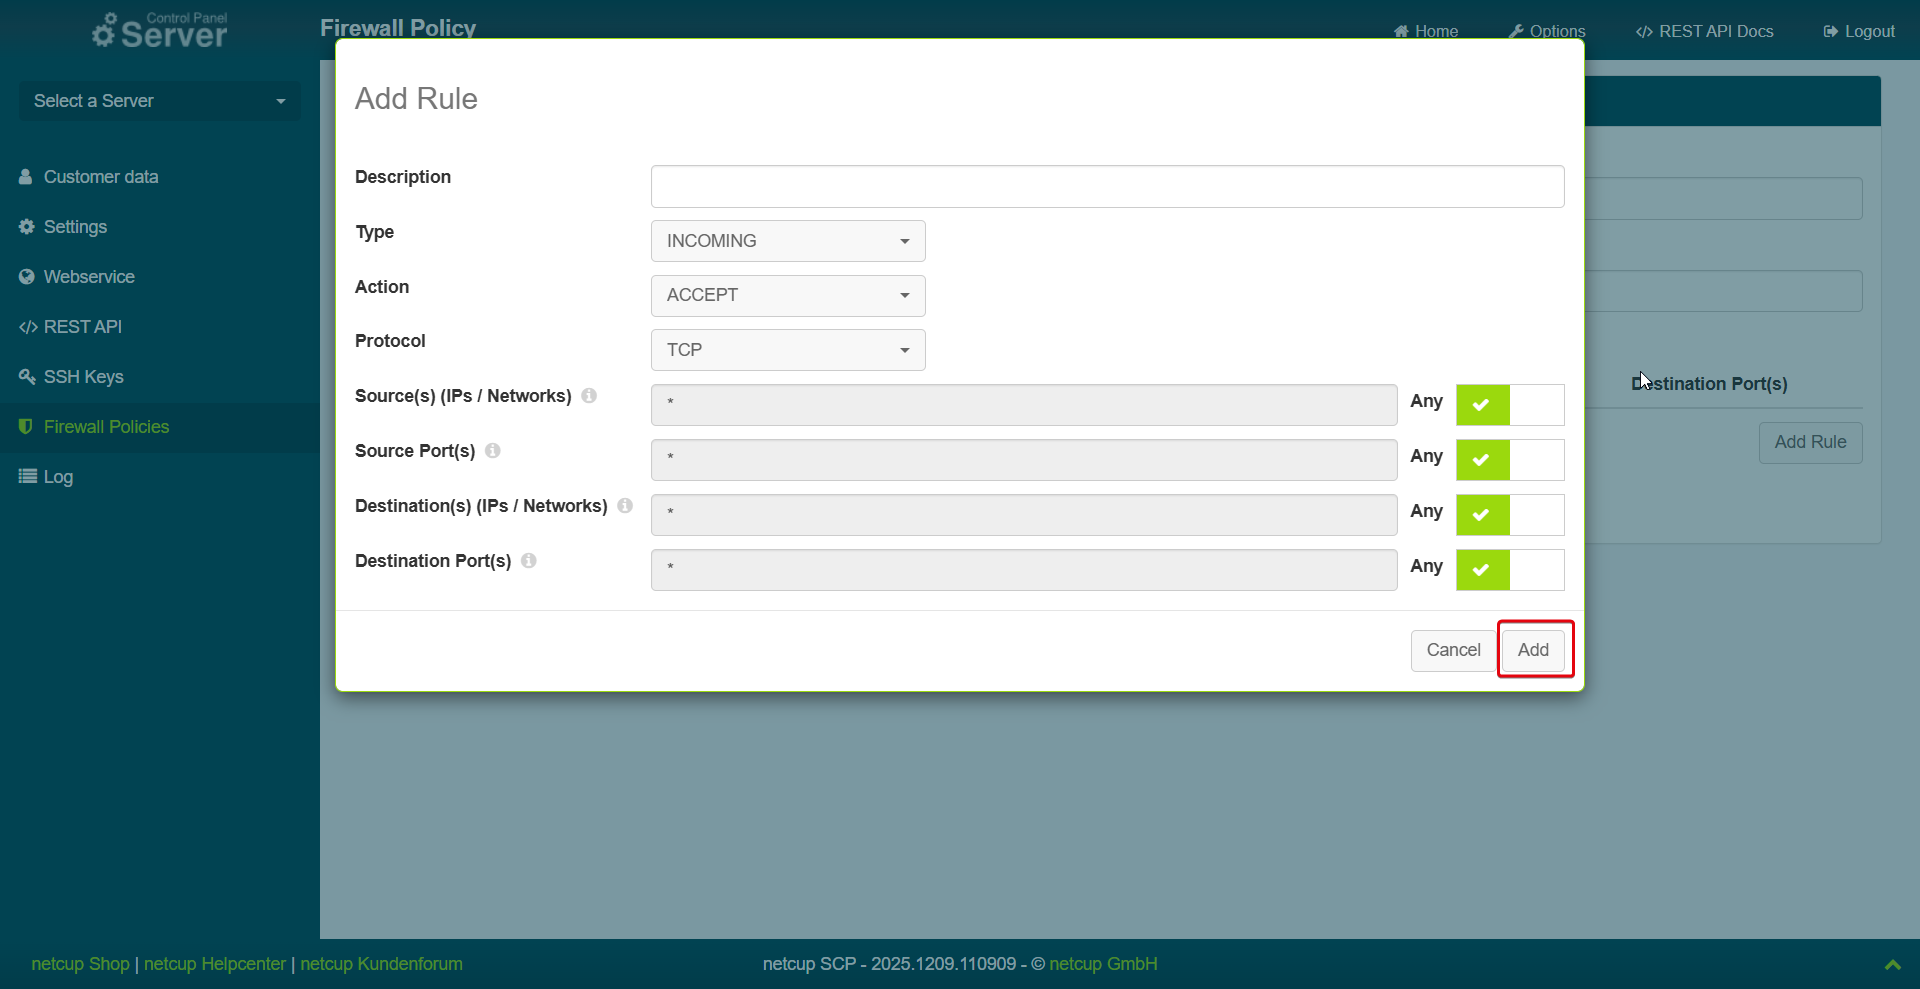
3. Creating Rules
- Click Add Rule.
- Enter a description.
- Select Type: Select whether the rule should be applied to incoming or outgoing traffic.
- Select Action: Select what should happen to the traffic:
- ACCEPT: Allow the traffic.
- DROP: The traffic is discarded. In this case, no response is sent to the sender.
As soon as a rule for INGRESS or EGRESS is defined and saved, the default rule for INGRESS/EGRESS is changed to DROP accordingly.
Note that the REJECT action (discarding the traffic and sending a response to the sender) is not supported. Implement your own firewall solution for advanced features of this type.
- Select Protocol
- Select Source (IPs/Networks): Defines the source IP addresses or source networks from which incoming or outgoing connections may originate.
- Select Source (Ports): Defines the range of source ports from which a network packet may originate. Each rule accepts only one port string.
Example: Port numbers: port “22” or port range “1000-11000”
To find out the ports for your services, check the documentation for your application or the configuration file for the service. The ports used are usually clearly specified there.
- Select Destinations (IP/S networks): Defines which destination IP addresses or networks the firewall rule may address.
- Destination ports: Defines which destination ports may be addressed. This port typically determines the destination application or service.
- Confirm by clicking Add.

If a policy's rules are changed while it is being applied to a server, the new settings will take effect as soon as the change has been saved.
4. Assigning Policies to a Server
- Select a server.
- Go to the Firewall menu item.
- Click on Edit Policies.
- On the left side, you will see all your previously defined policies. Move them to the right side to apply them to your server.
- >>: Apply all rules
- >: Apply selected rules
- Note that rules are handled according to priority. If a rule applies, the rules below it are ignored. You can drag and drop own rules up or down to change their priority.
- Add the desired policies to your server and confirm by clicking Edit.
- Then click Save. Changes will be applied immediately.

As this is a stateful firewall, firewall rules only apply when a connection is established. Already established connections are registered and processed according to their existing state. Subsequent packets are assigned to the existing connection and are not rechecked against the current rules. Therefore, such connections remain active even after a rule change that would otherwise prevent the connection from being established.

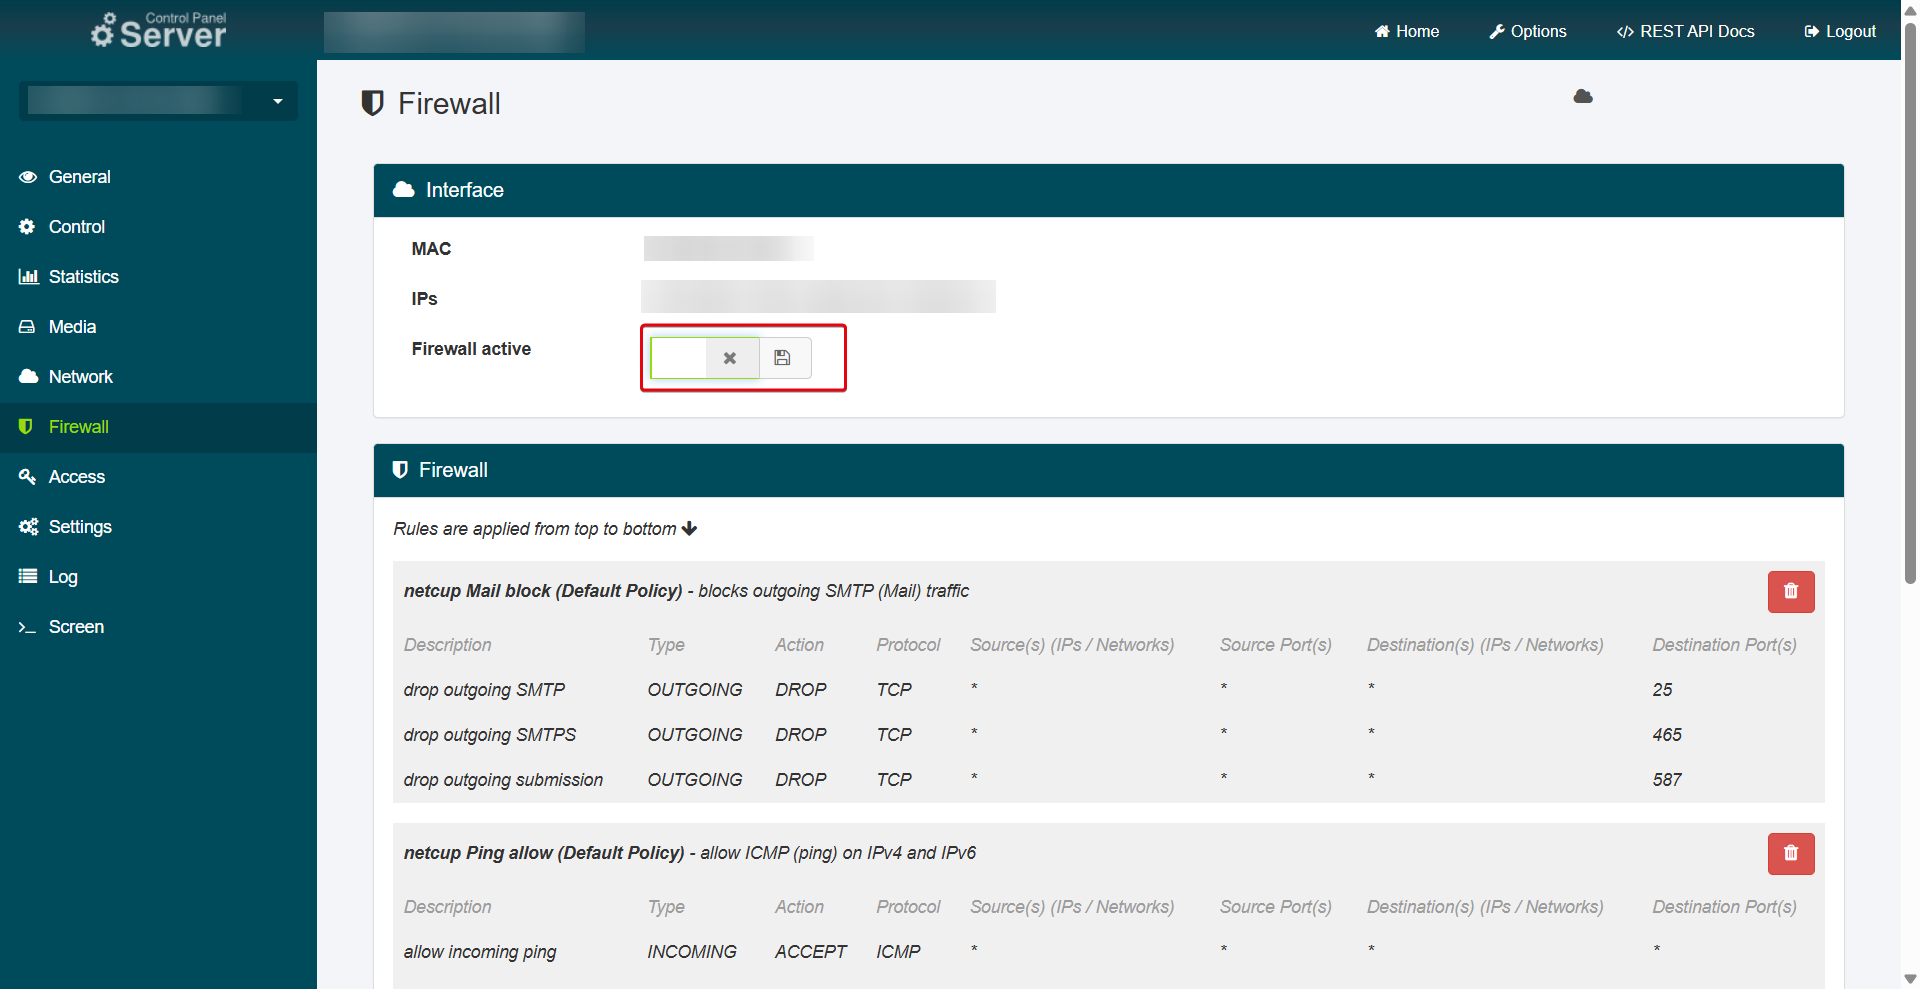
5. Deactivating the Firewall
You can also deactivate the firewall. This will not remove the configured rules from the overview. Switching the firewall on and off merely deactivates it, it does not change any policy configurations.
- Open your Server Control Panel (SCP) and select the desired server.
- Go to the Firewall menu item.
- Deactivate the slider for Firewall active.
- Click the Save Icon.
6. Use Cases
Example 1: Allow traffic to and from your SSH server
INGRESS, TCP, destination port 22, accept
EGRESS, TCP, source port 22, accept (Only define EGRESS if you have also configured extra EGRESS rules for client traffic, otherwise this traffic will be blocked (see example 6)).
Example 2: Allow Traffic to and from your web server (HTTP/HTTPS)
INGRESS, TCP, destination ports 80,443, accept (2 rules)
EGRESS, TCP, source ports 80,443, accept (2 rules) (Only define EGRESS if you have also configured extra EGRESS rules for client traffic, otherwise this traffic will be blocked (see example 6)).
Example 3: Allow all traffic to/from a specific IP-Prefix
INGRESS, TCP, source IP-Prefixes =198.51.100.0/24, accept
EGRESS, TCP, destination IP-Prefixes =198.51.100.0/24, accept (Only define EGRESS if you have also configured extra EGRESS rules for client traffic, otherwise this traffic will be blocked (see example 6)).
Example 4: Whitelist a specific host for DB (MySQL) access
INGRESS, TCP, source IPs = 198.51.100.10/32, 2001:db8::cafe/128, destination ports 3306 accept (2 rules)
EGRESS, TCP, destination IPs = 198.51.100.10/32, 2001:db8::cafe/128, source ports 3306 accept (2 rules) (Only define EGRESS if you have also configured extra EGRESS rules for client traffic, otherwise this traffic will be blocked (see example 6)).
Example 5: Allow DHCP
INGRESS, UDP, source port 67, destination port 68, accept
EGRESS, UDP, source port 68, destination port 67, accept (Only define EGRESS if you have also configured extra EGRESS rules for client traffic, otherwise this traffic will be blocked (see example 6)).
Example 6: Whitelisting client traffic from the server, so all the EGRESS rules above can be applied as well
For TCP, the firewall connection tracking will automatically allow return traffic (responses), so there is no need for INGRESS rules.
EGRESS, TCP, destination ports 80,443 accept (2 rules) (allows connecting to HTTP/S servers)
EGRESS, TCP, destination ports 22 accept (allows connecting to SSH servers)
EGRESS, UDP, destination ports 123 accept (allows syncing time with NTP servers)
INGRESS, UDP, source ports 123 accept (accepts NTP answer traffic)
Please note that once an EGRESS rule exists, the default action is DROP and anything that is not defined will be discarded. To ensure that everything continues to function as usual, EGRESS rules must be created for typical traffic, such as website visits (HTTP/S).
Example: EGRESS accept TO destination port 80,443
We recommend creating INGRESS rules only.
7. Frequently Asked Questions (FAQ)
How can I create an allow-all policy?
Go to Options > Firewall Policies and click Add Firewall Policy. Add 2 rules for each protocol type: Incoming rule, ACCEPT and Outgoing rule, ACCEPT
Make sure that the allow-all policy is in first place. You can move the policy up using drag and drop.
How quickly are changes applied?
Rules are applied immediately after saving.
Does the server need to be restarted or will it be temporarily offline?
The server remains active and does not need to be restarted.
Is there an alternative to the netcup firewall?
You can also use your own firewall solutions at the operating system level of your VPS or root server. For example: ufw, iptables, firewalld Also, make sure you protect your access with two-factor authentication/SSH keys and keep your system up to date.
Is the firewall sufficient to ensure the security of my server?
The firewall provides basic protection. It adds an upstream security layer to your network and blocks unwanted public services or system misconfigurations. However, it does not replace protection via local server firewalls. We recommend setting up your own internal firewall solutions, such as iptables or nftables, on the server itself. Also, make sure you protect your access with two-factor authentication/SSH keys and keep your system up to date.