
netcup wiki
Webhosting

Setting Up Domain Forwarding
Learn about the options available for domain forwarding and how to set it up.
1. Setting Up Forwarding via the Customer Control Panel (CCP)2. Setting Up Forwarding for Subdomains3. Setting Up Forwarding via .htaccess4. Setting Up Forwarding via index.html

Please note that redirection via HTTPS is only possible via .htaccess or index.html.
1. Setting Up Forwarding via the Customer Control Panel (CCP)

Please note that with the current hosting, all data belonging to the domain will be removed from the document root.
Getting Started
- Log in to the Customer Control Panel (CCP).
- Go to the Products menu item.
- Click on the Magnifying Glass Icon next to the corresponding web hosting plan.
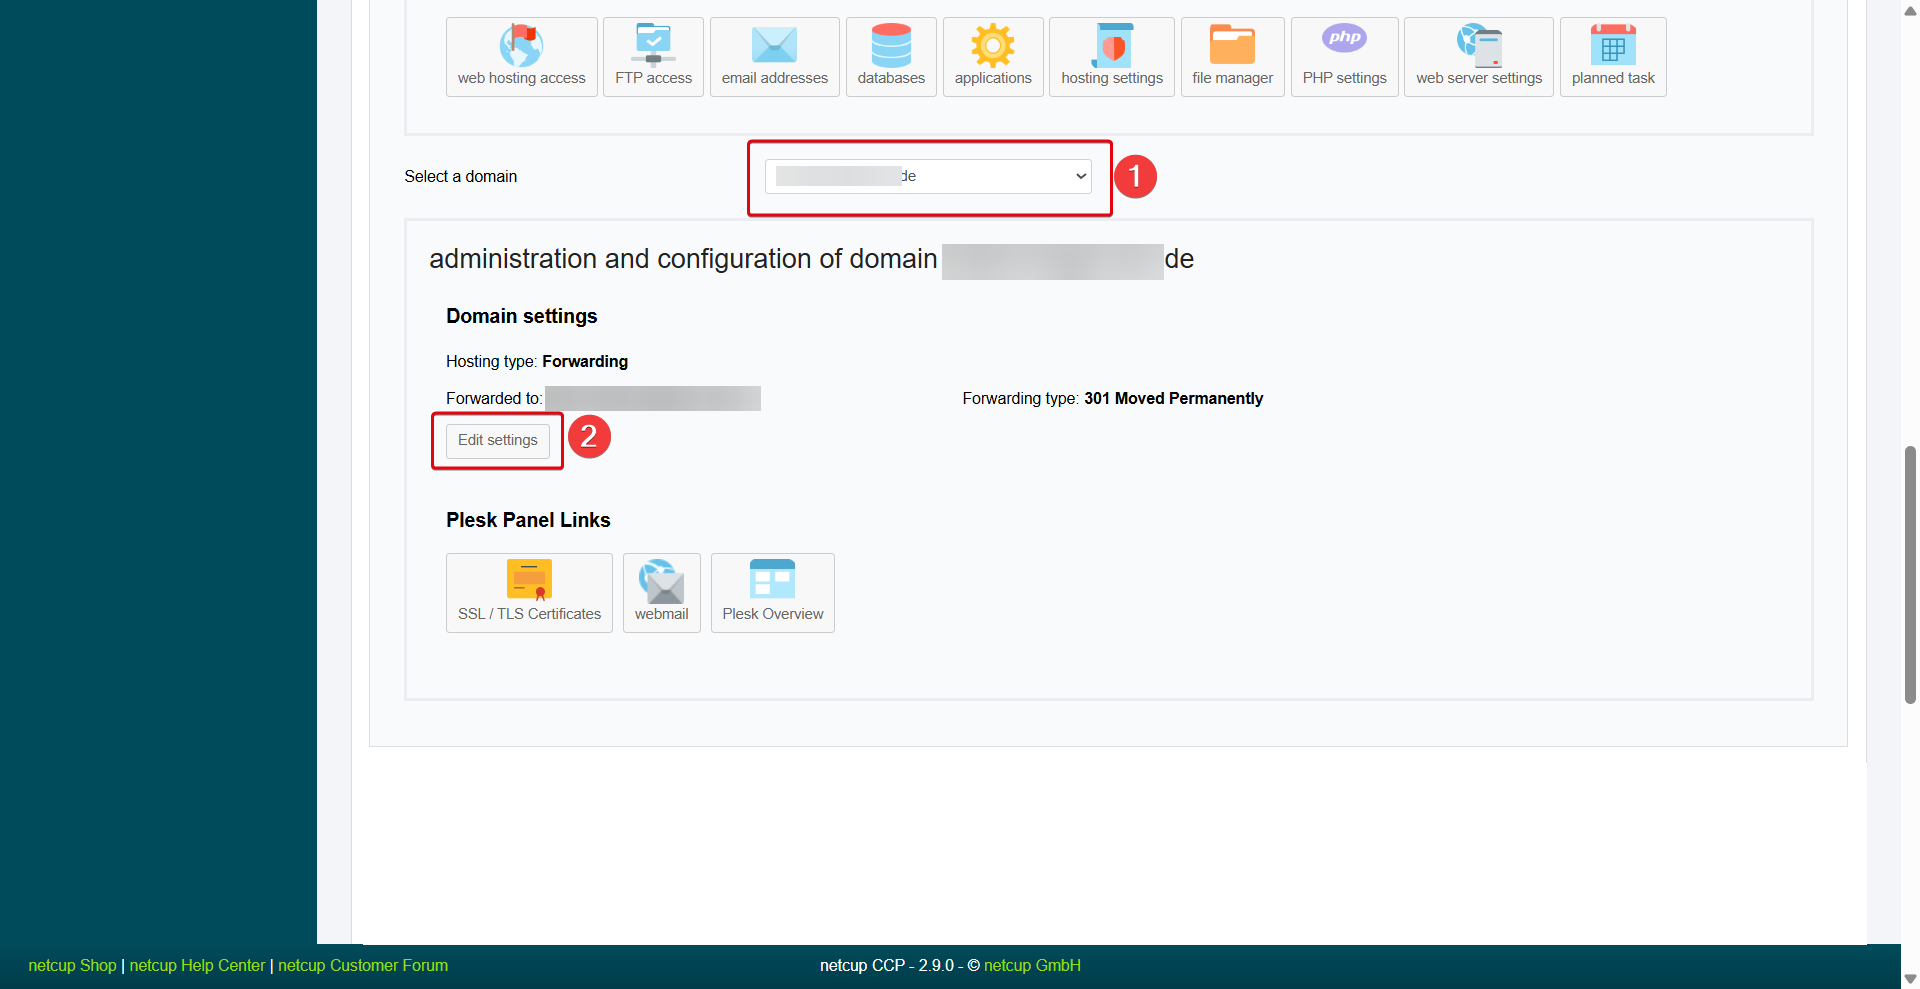
- Scroll down in the Overview to the section Administration and configuration of domain yourdomain.com.
- Select the desired domain from the drop-down list.
- Click Edit settings.
Setting Up Forwarding
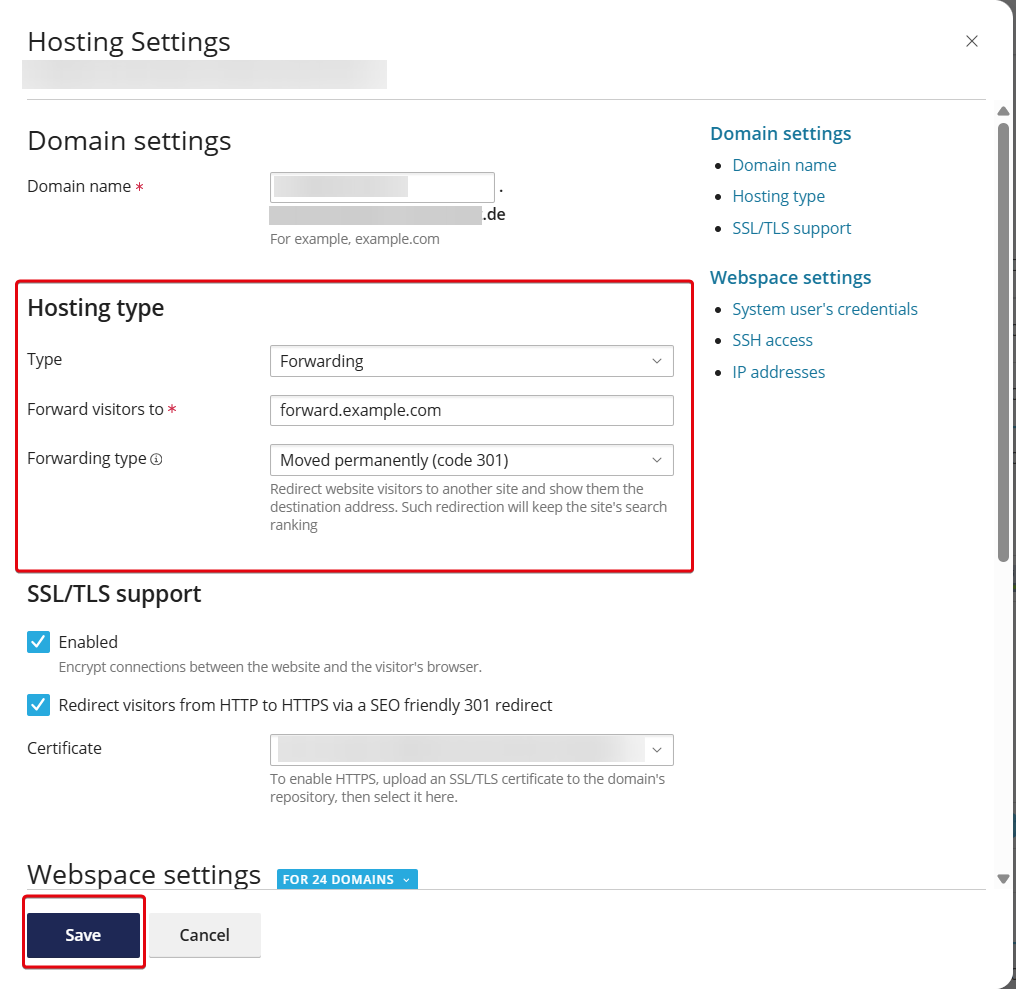
- Select the type of forwarding under Hosting type:
- 301 Moved permanently: Permanent forwarding to a new URL.
- 302 Moved temporarily: Redirect to another URL for a limited period of time.
- Frame forwarding: The website of another domain is displayed, but your own domain is shown in the URL (not supported by all websites).
- Website hosting: Provision of your own website under the domain instead of a forwarding.
- Enter the target domain under Forwarded to. Please note that redirection to "www" or a subfolder of the domain is not possible.
- Enter OK in the confirmation field.
- Click Edit settings.
2. Setting Up Forwarding for Subdomains
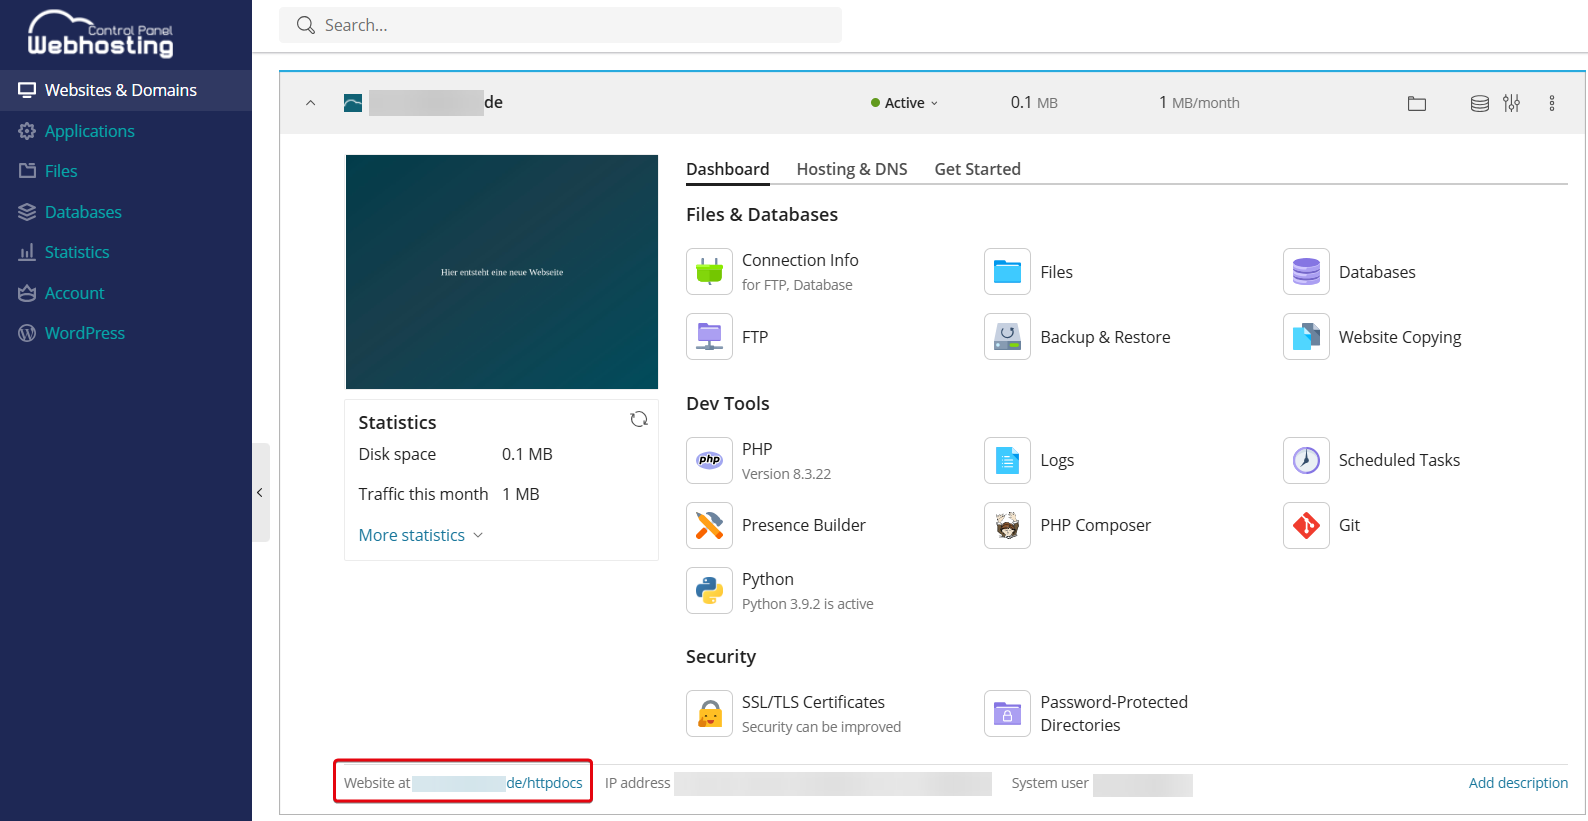
- Log in to the Webhosting Control Panel (WCP).
- Select the desired subdomain.
- Go to the Hosting & DNS tab.
- Select Hosting.
- Open the drop-down menu under Hosting Type > Type.
- Select Forwarding.
- Enter the target domain.
- Select the type of forwarding.
- Click Save.
3. Setting Up Forwarding via .htaccess
- Open the Webhosting Control Panel (WCP).
- Select your desired domain.
- Open the domain's document root by clicking on the linked directory at the bottom left.
- Click the Plus Icon > Create File.
- Name the file
.htaccess(without any other extensions). - Click OK.
- Open the file and paste the following content:
Redirect 301 / https://www.example.com
Replace "www.example.com" with the desired target URL. Make sure that the content is written without spaces in the first line.
- Click Save. The changes will take effect immediately.
4. Setting Up Forwarding via index.html
- Open the Webhosting Control Panel (WCP).
- Select your desired domain.
- Open the domain's document root by clicking on the linked directory at the bottom left.
- Click the Plus Icon > Create File.
- Name the file
.index.html(without any other extensions). - Click OK.
- Open the file and paste the following content:
<html>
<head>
<meta http-equiv="refresh" content="0; URL=https://example.com">
</head>
<body>
<a href="https://www.example.com">If you are not automatically redirected, please click here.</a>
</body>
</html>
Replace "www.example.com" with the desired target URL. Make sure that the content is written without spaces in the first line.
Under content, you can set the number of seconds after which a redirect will take place.
- Click Save. The changes will take effect immediately.